Have you tried this installation? If yes, then you might be facing some problems or not, but we’ll tell you the truth, we have faced a lot of problems and it was really a tough job for us to install FortiGate in VMware Workstation. FortiGate Firewall installation in VMware Workstation has been so popular because most people always did a mistake in this installation.
So now, we are going to show you very simple and easy steps.
Step 1. You must Register and Download a FortiGate OS file for VMware ESXi. If in case, above link will not work then, go to Fortinet Support Website > Click on Download > VM images > Select Product: FortiGate > Select Platform: VMWare ESXi.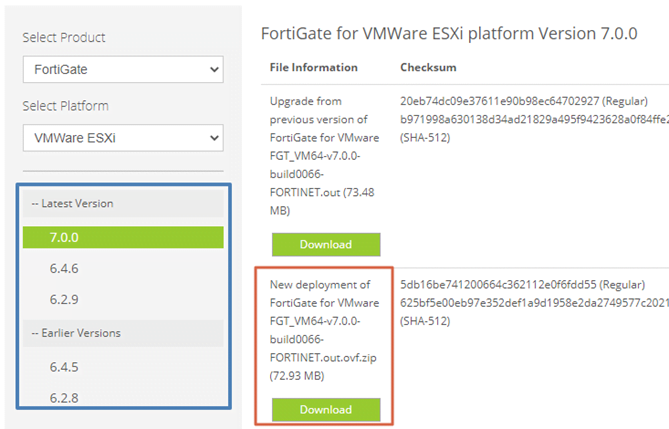
Download the version as per your requirement but we recommend the latest version. Please be sure that you will download “New Deployment of FortiGate for VMware”.
Step 2 – After Successfully downloading the .zip file > Extract the folder
Step 3 – Now, go to your VMware Workstation (you must download and install this software in your Desktop/Laptop) > Click on File > Open and browse the extracted folder (In Step 2) > Select .ovf file which has “vmxnet3”.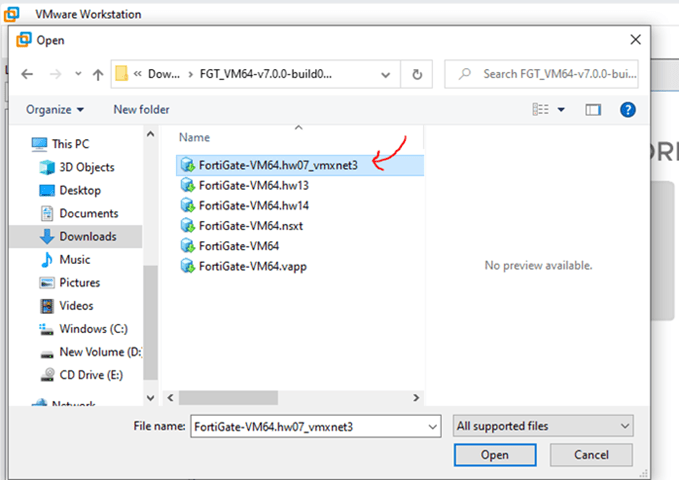
Step 4 – If it asks then accept the License Agreement > Import the Virtual Machine.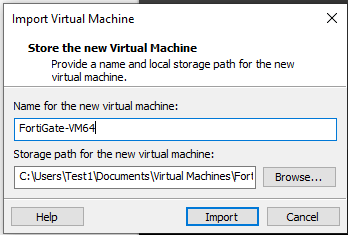
If this window shows up, then it means that you are on the right path. It takes a little time to import the files. By this time you must have realized that it’s a piece of cake.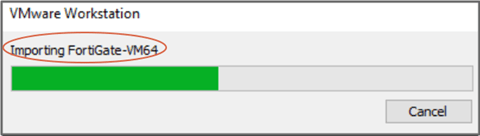
Step 5 – After you successfully import the files, you will see your Virtual Machine with default or basic hardware settings. You can change them as per your need.
For example: – You can change the Network Adapter settings to NAT.
If you want to know more about Virtual Machines and their Configurations, then you can contact us and we will help you out.
Step 6 – Click on “Power on this virtual machine”.
By now, you have done all the major steps of deploying the VM. Next, we will start the installation or initial Config Steps.
Step 7 – When VM prompts for login then type “admin” without quotes and press Enter. The password is blank by default.
Step 8 – It may be asked to change the admin password > Enter New Password
Step 9 – You can verify the details by using the “get system status” command.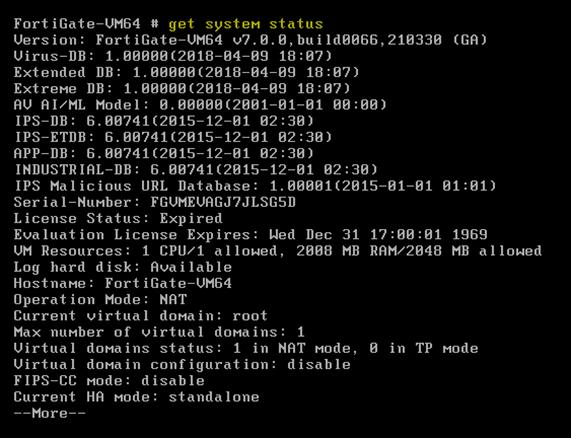
Step 10 – Now, you need to assign IP address details because we are doing all these things to get GUI access. To assign an IP address, you must enter the below-mentioned commands. (These are the basic configuration of an interface. So, you can access the GUI of FortiGate)
config system interface
edit port1
set mode static
set IP <IP_Address> <Subnet_Mask> “(example: set IP 192.168.122.200 255.255.255.0)”
set allowaccess https http ping ssh
End
Step 11 – Use the web browser to navigate http://192.168.122.200 and Login using the “admin” username and password is already set by you.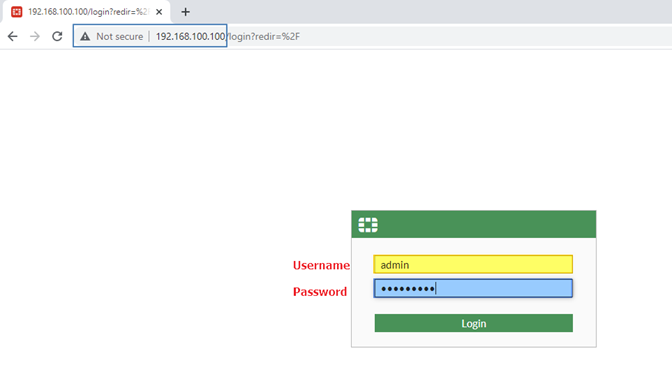
Now as you have diligently followed all the steps, the installation of FortiGate Firewall is complete. The main benefit of this installation is that you can practice every feature of the FortiGate Firewall or can create a lab.
We will further introduce other installations of FortiGate so, it will clear your all doubts about FortiGate Virtual Installation.
Zindagi Technologies provides all the solutions based on your requirement and on your need. If you want to know more about “FortiGate – Next-Generation Firewall” and its uses, read out our blog.
If you need any help with corporate installation and implementation, then please feel free to contact us or call us at +919773973971.
Author
Jagjeet Singh
Senior Consultant – Network Security