How To Deploy Connection Server In VMware Horizon
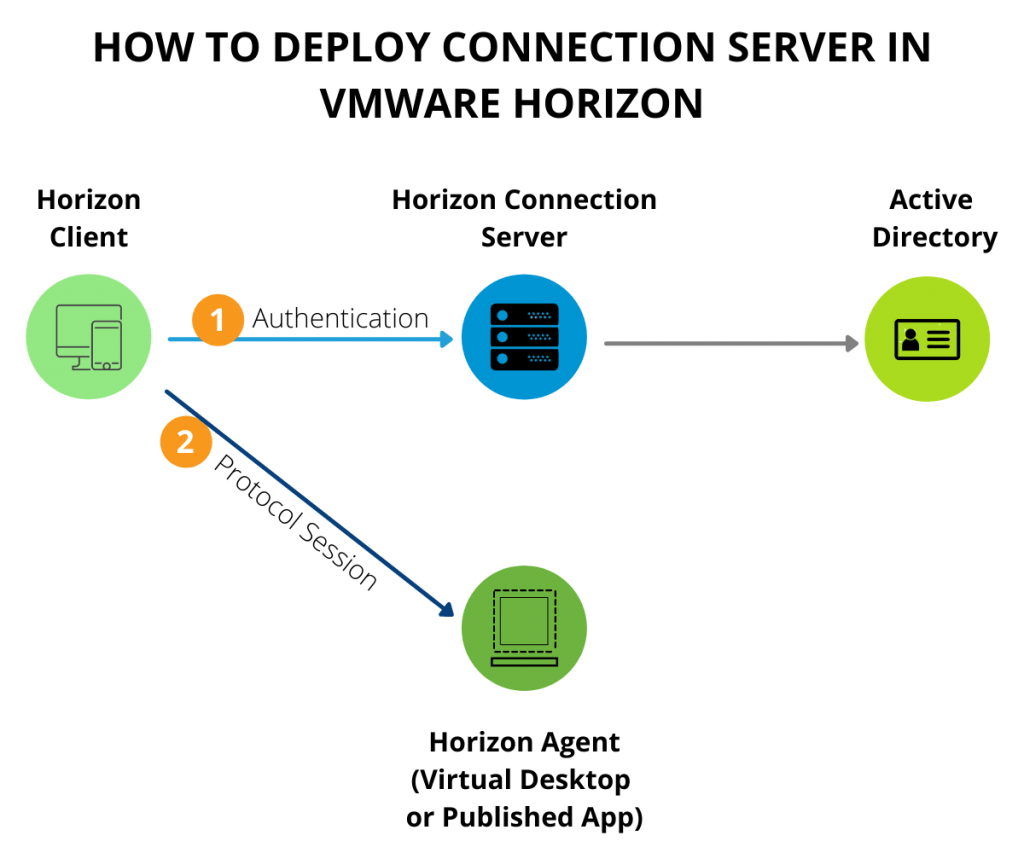
VMWare Horizon is a centralized desktop virtualization solution that enables organizations to deliver virtualized desktop services and applications to employees a managed service. In VMWare Horizon Connection Server plays a very important role, and they come in two variations – The Standard connection sever and the replica connection server. Connection Server handles multiple roles in the Horizon infrastructure. It handles primary user authentication against Active Directory, management of desktop pools, provide a portal to access desktop pools and published application, and broker connections to desktops, shared hosted desktops, and published applications.
When you run the Horizon installer, you will see two connection server types – the standard connection server and the replica connection server.
Connection Server provides the Features –
- Authenticating users.
- Entitling users to specific desktops and applications.
- Managing local and remote desktop and application sessions.
- Establishing secure connections between users and desktops or applications.
- Enabling single sign-on.
- Setting and applying policies.
- Managing an instant-clone engine.
Connection servers store all information relating to the end-user, desktop pools, virtual desktop machines, and other view-related objects, in an Active Directory application mode (ADAM) database.

Minimum requirement for the Connection Server
- Supported operating systems: The Horizon Connection Server must be installed on one of the following operating systems –

Installing the First Connection Server
Lab scenario
Machine name – DC1 (static ip 192.168.1.21) domain joined
Active Directory – zindagilab.com (domain name)
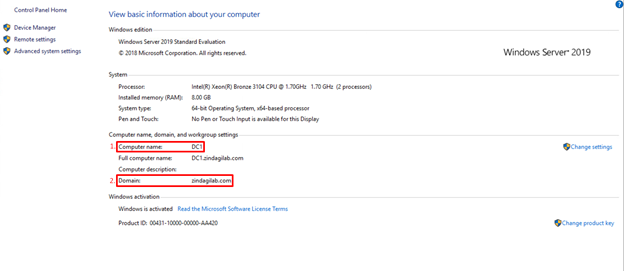
As you can see here 1st computer name and 2nd is domain joined. We are using Windows Server 2019 Standard Evaluation.
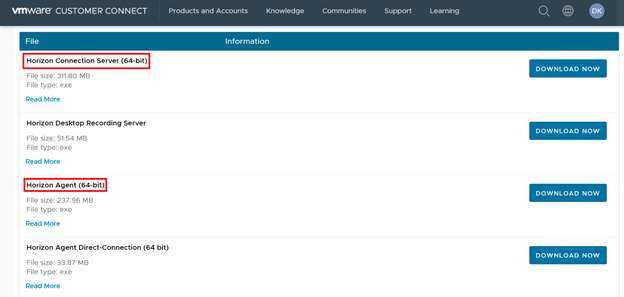
Download Horizon Connection Server (64-bit) and Horizon Agent (64-bit) also from the VMWare portal. Once the server is provisioned, and the Connection Server installer has been copied over, the steps for configuring the first Connection Server are –
Step 1 – “Lunch the Connection Server launcher”
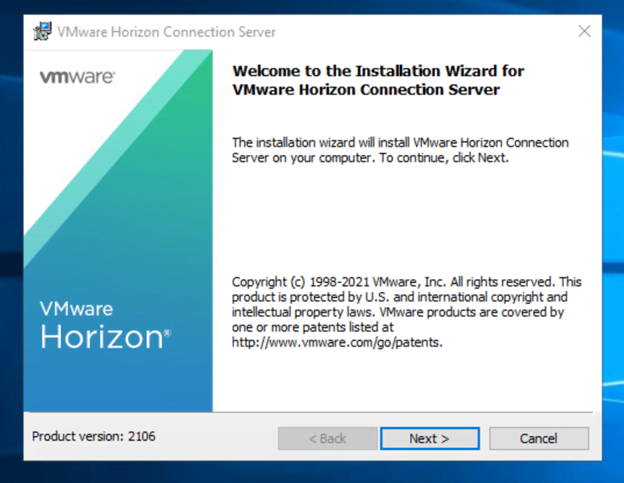
Click Next for the first screen to continue.
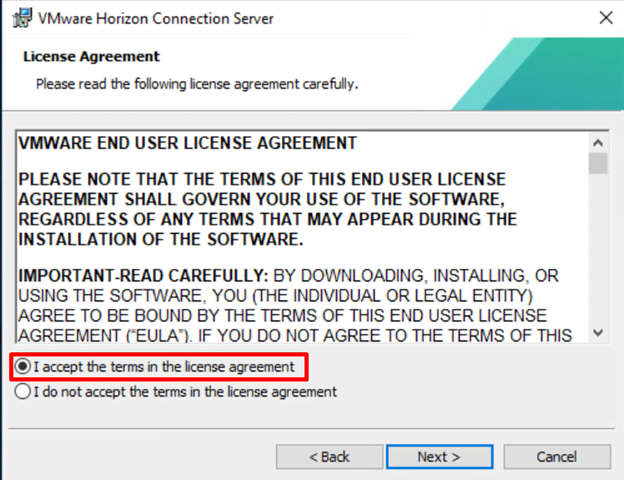
Accept the license agreement and click Next to continue.
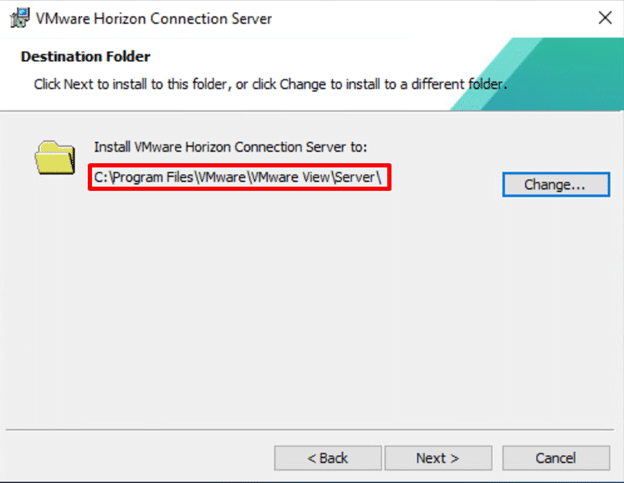
In this wizard, you can select the Destination Folder where Connection Server is installed. If you can need to change you can change it but as of now, we are using the default path for the connection server installation. Click Next for the continue.
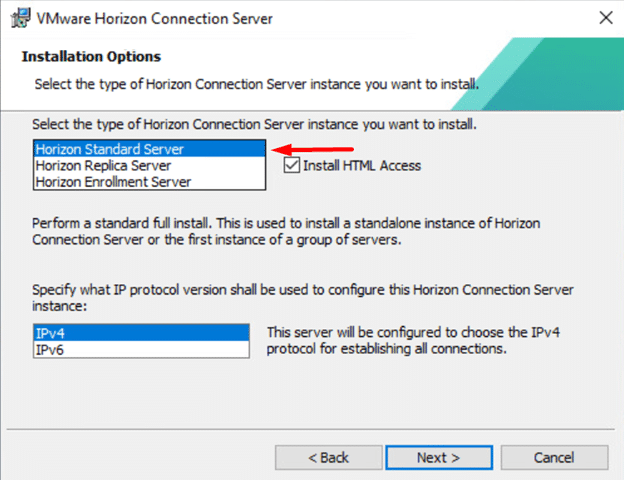
In this wizard very important things – inside the Installation option we can select which type of server we can install like Horizon Standard server, Horizon Replica Sever, or Horizon Enrollment Server. As of now, in this blog, we deploy Horizon Standard Server so that we select the first option, and second things inside IP protocol section we select IPv4 protocol. Click Next for continue.
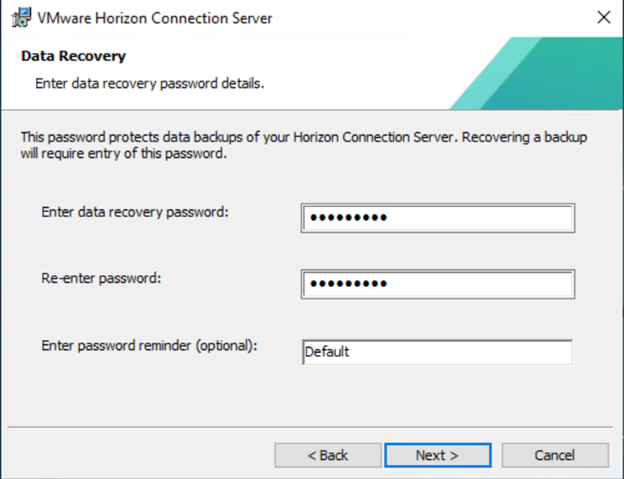
Inside this wizard Data Recovery, you can put your password so that you can login connection server login wizard.
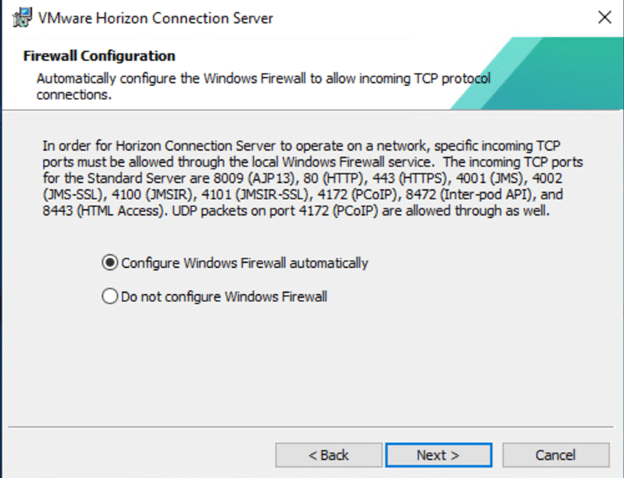
In this Firewall wizard, there are two options 1st is to Configure Windows Firewall automatically and 2nd is to not configure the windows firewall. We are using by default configure windows firewall automatically and click Next for the continue
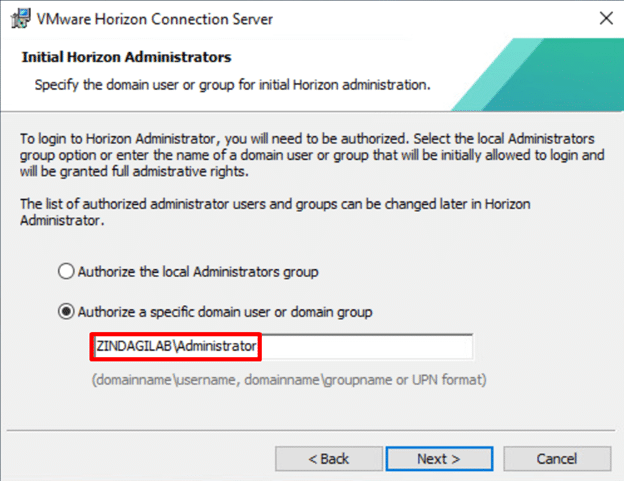
Here you can see, in this wizard Initial Horizon Administrators it is used for login credentials for the connection server.
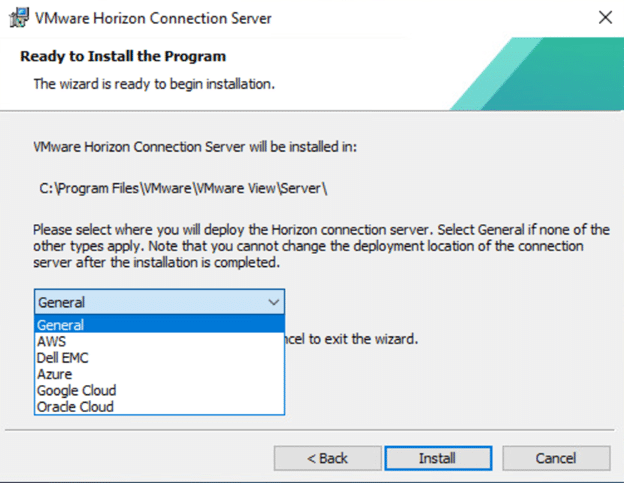
Now Finally, we are ready to Install the Horizon Connection server. Here we select General for the Standard Connection Server. If you are using any cloud solutions like AWS, Azure, etc then you can select these options. But we are installing a Standard connection sever so that we are selecting General. And click install for the final installation.
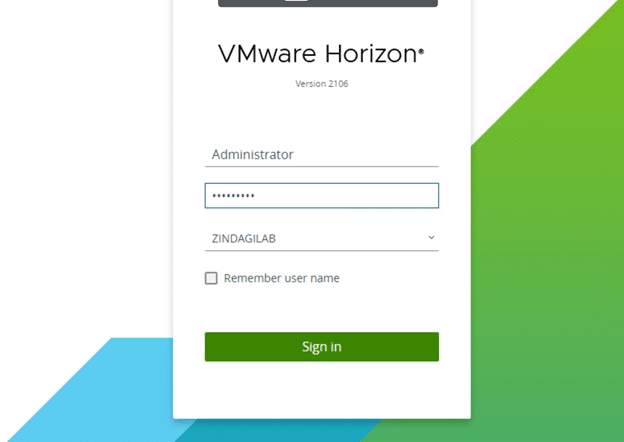
Here is the login dashboard of Horizon Connection Server. Insert the credentials which you give in the Data recover wizard.
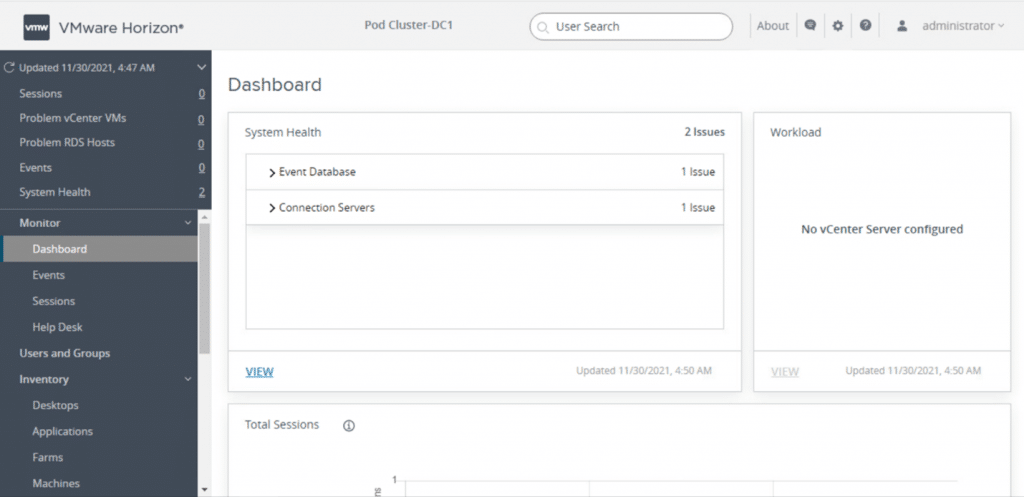
After assigning the connection server license you can see the Dashboard.
If you are planning for a Green-field Deployment, Tech Refresh, Migration from your traditional campus/enterprise network to a Software-defined network Solution You can always reach out to us, the team at Zindagi Technologies consists of experts in the field of SD-Access, Data Centre technologies, Virtualization, Private Cloud, Public Cloud, Data Center Networks (LAN and SAN), Collaboration, Wireless, Surveillance, Open stack, ACI, storage and security technologies with over a 20 years of combined industry experience in planning, designing, implementing and optimizing complex Data Centre, campus and cloud deployments.
We can discuss the betterment of your organization reach us on email at [email protected] or visit www.zindagitech.com. Give us a call at +91 97739 73971.
Author
Deepak Kumar
Consultant – Server & Virtualization

Bipin Singh
January 26, 2022Hi Deepak, very informative blog but can you explain how I deploy HA in the Connection Server?
and one more thing is its dependency on the window failover cluster?