How to Configure Data Deduplication in Windows Server 2019
After server 2012 editions, it will have a new feature called, “Deduplication Engine”. Server 2012 is also carrying this feature. In this blog, we will have look at how to configure the Deduplication feature in windows server 2019. It is not supported for certain volumes, such as any volume that is not an NTFS file system or any volume that is smaller than 2TB. This blog is based on the latest windows server 2019.
Firstly, we understand those who do not know what Deduplication is. Here we define –
“ By using this method, we can save more data in less space by segmenting file into a small variable-sized chunk (32 – 128 KB), identifying duplication chunks, and maintaining a single copy of each chunk. Redundant copies of the chunk are replaced by a reference to the single copy. All chunks are compressed and then organized into special container files in the system volume information folder.”
Firstly, we confirm that we have an E: disk, and in this disk we have only 541MB free space.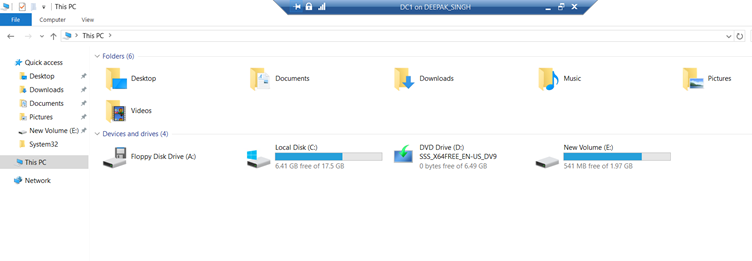
And inside the disk, all data are the same copy of one original data.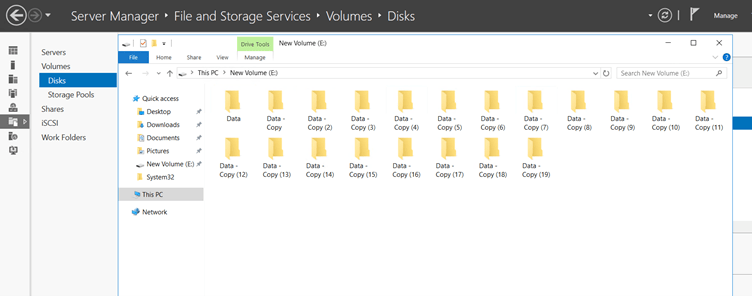
Here are the steps to configure Data Deduplication in Windows Server 2019
Step 1 – First we open our server manager and click Add roles and features.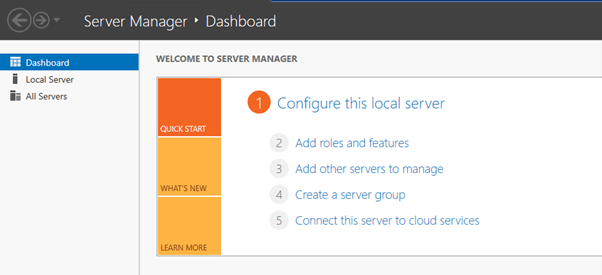
Step 2 – Select Deduplication roles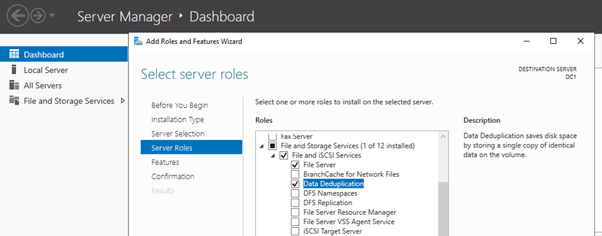
Step 3 – After install successfully Data Deduplication, we choose a disk at which to configure the deduplication feature.
In our case, we have an E drive (NTFS format) so we configure it. First select File and Storage on the left side of Server Manager.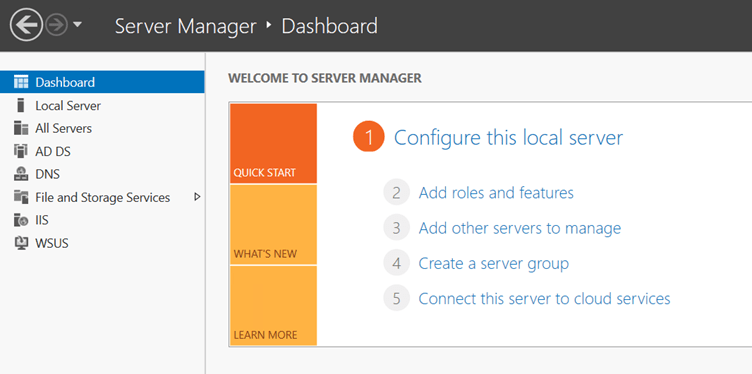
After that, we choose one by one these options
Click — Disk > E: disk on right click > configure Data Deduplication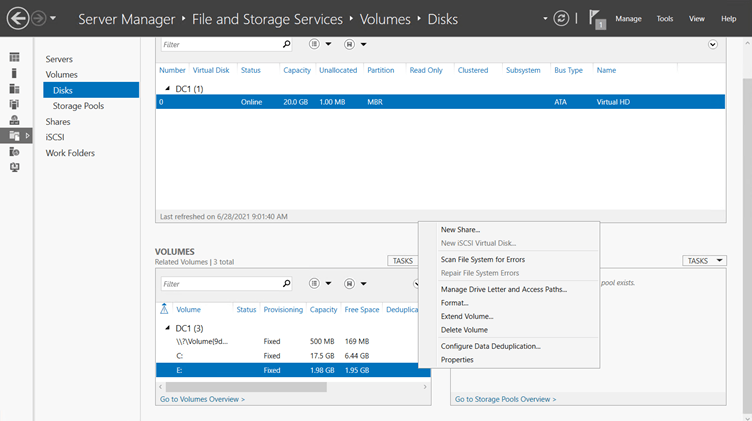
When you click on Configure Data Deduplication, open a new wizard in front of you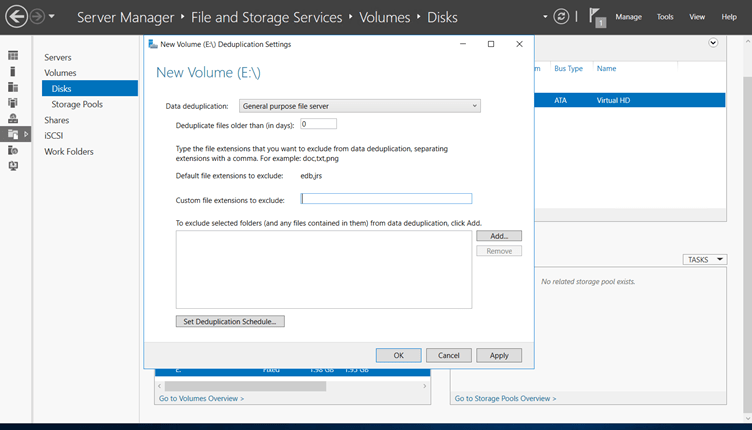
Understanding all options of Wizard –
1st – Data deduplication: (in which four options)
-Disable
-General-purpose file server (We select these options for Data Deduplication)
-Virtual Desktop Infrastructure (VDI) server
-Virtualized Backup server
2nd – Deduplication file older than (in days):
In which we give the number of days (1,2,3, …), after how many days data will be deduplicated.
3rd – Custom file extensions to exclude: Generally, we use this option when
4th – Set Deduplication Schedule –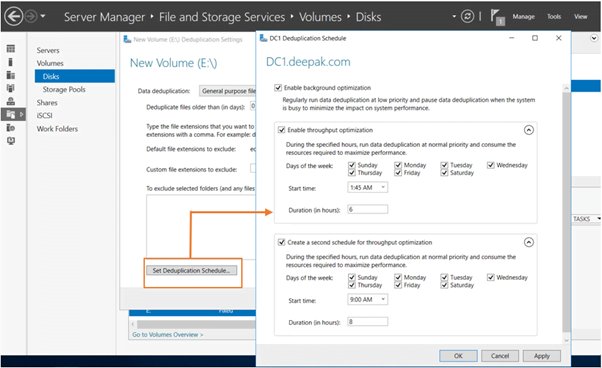
Set Deduplication Schedule –in this, we can manually set the day, date, and time that the duplicate data is being stored in our disk, what day, at what time, and after how many hours will it be deduplicated.
It has one more feature “Second scheduler” when our first scheduler did not work with any region, then the second scheduler will deduplicate the data of our disk.
When your scheduled day, date, and time then click apply and ok.
Step 4 – Afterall these configurations open PowerShell with Administrator privilege and run a simple command to apply our configuration on E: disk.
Command – Start-DedupJob -Volume E: -Type Optimization
Basically, this command is used to apply our all configurations on the selected disk.
Command to check process – Get-DedupJob -Volume E: -Type Optimization
When a process is complete 100% then we check our E: disk space.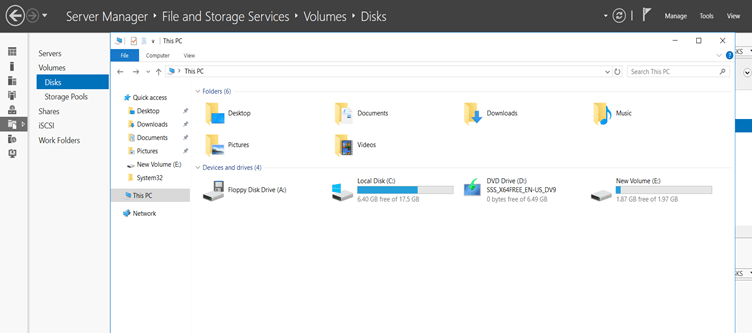
Here we see that our E: disk space is compressed and now, our free space is 1.87GB. and all data are present inside the disk.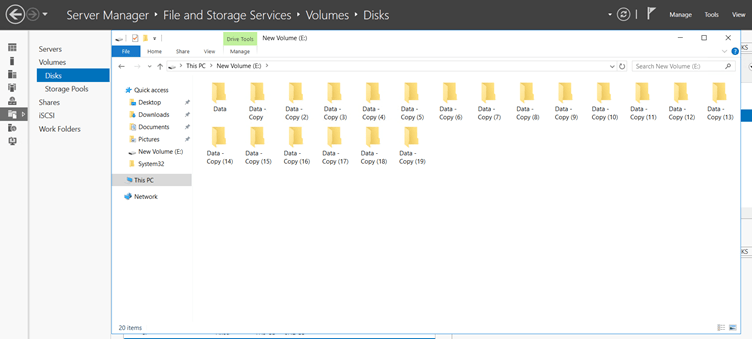
It is a very easy method to protect our disk space and deduplication of data. with this method, we can stop the space that is taking up duplicate data in our disk. This technology comes in handy when a lot of duplicates of the same data are saved in the shared disk in our environment and the space of our disk is very expedited, in that case, we can save the space of pen disk from getting full by doing this technique.
In this way, we can stop unwanted use of disk space in our environment and save our high disk utilization. I hope, this blog helps you for learning new things or solve your problems. If you like this blog this is big deal for us. But even now you have any queries or doubts, please feel free to contact us at +91 9773973971 or you can get in touch with us through the mail.
Author
Deepak Kumar
Linux and Server Administrator
