Day 0 Configuration Of UCS Server.
UCS CIMC Port Configuration
Step 1: A keyboard and monitor to the USB and VGA ports on the appliance’s rear panel or A KVM cable to the KVM connector on the appliance’s front panel.
Step 2: Make sure that the appliance power cord is plugged in and the power is on.
Step 3: Press the Power button on the front panel to boot the appliance. Watch for the Cisco IMC Configuration Utility boot screen to be displayed.
Step 4: As soon as the boot screen is displayed, press F8 to perform Cisco IMC Configuration. The Cisco IMC Configuration Utility displays the CIMC User Details screen, as shown below.
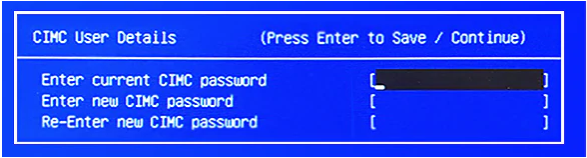
Step 5: Enter the default CIMC user password (the default on a new appliance is password) in the Enter current CIMC Password field. Then enter and confirm the new CIMC user password in the Enter new CIMC password and Re-Enter new CIMC password fields.
Step 6: When you press Enter in the Re-Enter new CIMC password field, the Cisco IMC Configuration Utility displays the NIC Properties screen, as shown below.
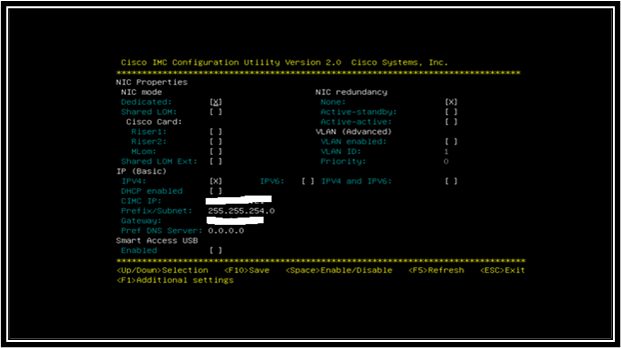
Step 7: Make the following changes:
- NIC mode—Select Dedicated.
- IP (Basic)—Select IPV4.
- CIMC IP—Enter the IP address of the CIMC Port (M).
- Prefix/Subnet—Enter the subnet mask for the CIMC Port IP address.
- Gateway—Enter the IP address of your preferred default gateway.
- Pref DNS Server—Enter the IP address of your preferred DNS server.
- NIC Redundancy—Select None.
Step 8: press F10 to save and then Esc to exit and reboot the appliance.
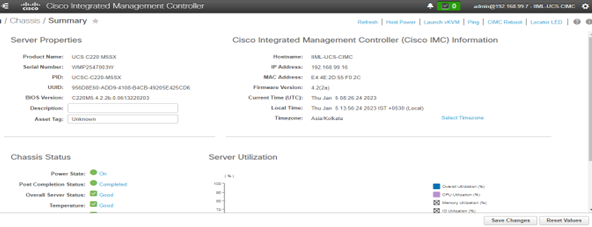
Step 9: Now after reboot open a Browser on a client machine with access to the subnet on which the appliance is installed and enter the following URL:
(https://CIMC_ip_address where CIMC_IP_address is the CIMC Port IP address that you entered)
You’ll get CIMC GUI
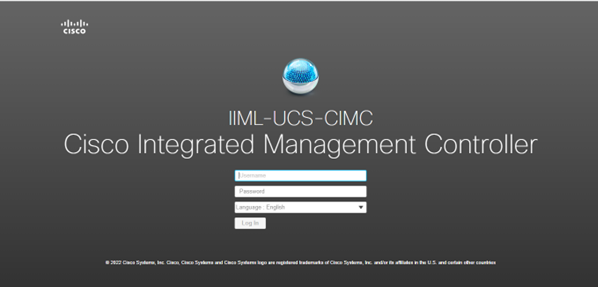
Step 10: Login using the CIMC user ID and password you set previously.
UCS CIMC Upgradation
Step 1: Click on Launch KVM.

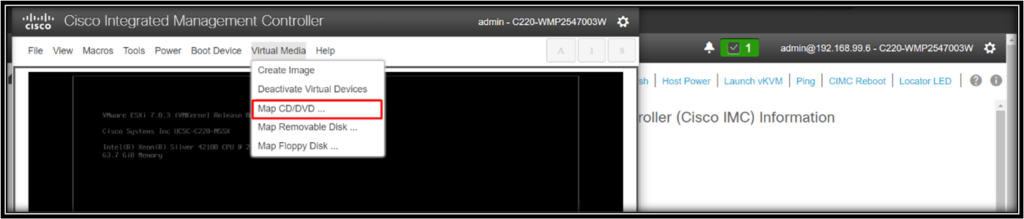
Step 2: Go on Virtual Media and Click on Activate Virtual Devices.

Step 3: Click on Map CD/DVD…
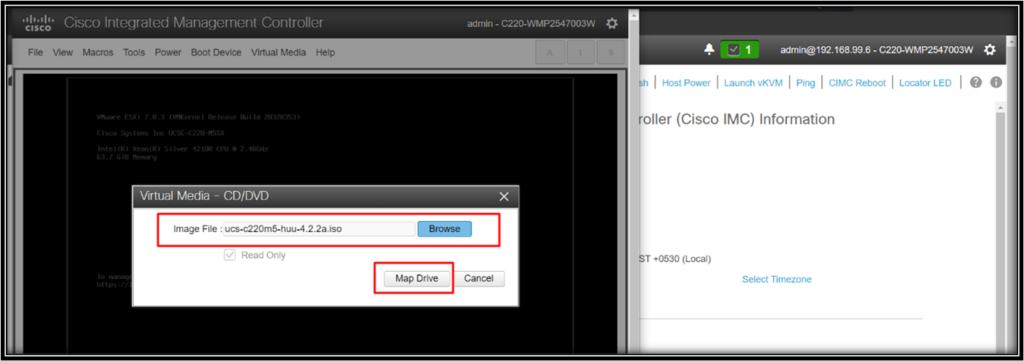
Step 4: Browse the .iso file for firmware upgradation and click on Map Drive.
Step 5: Go on Power and click on Power Cycle System (Cool boot) to reboot.

VMWare 7.0.3 Installation
Step 1: Click on Launch KVM.

Step 2: Go on Virtual Media and Click on Activate Virtual Devices.

Step 3: Click on Map CD/DVD…
Step 4: Browse the file for firmware upgradation and click on Map Drive.

Step 5: Go on Power and click on Power Cycle System (Cool boot) to reboot.

After Rebooting, it looks like this
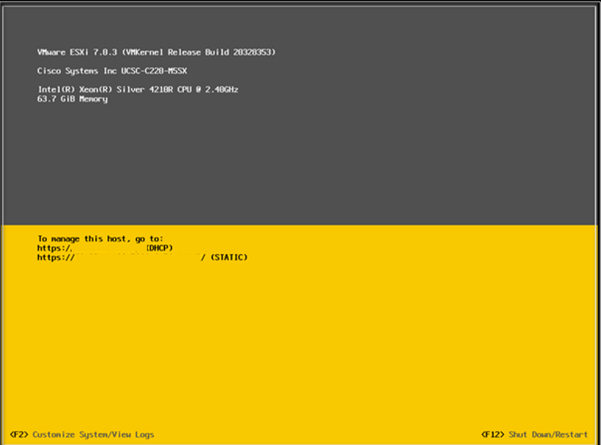
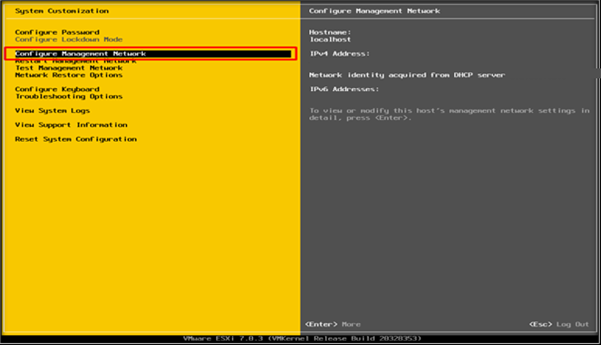
Step 6: Configure Management Network
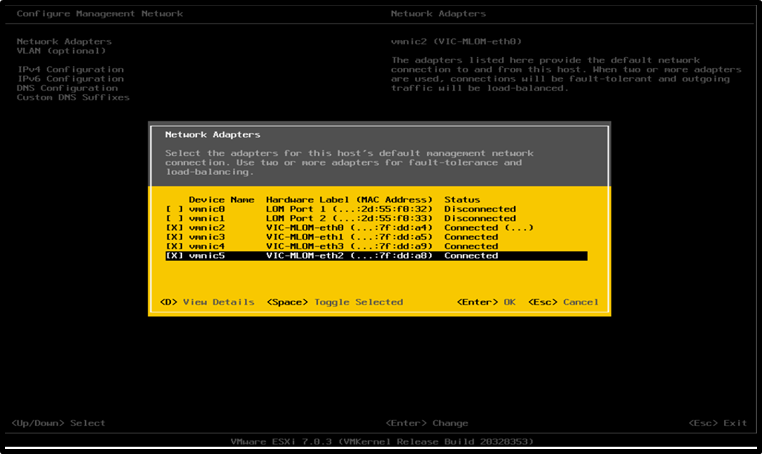
Step 7: Network Adaptors are shown on this page. Click Enter on Keyboard.
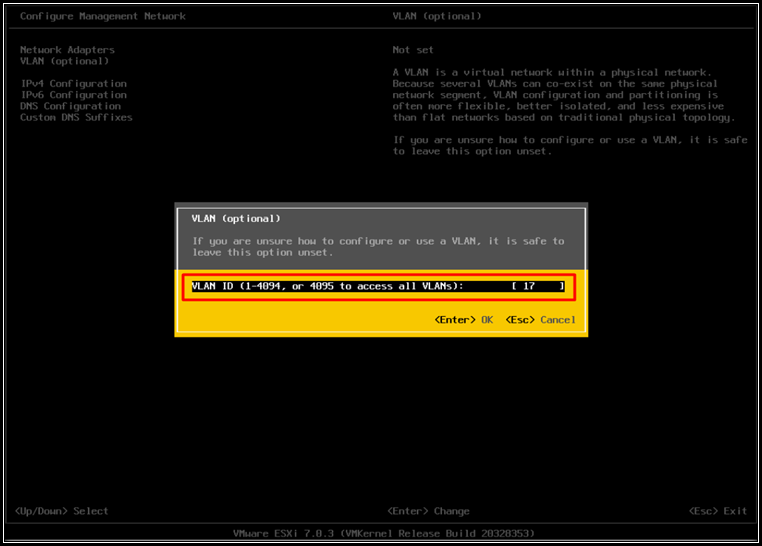
Step 8: Mention VLAN ID and click Enter on the Keyboard.
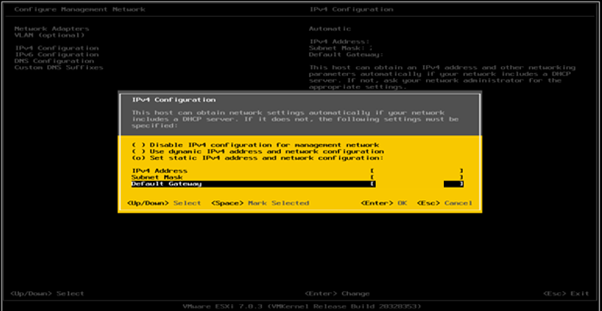
Step 9: Configure the IPv4 address, Subnet Mask and Default Gateway for Esxi management and click on Enter.
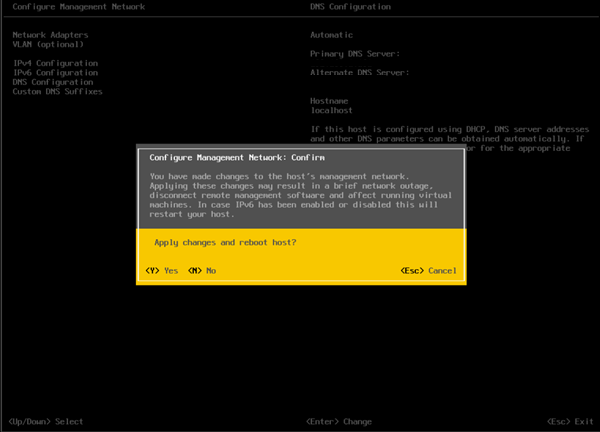
Step 10: Click on <Y> on Keyword to confirm the Management Network.
That’s all about the basic configuration of the UCS Server from the unpacking of the box
Zindagi Technology is an IT Consultant Company in Delhi. We have completed a lot of projects in the Public and Private sectors. Zindagi Technologies consultants have expertise in the field of designing, building, and maintaining large-scale Networks. If you require any support, Please Contact us, drop us a message at +91-9773973971, or get in touch with us via email. Follow us on LinkedIn and keep in touch with the latest technology blogs.
Author
Abhishek Kaushik
Associate Consultant