Best Practices: Cisco NIPS Day 1 Configuration Guide
In this blog, you will see about the necessary config. of NIPS 8350 (Network Intrusion Prevention System). We will give you point-to-point information, will not complicate this by going into deep theories. We will keep it technical for your better understanding.
We are using hardened operating system Cisco Sourcefire NIPS-8350 physical device in this blog as an example:
In the below diagram, you will see 2 Network IPS 8350 for redundancy, ASR routers for WAN connectivity, Firewall, and switches.
You can use the hyperlinks below to go to the specific configuration. We are going to discuss the first 12 in this blog and in the next blog, we will go with the remaining 13.
- Configure Management Interface
- Configure Hostname
- Configure NTP Server
- DNS Server
- HTTPS Certificates
- Users and User Roles
- Integrations
- User Preferences
- Fast-Path Rules
- Licenses
- Interfaces and In-Line Sets
- Access Control Policies
- HTTP Responses
- General Settings
- Intelligent Application Bypass Settings
- Detection Enhancement Settings
- Pre-filter Policy Settings
- Balanced Security and Connectivity Policy Settings
- Detection Enhancement Settings
- Performance Settings
- Network Analysis Settings
- Latency Based Performance Settings
- File and Malware Settings
- Syslog Settings
- OEM Document
Configure Management Interface
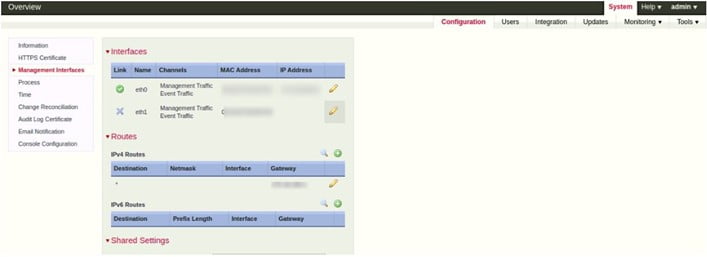
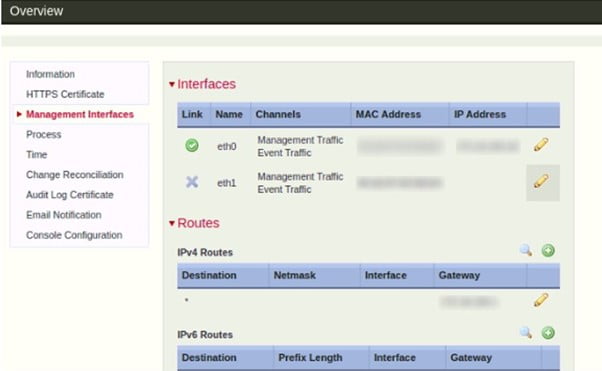
To configure management interface –
- Go to System > Configuration
- Management Interfaces
- Configure the management interfaces as per your requirement
Configure Hostname
We will use FMC (Firepower Management Center) to configure and manage the firepower devices centrally.
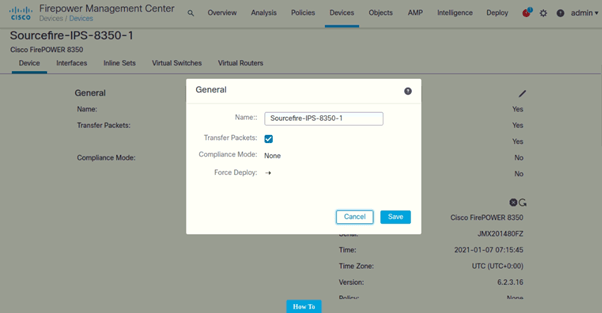
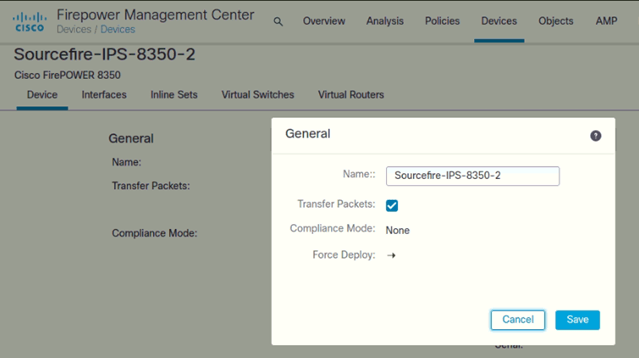
- Login to FMC
- Go to Devices > Select your NIPS
- Click on the pencil icon to change the hostname
Please check the screenshot below:
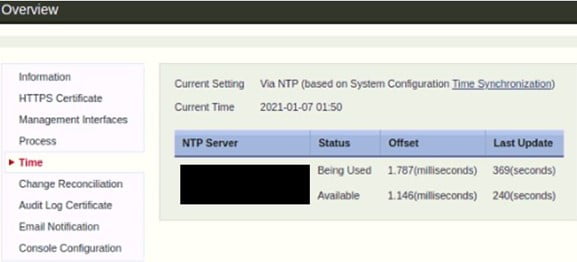
Configure NTP Server
We have an NTP Server in our network, will use the internal NTP server IP address for both the NIPS.
To configure NTP Server –
- Go to System > Configuration
- Click on Time
- Configure the NTP server

Configure DNS Server
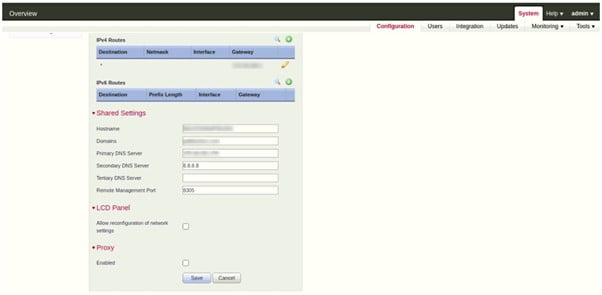
If you have an internal DNS server then add their IP or you can use 8.8.8.8 on both devices.
To configure DNS Server –
- Go to System > Configuration
- Click on Management Interfaces
- Go to Shared Settings
- Configure DNS server
Configure User and Roles
Currently, there is a single admin user configured for both the NIPS.
To configure DNS Server –
- Go to System > Users
- In Users section > Click on Create User to create a new user or,
Click on the pencil icon to edit an existing user.

- To configure roles – Click on “User Roles”

Integration with FMC
We can manage NIPS via FMC centrally. Need to configure “Remote Management” in NIPS.
To integrate with FMC (Firepower Management Center) –
- Go to System > Integration
- Click on Add Manager

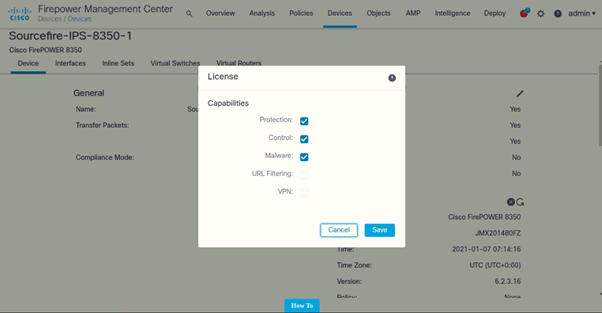
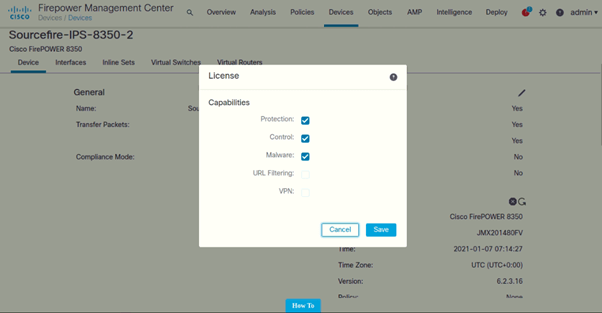
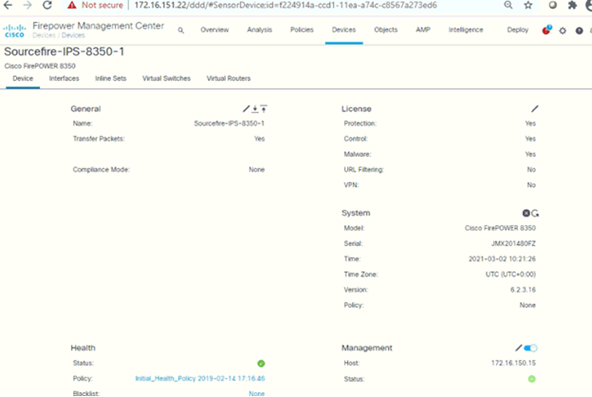
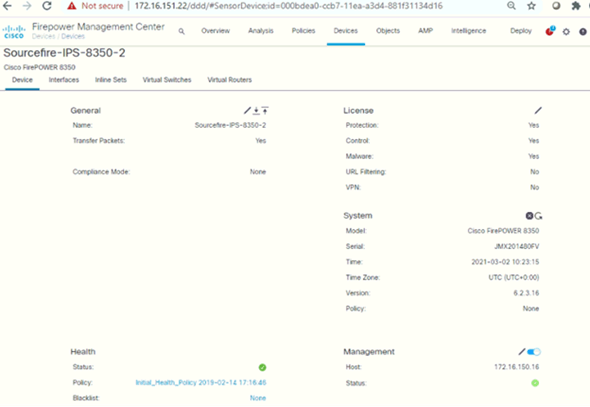
Licenses
Following are the licenses added for both the IPS’s:

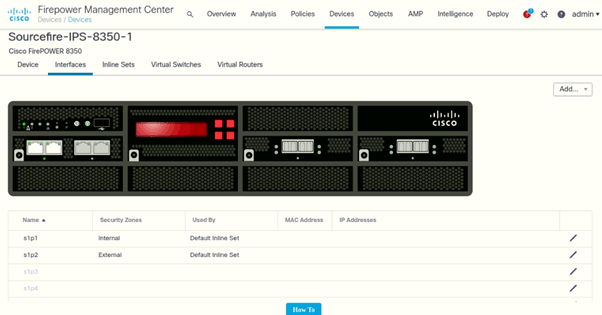
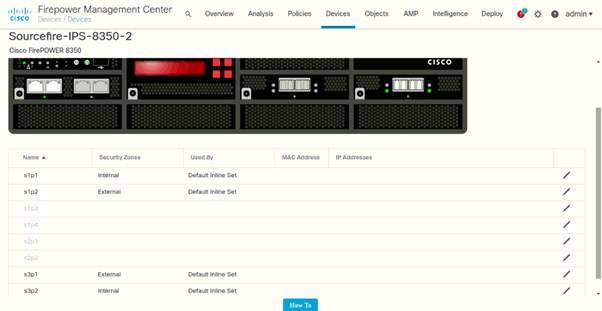
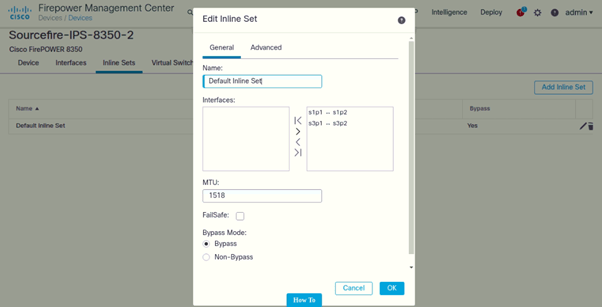
Interfaces and In-Line Sets
Following are the interfaces configured for IPS-1 and its in-line sets:
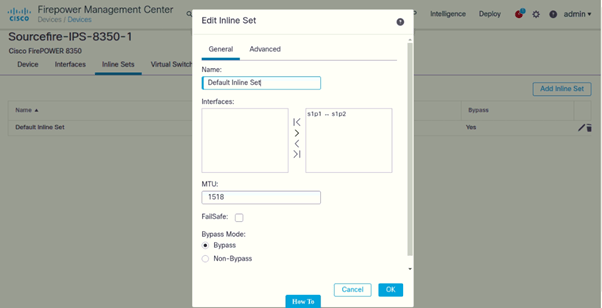
Bypass mode has been enabled on the device:
Following are the interfaces configured for IPS-2 and its in-line sets:
Bypass mode has been enabled on the device:
Access Control Policies
Following are the access control policies configured on both IPSs:
In this blog, you will see about the necessary config. of NIPS 8350 (Network Intrusion Prevention System). We will give you point-to-point information, will not complicate this by going into deep theories. We will keep it technical for your better understanding.
We are using hardened operating system Cisco Sourcefire NIPS-8350 physical device in this blog as an example:
Today, we read about the initial and basic configuration of the Cisco NIPS. For now, we will stop here but will continue the rest of the configuration in our next blog. We will not confuse you because we know this is a little bit complicated about the device but I hope that I made it easy for you. Stay tuned for the next part. Meanwhile, if you want the best security options for your organization then drop us a message on +91 97739 73971.
Author
Jagjeet Singh
Senior Network Security Consultant
