How should we Implement Active Directory Certificate Services?
Many apps and services rely upon digital certificates to provide authentication and additional security through encryption. You can install and configure Active Directory Certificate Services (AD CS) as the foundation of your public key infrastructure (PKI) to deploy and manage digital certificates within your organization. ADCA is needed whenever you are hosting a web server that needs to encrypt data over the wire. Instead of buying a public certificate, you implement your own trusted Internal Certificate Authority (CA), deploy a root certificate to your client through GP, and then you can create as many webs server certificates as you want.
Public Key Infrastructure Provides The Following Benefits Within Your Organizations
Authentication – Enable you to identify users, computers, and services.
Verification – Ensure that data in transit, such as in an email message, has not been modified. Verification also verifies that the sender is who they claim to be.
Privacy – Provides a means to encrypt data, either at rest, such as on a file system, or in transit, such as an email message.
Choosing between a standalone and Enterprise CA –
Windows Servers 2019 supports two CA deployment options. These are
Standalone – you can deploy a standalone CA without AD DS. Standalone CAs (Certificate Authority) are often deployed as offline root Cas and have the following additional characteristics.
- Users must request a certificate using web enrollment or another manual process.
- An administrator must approve all Certificate requests.
Enterprise – To deploy an enterprise CA, you require AD DS. Enterprise Cas cannot be deployed as offline root Cas and has the following additional characteristics.
- CA configuration and registration information is stored in AD DS.
- Users can request certificates using web enrollment or another manual process but can also use autoenrollment and web services.
- An administrator does not need to manually approve certificate requests, Instead, requests can be handled automatically based on the configured setting.
The decision of whether to deploy an enterprise or standalone CA is related to the decision to deploy a single or multiple tier CA architecture, based on a root CA and subordinate Cas.
Installing the Certification Authority Roles Services
Before you can configure the CA, you must install the Certification Authority role services. In Server Manager, use the following procedure to complete this task:
Step 1 – Sign in as a Local Administrator. Open the Server Manager, and then click Add Roles and Features.
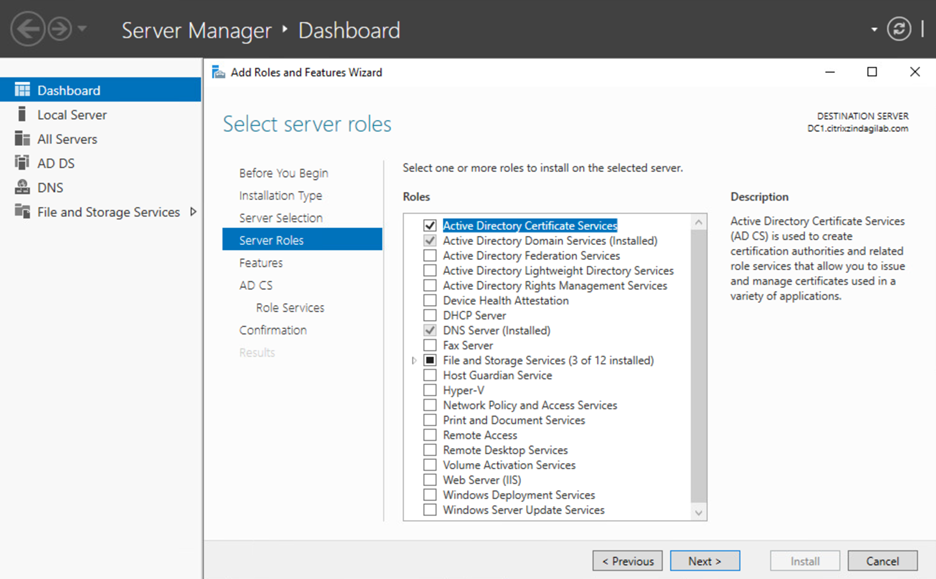
Figure-1
Click Next twice, on the Role Services wizard click the Certificate Authority check box and click Next.
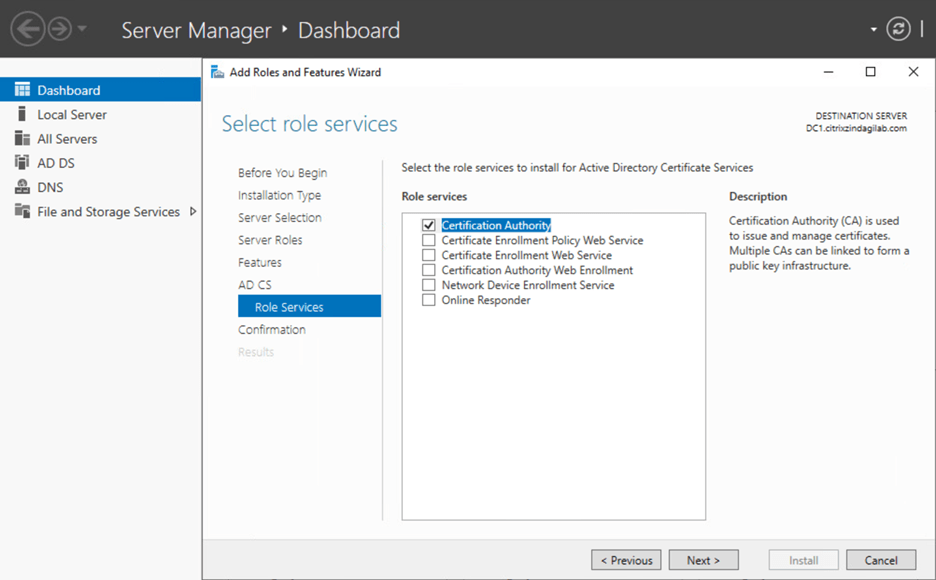
Figure-2
On the confirmation installation Selection page, click Install. After the role services install, click Close.
After Installation of the Certification Authority role services, you must configure your CA as either Standalone or Enterprise.
Install Standalone CAs – After installing CA role services you must configure it. From Server Manager, use the following procedure to install a Standalone CA.
- In Server Manager Flag notification on the toolbar.
- Click configure Active Directory Certificate Services on the destination server.
- On the Credentials page, either the credentials for a user account with at least local Administrator group membership.
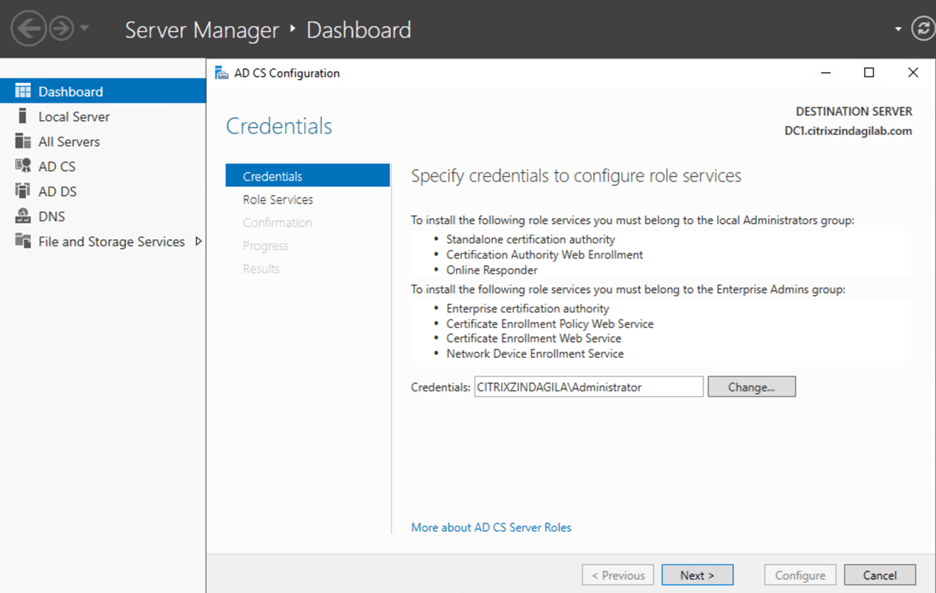
Figure-3
Here you can see that in the Credentials section you have your domain name and user.
- On the Role Services page, select the roles that you want to configure. In this instance, select the Certification Authority check box, as shown in figure-3, and click configure.
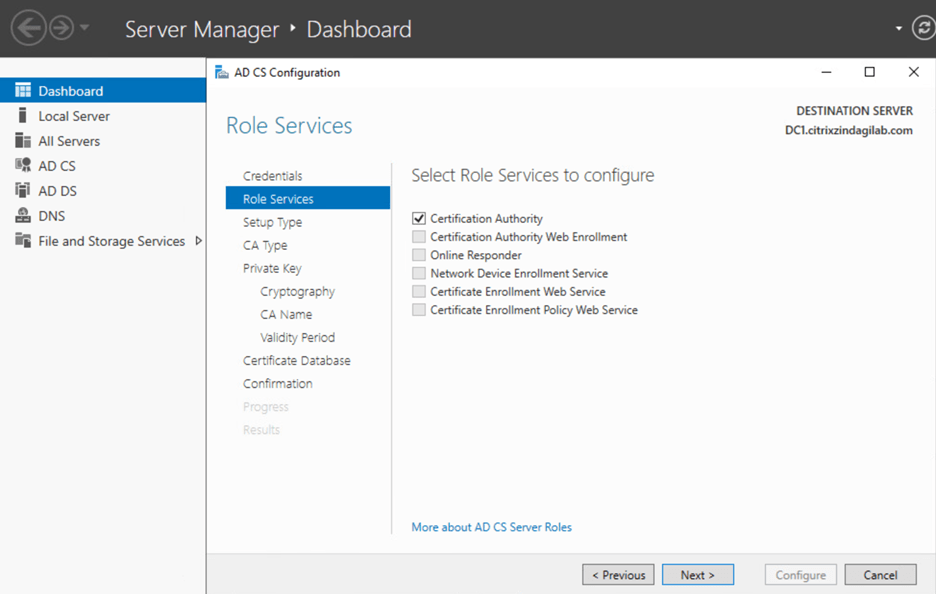
Figure-3
- On the Setup Type page, shown in figure-4 select Standalone CA, and then click Next.
(In this wizard you can choose what you configure Standalone or Enterprise)
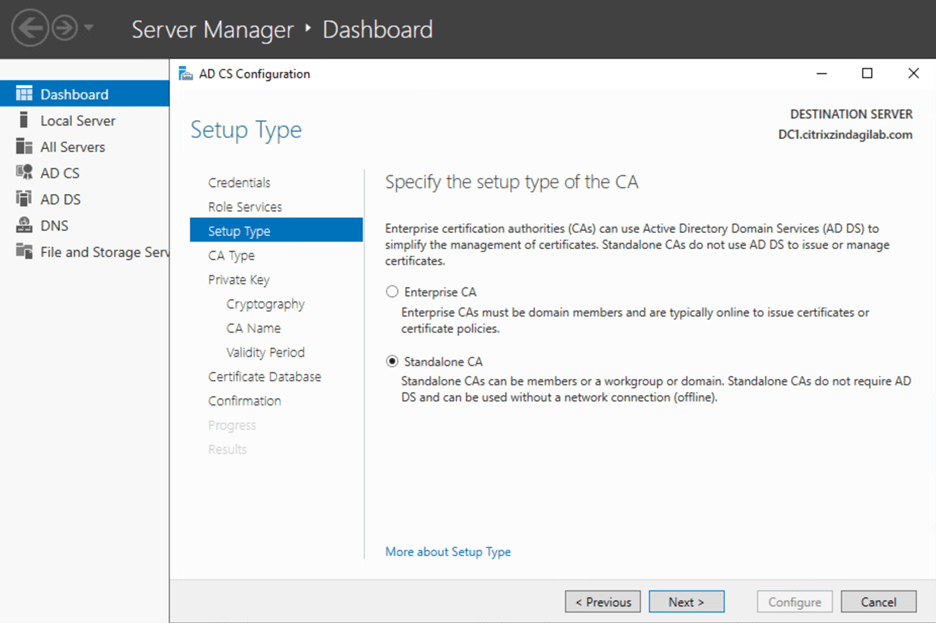
Figure-4
- On the CA Type page, if this is the first CA, click Root CA, as shown in figure-5, and then click Next.
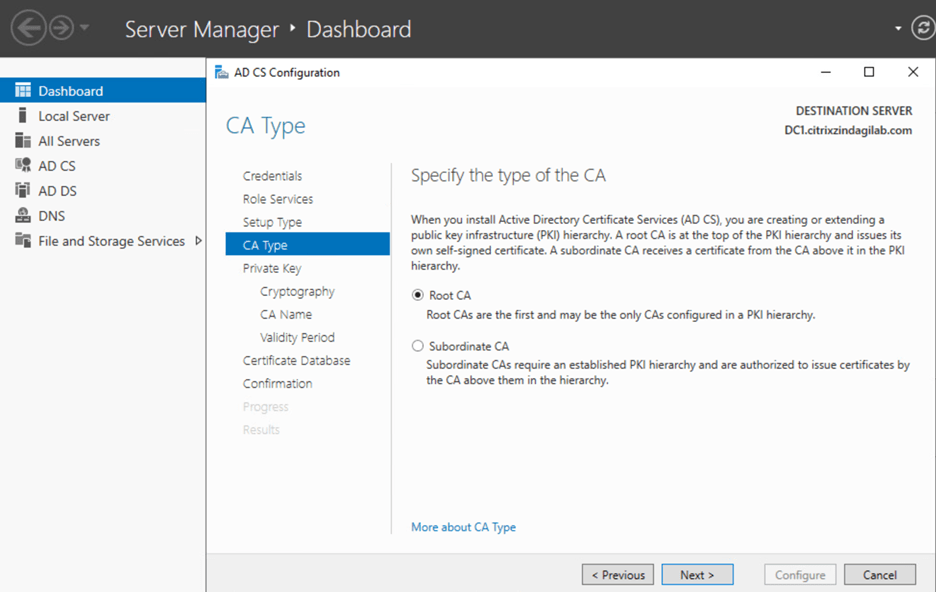
Figure-5
- On the Private Key Page, if this is a new deployment, as shown in figure-6, click Create a New Private Key, and then click Next. If you have an existing key that you want to use, click maintain continuity with previously issued certificates.
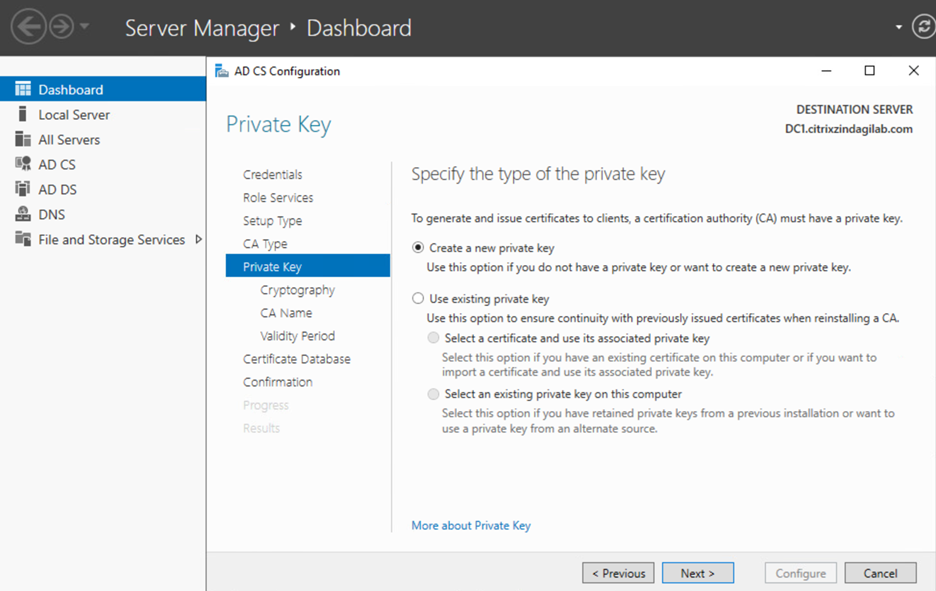
Figure-6
- On the Cryptography for CA page select the appropriate cryptographic provider, key length, and hash algorithm, as shown in figure-7, and click Next.
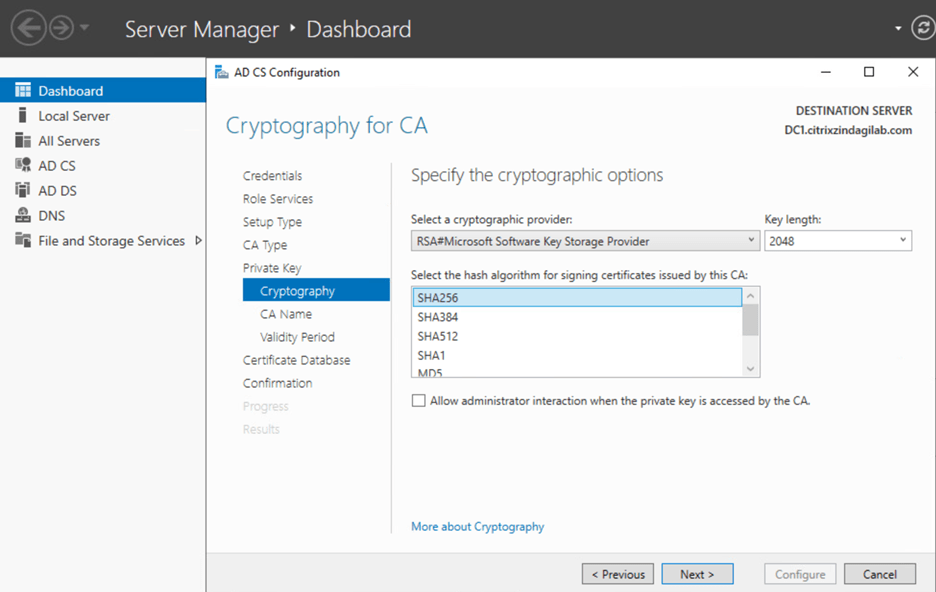
Figure-7
For best practices, you need to select by default Cryptography provider SHA256.
On CA name wizard you can see here in as shown in figure-8 there are three boxes. Inside these boxes are all credentials like the Common name of CA, domain name, etc.
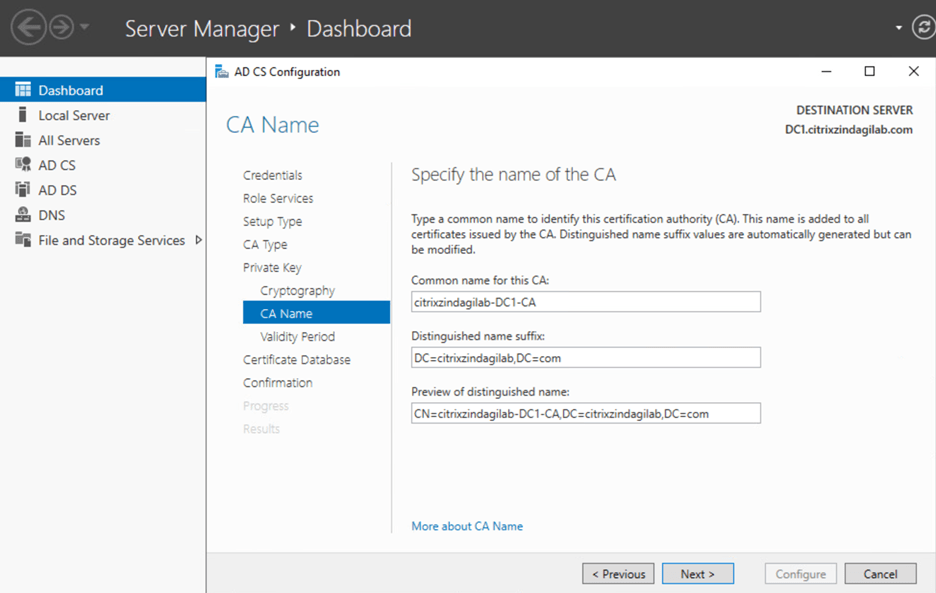
Figure-8 On the Validity Period page, shown in figure-9, select the appropriate validity period for the certificate that is to be generated for the CA. this must exceed the validity period for a certificate that is to be issued by the CA. Click Next.
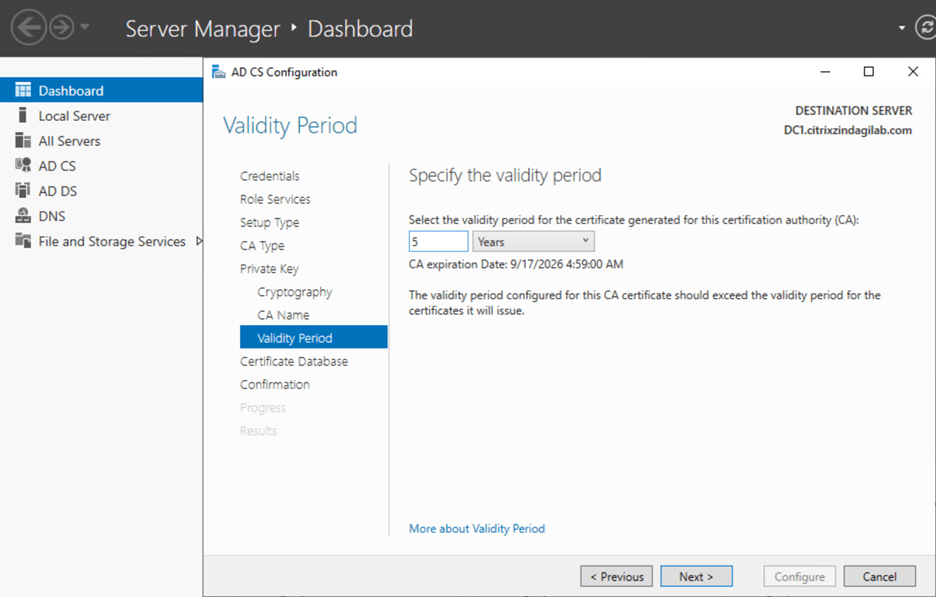
Figure-9
On the CA Database page, specify the location for the certificate database and related log files, as shown in figure-10. Click Next.

Figure-10
On the confirmation page, shown in Figure-11, verify your configuration choices, and then click configure.
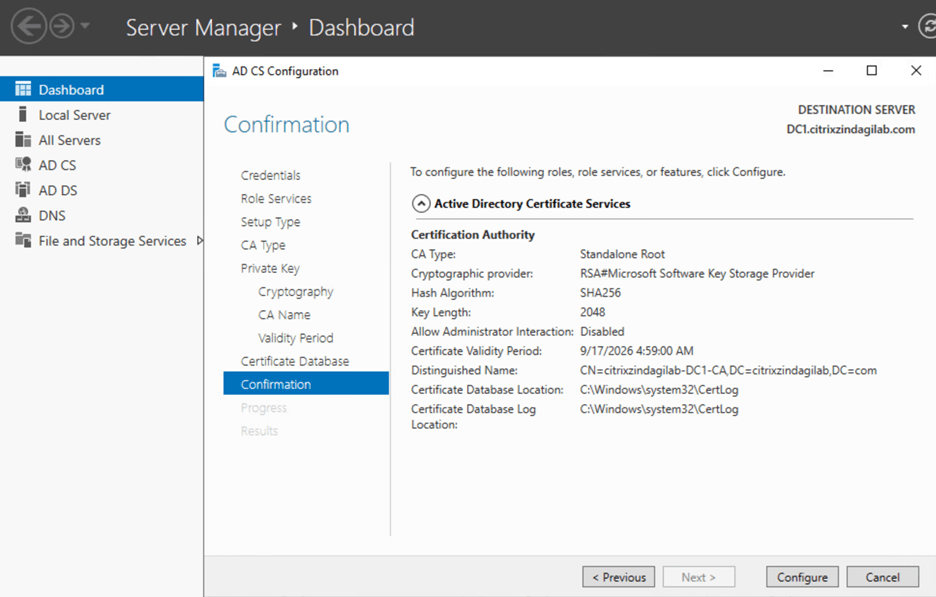
Figure-11
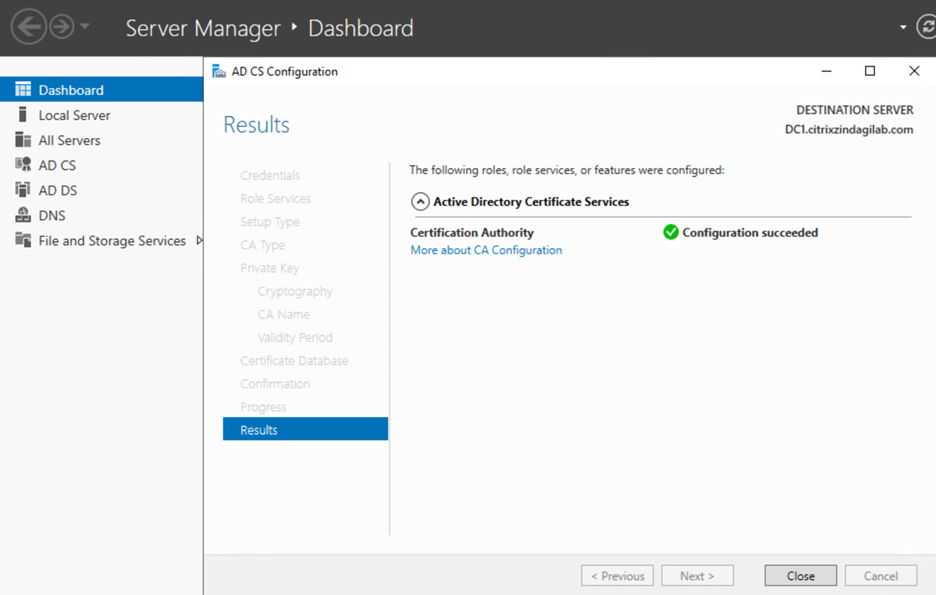
Now our Standalone CA is successfully configured.
Zindagi Technologies is an IT consulting company that specializes in Data Centers, Managed IT Services, Cloud Services, Security Services, Design, Planning, and Implementation of different aspects. If you require any of our services for your organization then you can get in touch with us through email or you can give us a call at +91 97739 73971.
Author
Deepak Kumar
Linux and Server Administrator