How to Configure Local (Yellowdog Updater, Modified)YUM Client
What is YUM Client
Package managers are a great feature of every Linux system. They allow us to easily handle the installation, removal, and inspection of software packages.
YUM is a package management utility for RPM-based distribution. RPM (RedHat package manager) is the package manager that systems like RHEL and CentOS are based on.
In this blog, we know that how we use YUM without an Internet connection. “Install all packages using Local Repo.”
Create a Local YUM Client
If we create local YUM repo in our machine that means we used the YUM command and installed it without internet all the packages in the Linux machine and server.
Configure Local YUM client
When we create a YUM client manually then we need to know that where are all YUM repo files.
Path – /etc/yum.repo.d/ (all repo file)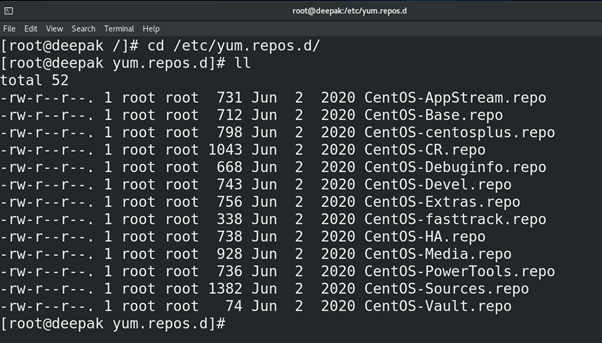
We will verify that all repo files are stored here.
Configuring the Local repo in easy 6 steps
Step 1
“Mount CentOS ISO image in your Linux machine”
Firstly, you browse CentOS ISO images in your machine like this….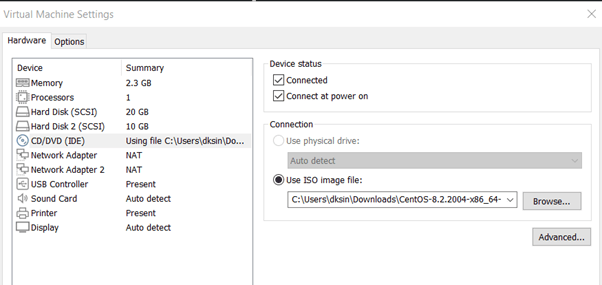
When you mount an ISO image in your machine then it should show in your device list. On-device (sr0) mounted your CentOS ISO image.
In this screenshot, device name sr0 and on this device-mounted CentOS image.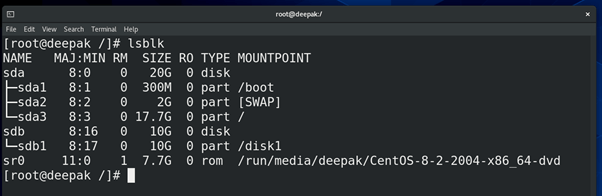
Step 2
Firstly, you ready up a 10 GB disk in your machine to copy repos in this disk.
Like this, in our case, the sdb1 disk is ready to use and mount on /disk1 directory.
Step 3
When all these things are done, you simply follow this path and copy all new repo in our local machine.
Command – cd/run/media/deepak/CentOS-8-2-2004-x86_64-dvd and press ll (long list) command –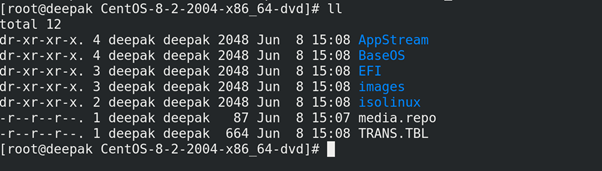
After that copy, all AppStream and BaseOS file on your local disk sdb1 Copy AppStream – Command – cp -R AppStream/ /disk1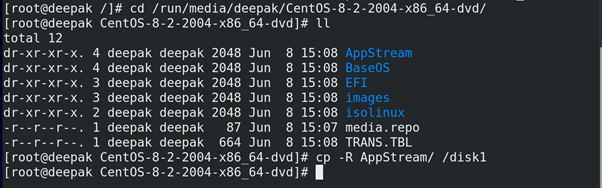
Copy BaseOS – Command – cp -R BaseOS/ /disk1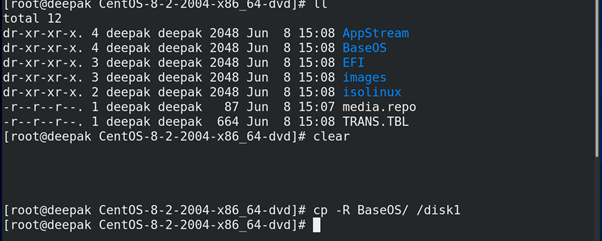
After all this task is done. Verify-in directory disk1 – Command – cd /disk1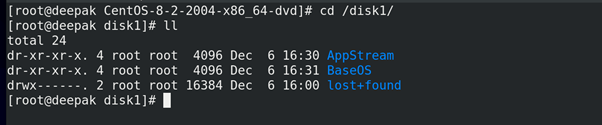
In disk1 directory, AppStream and BaseOS directory are successfully copied.
Now our repo location is ready in which repo all packages are available.
Step 4
“Configure yum.repo.d file”.
Command – cd /etc/yum.repo.d/
In this directory, all data are by default present here. We copied all data in a directory and created a new file and configured the YUM script.
Create a backup directory and move all CentOS_* file
Command- mkdir backup
mv CentOS_* backup/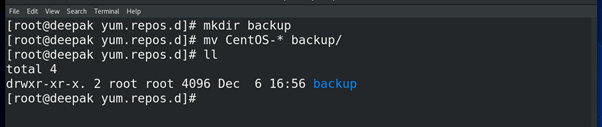
Step 5
“Make a file and configure”.
Make a file local. repo and configuration YUM script.
Command- touch local.repo
Configure local.repo file – Command – vi local.repo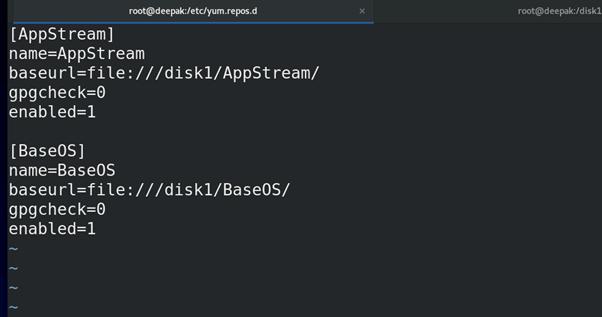
In local.repo file configuration all values are explained here for your understanding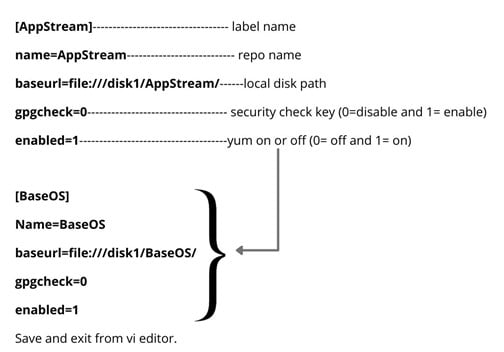
After configuring local.repo file we must execute some command just like —
Commands
1st – yum clean all.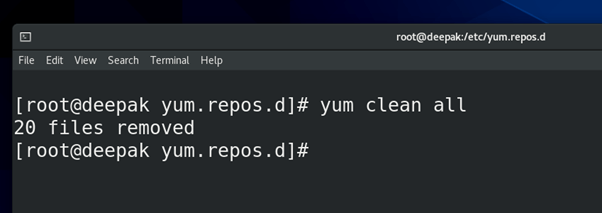
2nd – yum repolist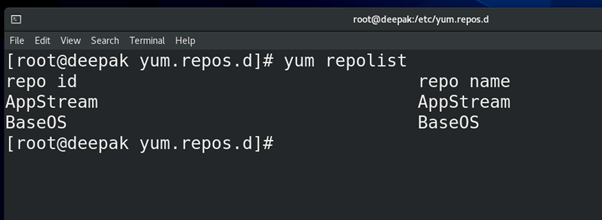
Check our all repolist.
3rd – yum makecache (create a cache memory for YUM)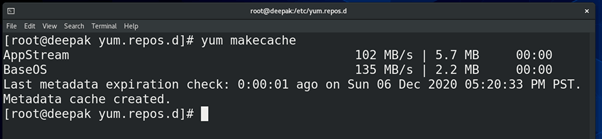
Now, finally, we create a local repo and all packages we install without connecting internet.
Step 6
“Install any software via YUM command offline (without internet)”
Example – install nano package.
Command – yum install nano.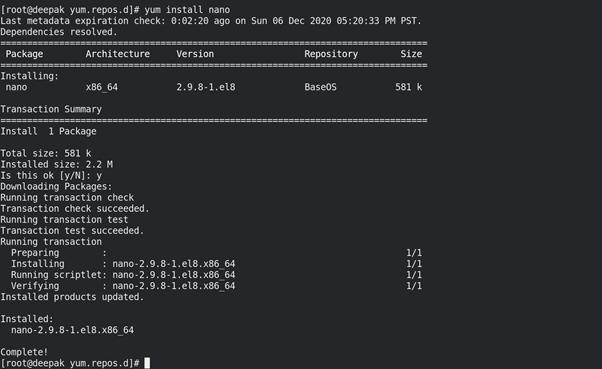
Wawwoooo, It’s working.
Here we created or configured a local repo so that we can download all packages via the YUM command without any internet connection. By this method we can do this if we do not have any internet in our server or the local machine.
If this blog was helpful to you then follow these steps to configure a local repo without the help of internet connectivity, otherwise please feel free to contact us call us at +919773973971 we will be happy to help you.
Author
Deepak Kumar
Linux and Server Administrator