Manage Networking in CentOS with the help of NetworkManager Services
In CentOS operating system, we manage all networking services with the help of the NetworkManager daemon. The Network Manager will also assist in configuring the control network devices and changing the network dynamically. It will help to manage the network connection status. In this blog we are going to understand CentOS NetworkManager daemon, installing, configuring, and managing.
Installing NetworkManager in CentOS –
Basically, Network managers should come preinstalled on a Centos or RHEL operating system, if in case you have no installed network manager daemon you can install manually via using the yum command.
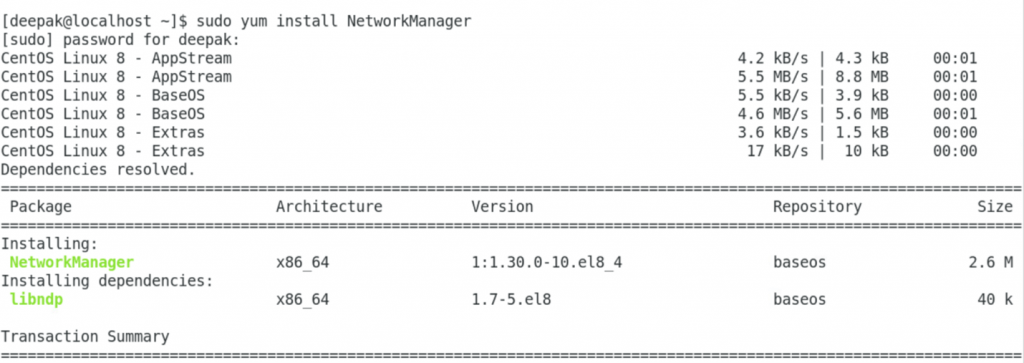
Command – sudo yum install NetworkManager -y


Here you can see this the NetworkManager services are installed successfully. After this installation, we can start this daemon and enable it.
Managing NetworkManager using systemctl on CentOS
In CentOS and other modern Linux systems that have adopted the systemd (system and service manager), services are managed using systemctl tools.
If the NetworkManager is not running, you can start easily following these commands.
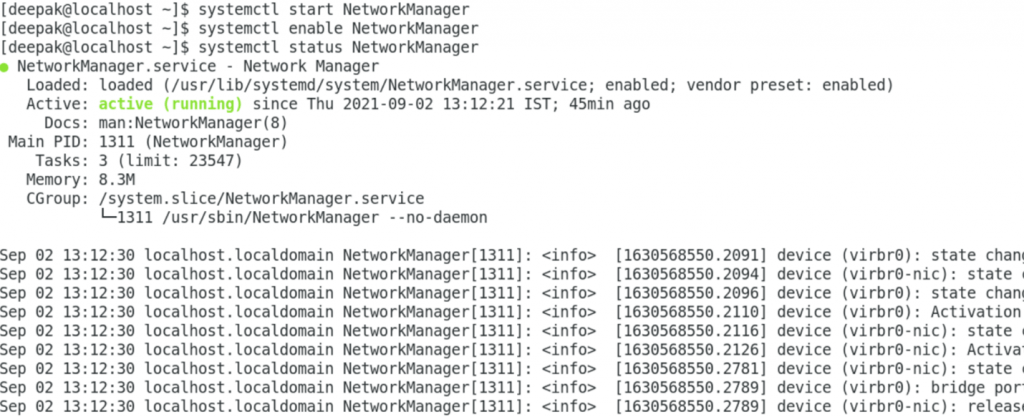
Start, enable, and check the status of NetworkManager using systemctl
Command – sudo systemctl start NetworkManager
sudo systemctl enable NetworkManager
sudo systemctl status NetworkManager

Stop NetworkManager
If you can stop the NetworkManager for one reason or another issue, follow this command.
Command – systemctl stop NetworkManager
Get the list of all Devices –
Command – nmcli devices status
As per the above command, we are getting the list of devices available in the CentOS environment.

Here you can see this, in our case we have four devices connected in our CentOS environment and you can also see here the status of devices.
The Global Configuration File of NetworkManager
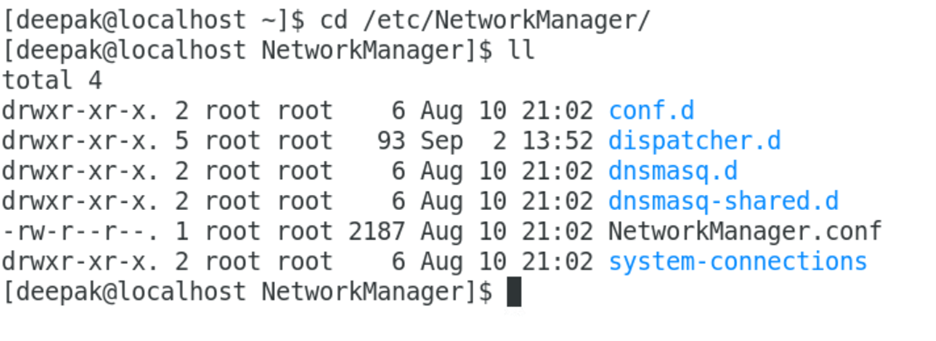
The global configuration file for NetworkManager is located at /etc/NetworkManager/NetworkManager.conf and additional configuration files can be found in /etc/NetworkManager/

Inside this directory, all the Network configuration files are there. If you have any changes to interface configurations files or NetworkManager daemon’s configuration (located under the /etc/NetworkManager/ directory), you can restart (stop and start) the NetworkManager to apply the changes as shown –
Command – systemctl restart NetworkManager
Set Static IP Address on CentOS Using CLI Terminal
Network Interface-specific configuration file are stored in the /etc/sysconfig/network-scripts/ directory. You can edit any of these files and modify them accordingly.
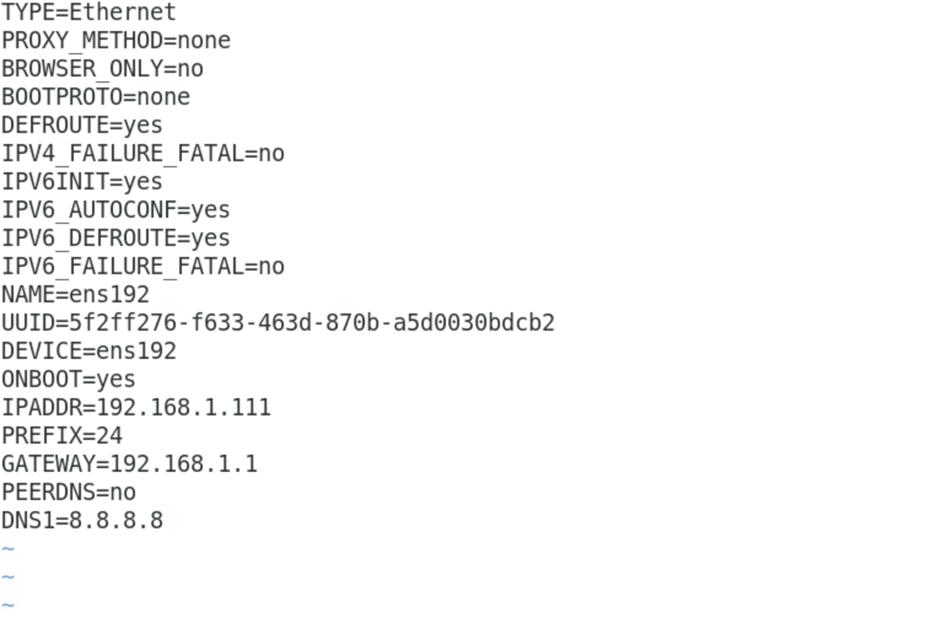
For example, in our case, we set a static IP on our CentOS machine using this config path.
Command – vi /etc/sysconfig/network-scripts
We set our static ip is – 192.168.1.111/24 and DNS is 8.8.8.8


When you edit this file, you must restart your NetworkManager then all changes are applying.
We are set a static IP and DNS ip in our CentOS environment. And after config this file, we are run the restart for the NetworkManager command.

Here you can see, my ens192 interface IP is changed.
Here we can see all the “CentOS NetworkManager” all concepts with the help of proper examples and explanations, and command with the outputs. The network Manager will help to manage all networking level activity in the CentOS environment.
Here at Zindagi Technologies, we manage our projects and work responsibilities in the best possible way. We give shape to the organizations in terms of Data Center, Managed IT, Cloud Solutions, SAAS, Cyber Security, IT Consulting, and many more. Our aim is to offer the right service the is needed by the organization and we provide our best engineers on-site and off-site for continued support. If you need to see the required change in your company, then email us and we will get back to you or you can also give us a call at +91 9773973971.
Author
Deepak Kumar
Linux and Server Administrator
