2 Simple Ways To Recover A Lost Key Pair Of AWS Linux EC2 Instance.
In this blog, we will show you different ways to recover your AWS Linux EC2 instance in case of the lost key pair.
Scenario
Suppose that the EC2 instance is running that contains web site but you have lost the key pair that is associated with the EC2 instance (The web server).
Key pair: it is the combination of the private key and public key that is used to access the Ec2 instance. Key pairs are used to secure a connection to the EC2 instance.
EC2 instance: EC2 stands for Elastic compute cloud. it is used to access the secure and resizable compute capacity in the cloud.
Prerequisites
- Knowledge of Using AWS portal.
- Basic knowledge of Linux Command Line
Method 1: By using AMI (Amazon Machine Image)
By using this method, we don’t need to power off the running EC2 instance and we can recover the web application service that is running on the
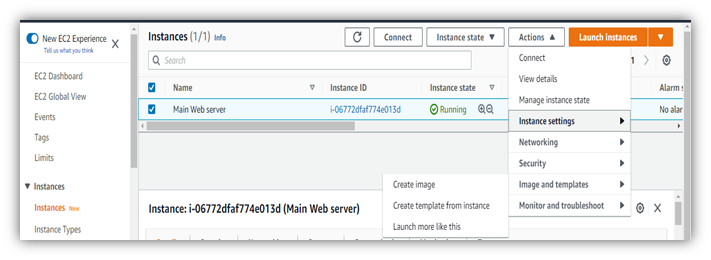
First, select the primary web server and click on the Actions >Instance settings > Create Image
Here you can create Your AMI by giving information such as the Image name, and image description
Note: if you don’t want to reboot the EC2 instance after creating Customized AMI then you must need to select the option “Enable”.
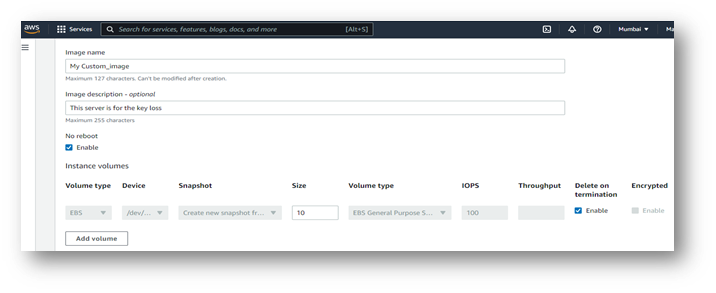
Then, select Tag images and snapshots together and select create image button.
After a few seconds… Your Customize AMI will be created.
Now you can run the new instance by using the Customized AMI that you have created. To create a new EC2 instance by using customized AMI follow the below steps:
First, click on the Launch instance on the instance dashboard.

Then Type the name of the new instance name. In my case given the name “my Backup server”.

Then select the Customized AMI on the MY AMI option ……
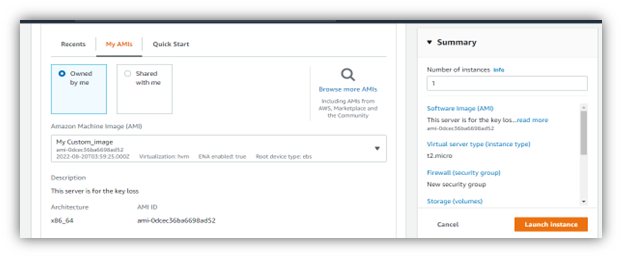
As well as create the new key pair for this EC2 instance (The web server).
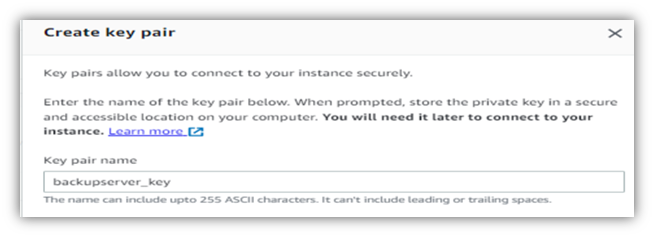
after that click on Launch Instance to run the new instance for the Web server.
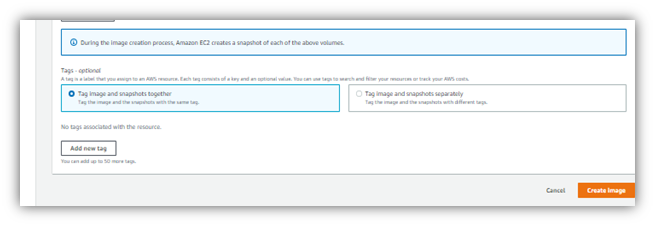
Now you can launch the new instance with a new/different key pair using the AMI just created and terminate the older instance (i.e., the key pair has been lost)

Now you have access to a new instance for the Web server without interrupting the service.
Note: For the uninterrupted web service for the client, On the DNS server you need to provide the IP address of the Second server before terminating the older web server.
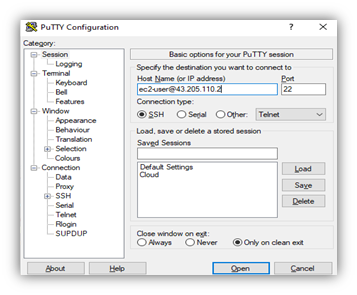
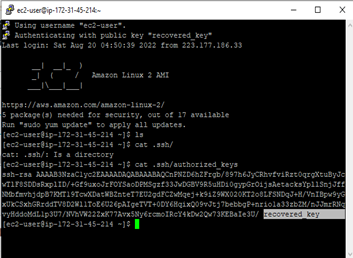
Note: In this method, we are not recovering the key Pair of the First instance, but instead we are building up the custom image of the server with the new key Pair and launching the web server with the same application.
But, if we want to Launch the Main instance without using the Customize AMI, then we will follow the second method to recover the instance key pair.
Method 2: By Swapping the Volume of the EC2 instance
By using this method, we can run the EC2 instance by recovering keys, but the disadvantage of this method is, that we need to stop the instance to recover the Key pair. So, It can interrupt the services of the Company.
For this demonstration, I have created an EC2 instance with Redhat Linux AMI, but You are free to choose any other Linux distribution AMI. Make sure to use different key pairs of this instance.
In my demonstration, I have set the name of the Main instance as” New web server” and the name of the second instance is “My backup server”.
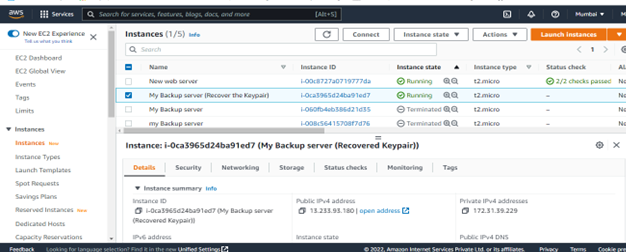
Once the instances are running properly, click on the Volume from the Left Panel of the EC2 dashboard.
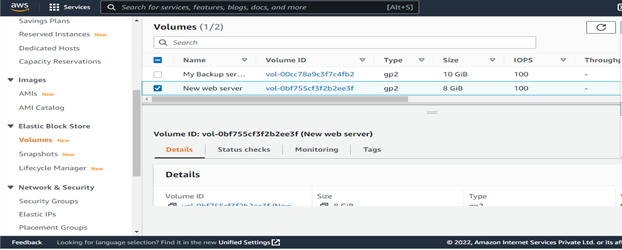
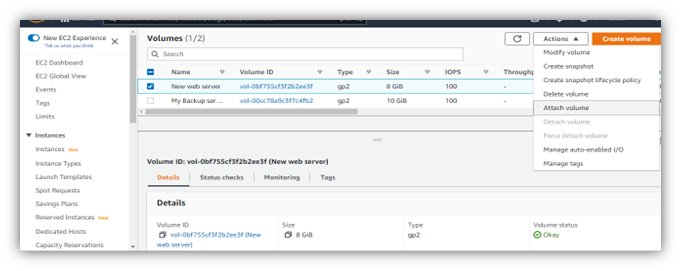
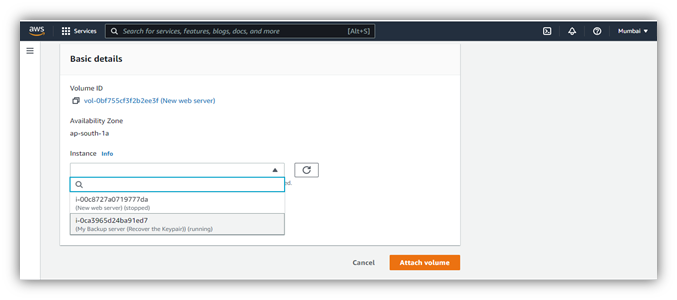
Now you need to detach the volume from the new web server (First EC2 instance) and attach this volume to the My backup server (second EC2 instance).
Note: If you receive an error message while detaching the Volume from the EC2 instance then you need to stop the instance after that try to detach the volume.
Another point noted here is that before detaching the volume we need to write down the root device name for example /dev/xvda.

Now, you must SSH to the new instance (i.e., My backup server in my case) and attach the Volume of the New web server (First EC2 instance) to this instance.
Now I am listing the volume attached to this EC2 instance by using the command lsblk. Here you can see the disk xvdf, which is not yet mounted.
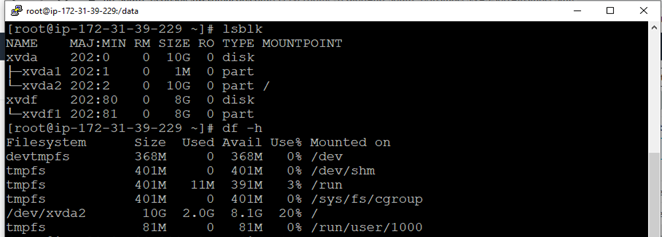
To mount this disk, First, create the directory (in my case the directory name is data). To mount the disk /dev/xvdf1 on the data directory using the mount command.

Note: In case you fail in mounting the partition, check the UUID of the disks, If the disks are the same UUID so that you can mount the partition with the same UUID without overwriting it by the command:

Now switched to the directory /data/home/ec2-user/.ssh. Now, you have to replace authorized_keys of the New web server (First EC2 instance) with My Backup server (Second EC2 instance).

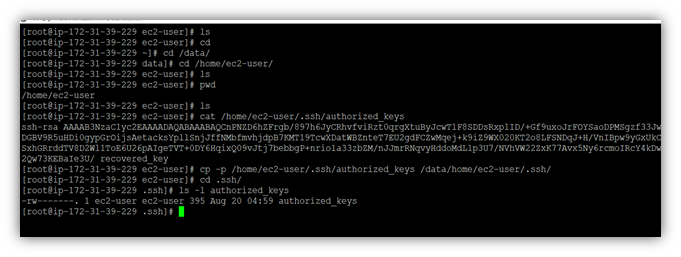
Now, it’s time to detach the volume from this instance and again re-attach this volume to the First instance.
Note: Keep in mind that while attaching the volume to the new web server using the path /dev/xvda (as described in the below images) as previously noted.
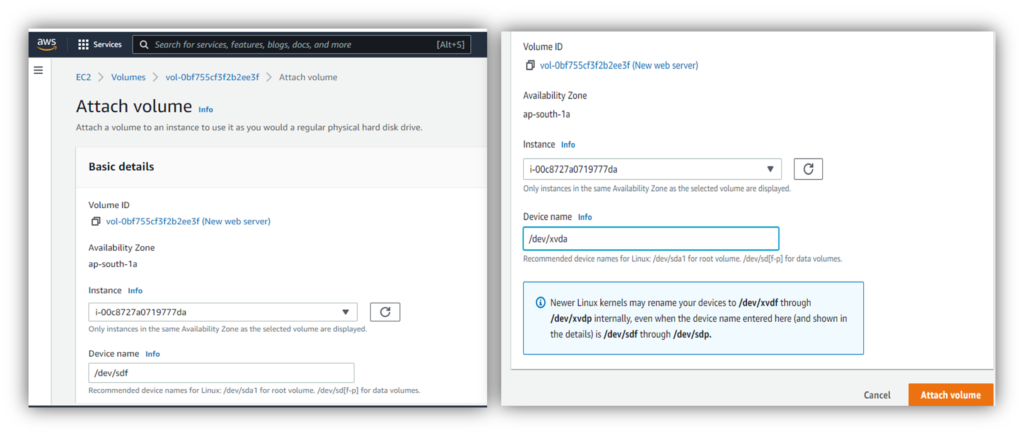
Now Finally start the New web server ( First EC2 instance ) and SSH this instance by using the new key.

We are Zindagi Technologies, an IT consulting company in Delhi. We have completed several IT projects in the both public and private sectors and provide IT solutions such as cybersecurity, planning, designing, and implementation of the data centers, cloud-based services, Application Development, VoIP, and other IT business-related services. We are the right people to support you with network programs and cloud solutions. If you wish to make use of any service, you can contact us at +919773973971 or drop an email to us.
Author
Amit Kashyap
Consultant – Server and Virtualization

Media streaming server configuration by AWS | Zindagi Technologies
October 2, 2022[…] Knowledge of AWS EC2 […]