How to configure Cisco ACI Part 1 of 2
Before going deep into how to configure Cisco ACI (Network Centric Mode), let’s understand what Cisco ACI is.
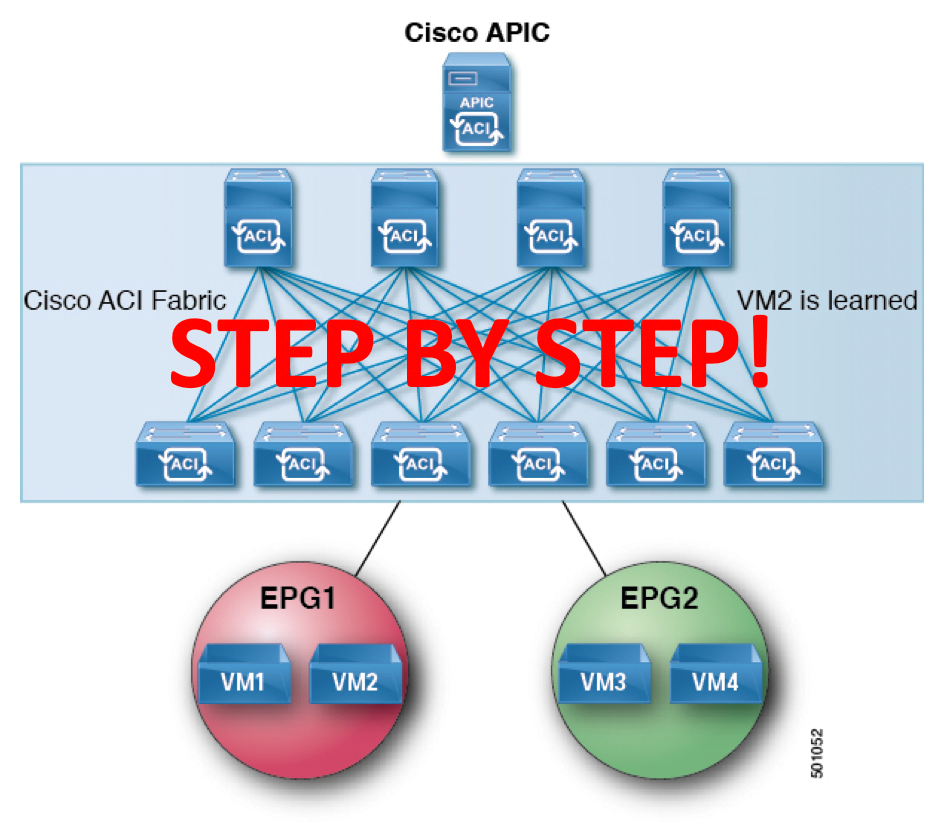
Cisco ACI (Application Centric Infrastructure) is Cisco’s Software Defined Networking Solution for the Data Center.
It let’s the application requirements define the network.
At a high level, it comprises of:
1. An APIC cluster (Application Policy Infrastructure Controller) which defines policy models, and provides management, analytics and monitoring for the entire fabric.
2. The actual fabric; which comprises of Cisco Nexus leaf / spine switches running the Cisco ACI mode operating system.
3. The resource pool which comprises of L2/L3 connectivity, infrastructure services (L4 to L7), Compute, Storage and virtualisation.
About this text
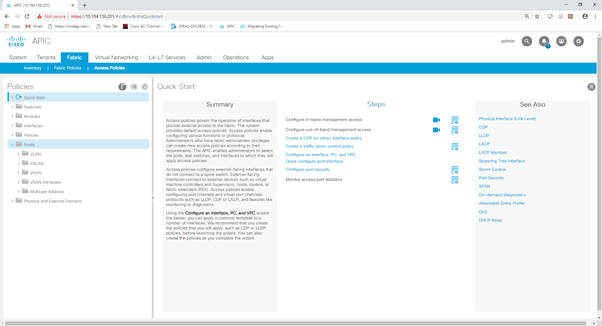
I’ll break up this text into two parts. The table of content has been provided for your reference. Part 1 will cover the fundamentals of configuration. Followed by that, we’ll get deeper into startup config, and discovery. After that, we’ll head towards installing and upgrading the image on the APIC. After that, we’ll configure the basic logical constructs such as tenant, application profile, bridge domain, end point group, etc. We’ll end this part with a discussion on creation of physical domains.
Table of Contents – Configuring Cisco ACI
- What is Cisco ACI
- Initial Start-up configuration
- Fabric Discovery and Node registration
- Upgrade the fabric
- Add Image to APIC
- Upgrading Device
- Creating Tenant
- Create Application Profile
- Create Bridge Domain
- Creating EPG ( END POINT GROUP)
- ADD Domain in EPG
- Assign Static Ports IN EPG
- Creating VLAN Pool
- Creating Physical Domain
- Create Policies
- Create Global Policies
- Create Attachable Access Entity Profiles
- Create Interface policies
- Link Level policies
- Create CDP Interface Policies
- LLDP Interface Policies
- Port Channel Policies
- Switch Policies
- Configuring Leaf Interfaces
- Leaf Interface Policy group
- Create Leaf Access Port
- Port Channel Interfaces
- Virtual Port-Channel Interface (VPC)
- Leaf Interface Profiles
- Configuring Leaf switch
- Leaf Switch Policy Group
- Leaf Switch Policy Group
- Leaf Switch Profiles.
What is Cisco ACI
Before getting into Configuring Cisco ACI, let’s understand what the APIC is. The Cisco Application Policy Infrastructure Controller (Cisco APIC) is the main architectural component of the Cisco ACI solution. It is the unified point of automation and management for the Cisco ACI fabric, policy enforcement, and health monitoring. The controller optimizes performance and manages and operates a scalable multitenant Cisco ACI fabric.
Initial Start-up configuration when configuring Cisco ACI
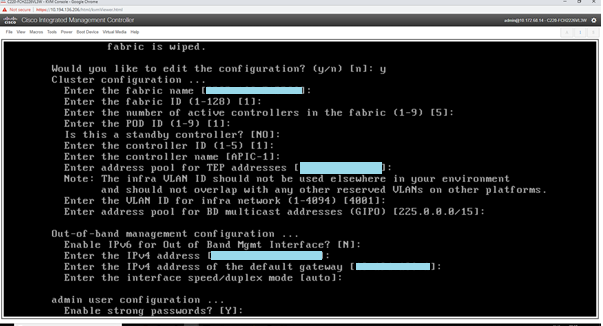
Step 1 :- Enter your Fabric Name.
Step 2 :- In second step you will enter the fabric ID here.
Step 3 :- In this you will specify who many active controller you have in the fabric, active controller can 3, 5 or 7.
Step 4 :- Enter the POD ID, Single POD ID represent individual site.
Step 5 :- In this Step you will specify that is this a active controller or standby controller.
Step 6 :- In this you will enter the VTEP IP Address pool. This pool ACI will use for his own internal communication.
Step 7 :- Here you will specify the Out-Of-Band Management details and Interface Mode.
Step 8:- And in the final step you will specify the admin credential.
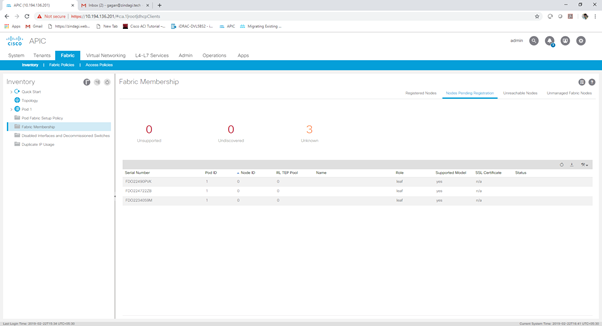
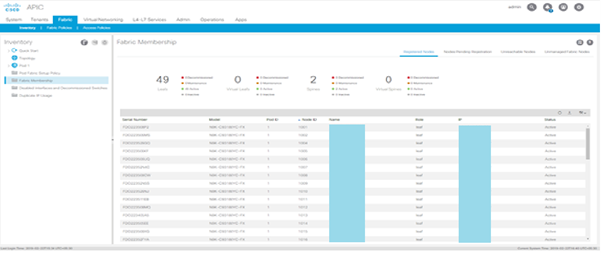
Fabric Discovery and Node registration
Step 1 :- Go to Fabric tab> Inventory
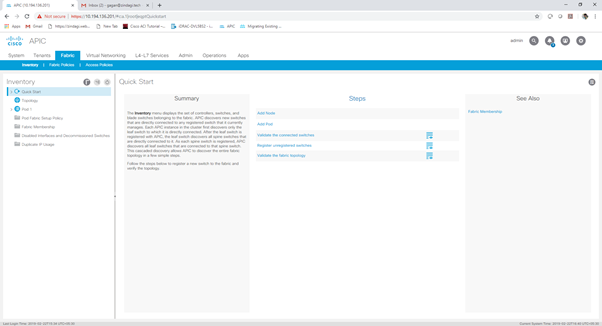
Step 2:- Click on Fabric Membership

Step 3 :- Go to None Pending Registration and select the Node.
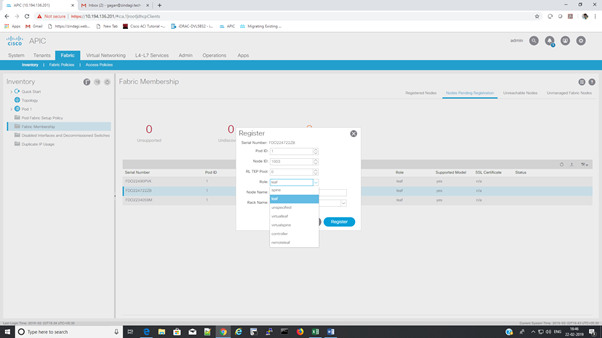
Step 4 :- Right click on discovered switch and click register.

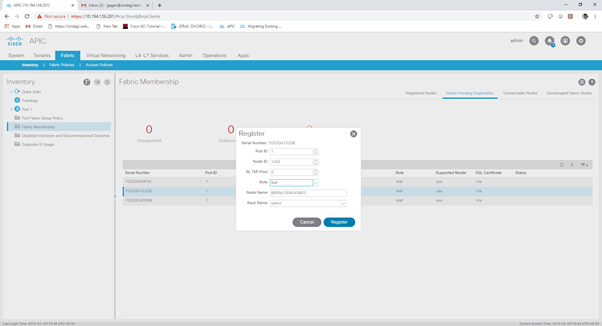
Step 5 :- Enter Node ID, Select Node and enter Node Name and click register.
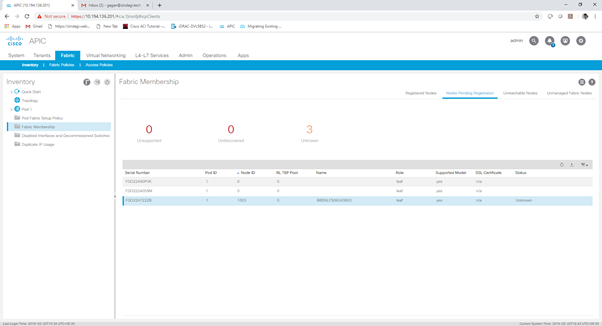
Step 6 :- After register you can see the Node ID, Name and Status. it will shows Unknown first after registration.
Step 7 :- After that your register node will move from none pending Registration to Registration Node and it will see as an Inactive first , it will take time to come from Inactive to Active.
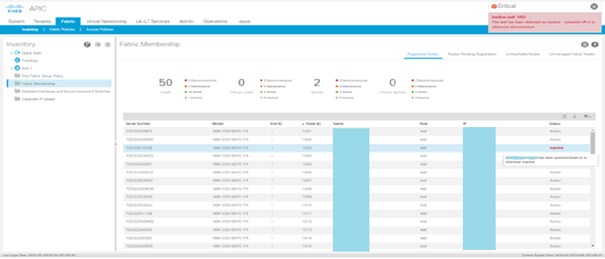
Step 8 :- Now finally you can see that you node is completely register.
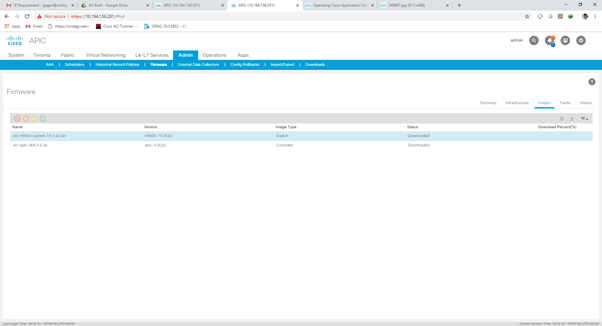
Upgrade the fabric
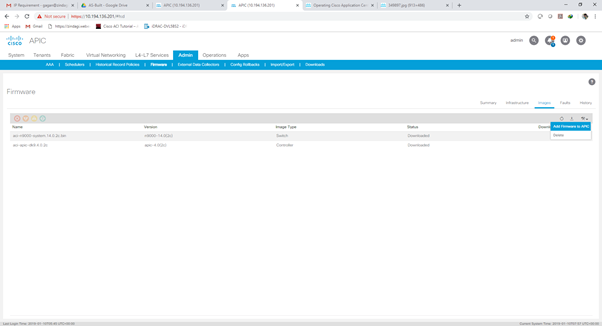
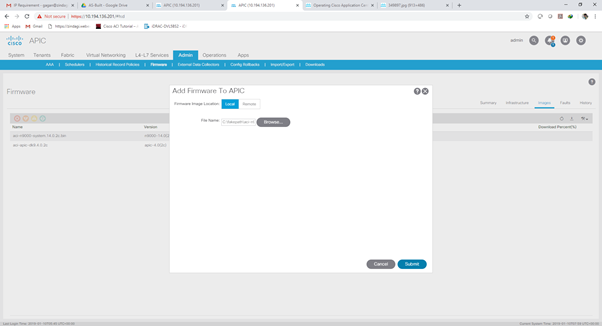
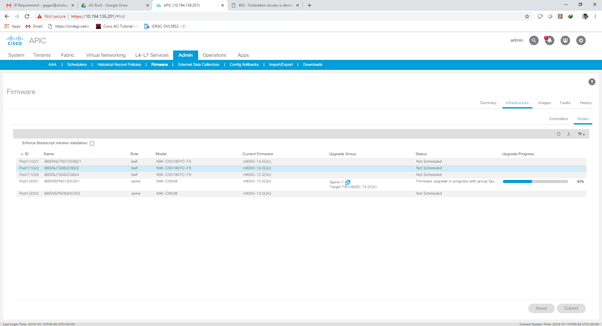
Add Image to APIC
Step 1 :- Login APIC GUI using GUI Credential.

Step 2 :- Go to admin tab > Firmware > go to the right corner click on image and then click on setting and then click on add firmware to APIC.
Step 3 :- Select the image location option from where you will fetch the image and then browse it.
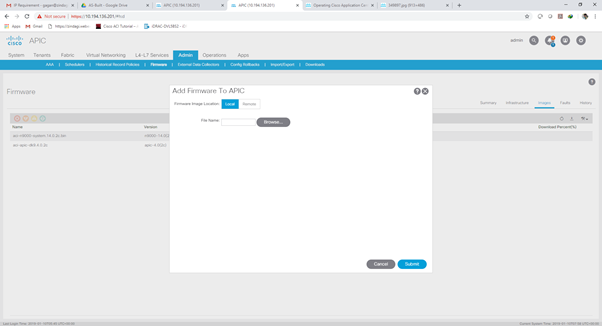
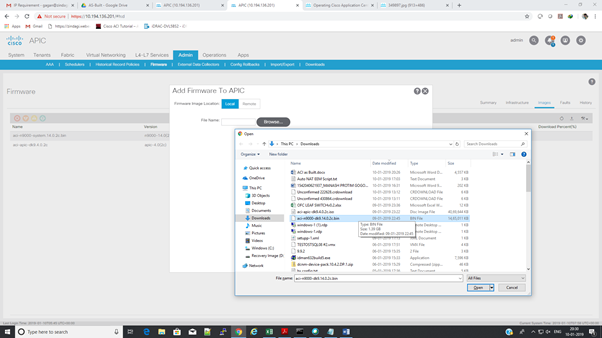
Step 4 :- After browse click submit.
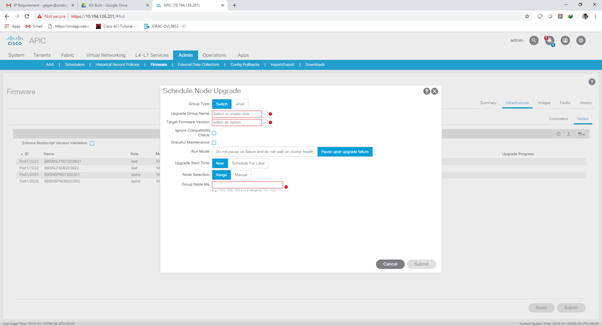
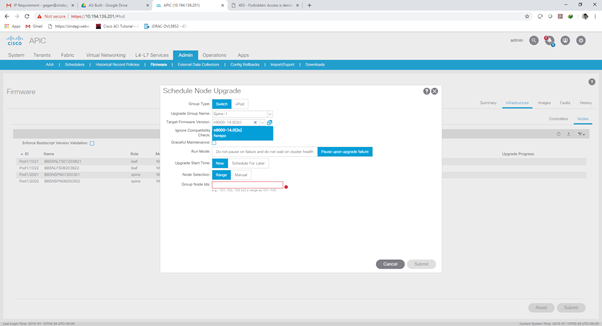
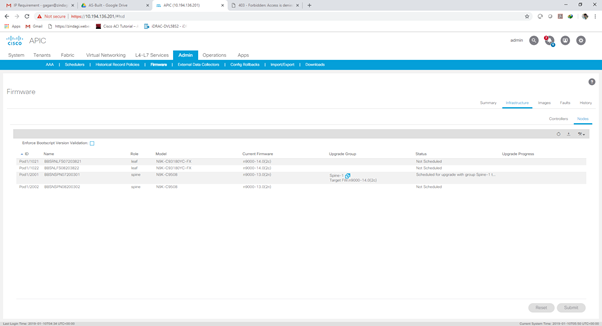
Configuring Cisco ACI – Upgrading Device
Step :- Go to Admin > Firmware > Infrastructure > Nodes.
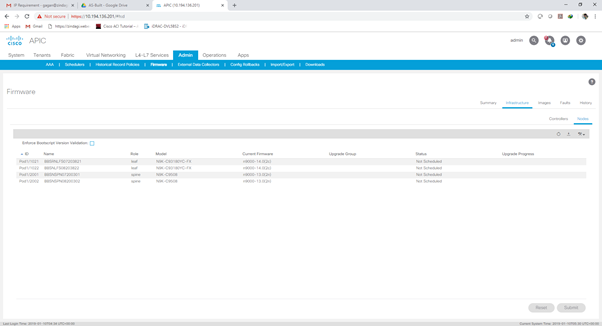
Step 2 :- Click on right corner below the node and schedule the upgrade.
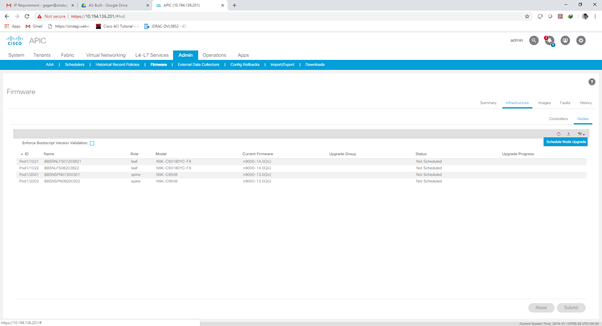
Step 3 :- Fill the required field.

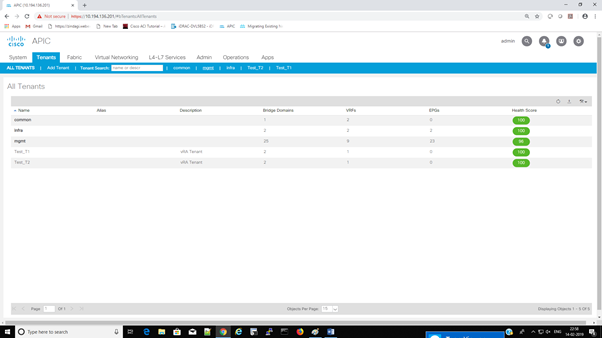
Configuring Cisco ACI – Creating Tenant
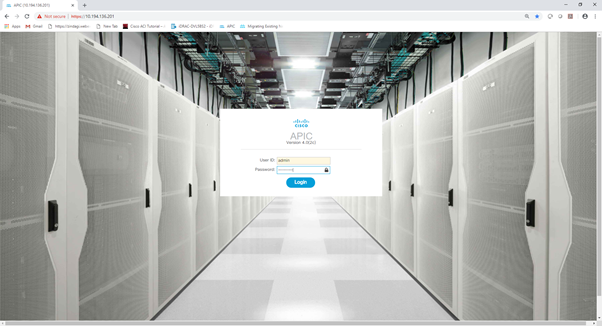
Step 1: Open ACI in browser and enter USERNAME and PASSWORD
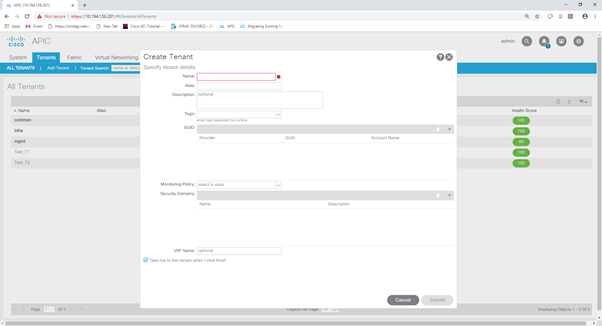
Step 2:- Go to Tenant tab

Step 3 :- Click on Add tenant tab

Step 4: Fill all the required field and click on Submit.
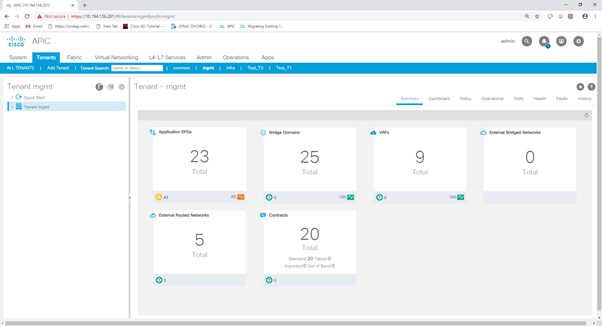
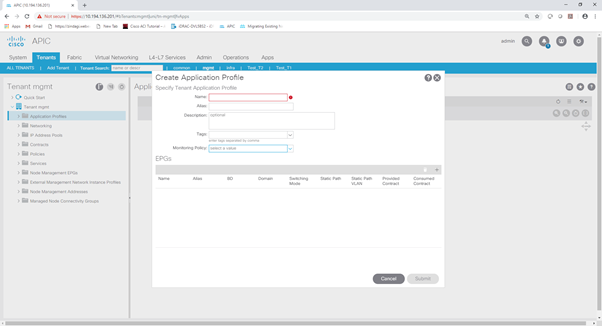
Configuring Cisco ACI – Create Application Profile
Step 1:- Go to tenant tab
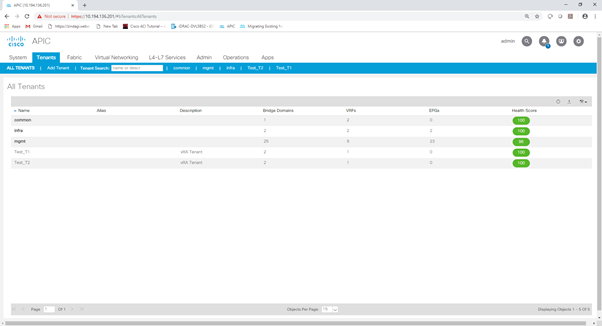
Step 2 : Click on created Tenant like: I have create common, mgmt, infa tenant
Step 3:- Click on Tenant (Mgmt) dropdown arrow.
Step 4: Right Click on application Profile.
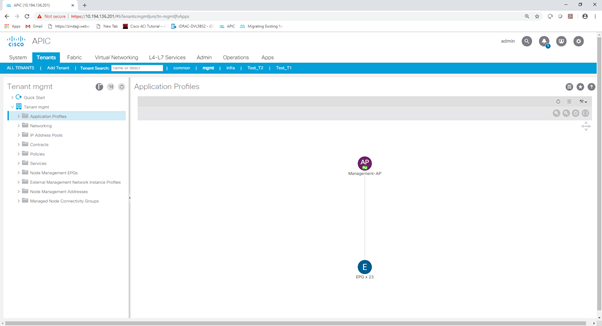
Step 5 :- Create application Profile
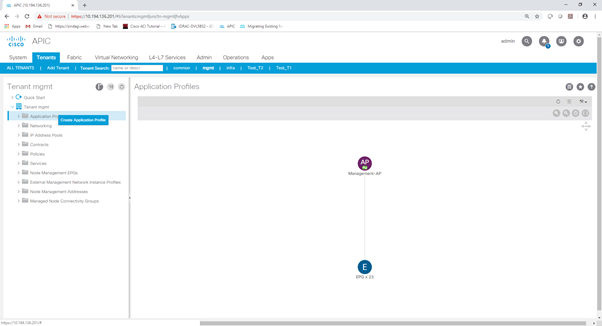
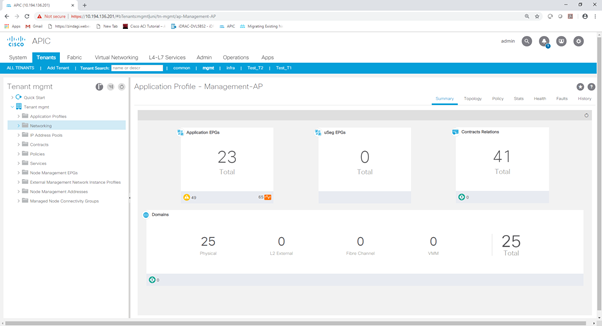
Step 6:- Fill all the required field and then click submit.
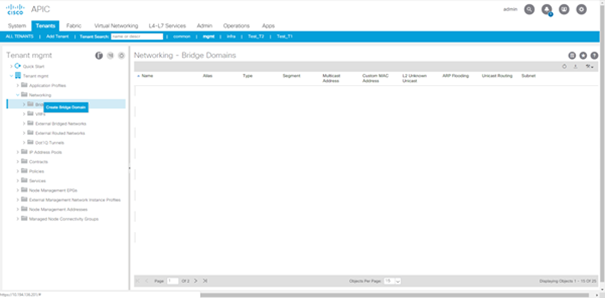
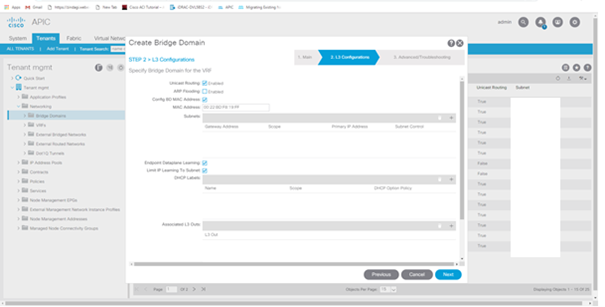
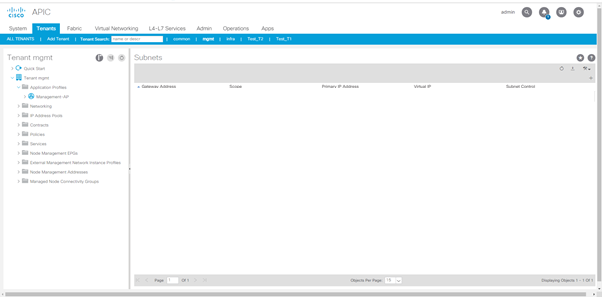
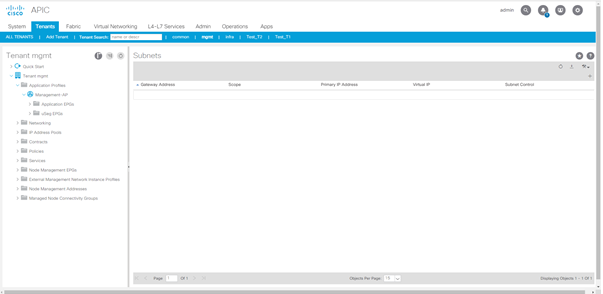
Configuring Cisco ACI – Create Bridge Domain
Step 1 :- Go to the Tenant tab > Tenant dropdown in left side navigation > Networking.
Step 2: Click on networking dropdown

Step 3: Right click on Bridge Domain and create bridge domain.
Step 4: Enter the Name of the BD and VRF in Step1 > Main and click next
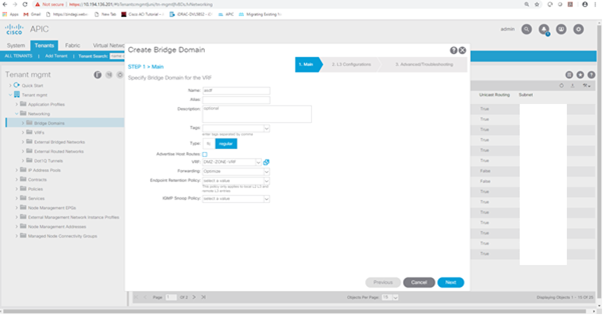
Step 5: In Step >2 L3 Configuration click on add subnet button and add subnet
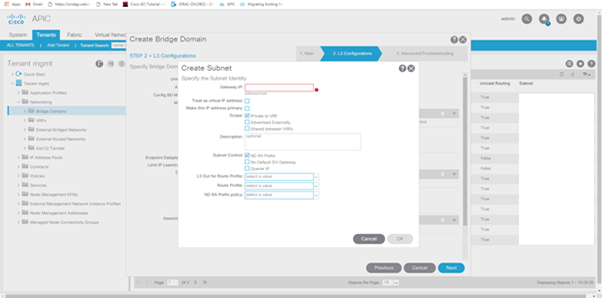
Step 6:- In Create Subnet will define the gateway and scope of the network and click OK and then click on Next.
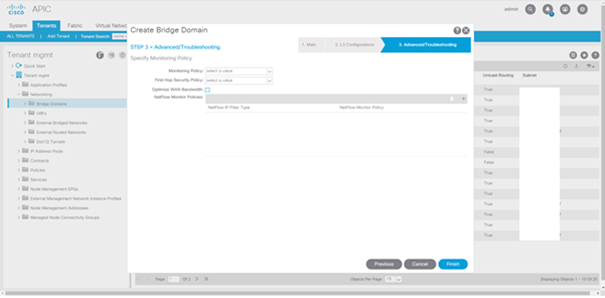
Step 7 :- In Step > 3 Advanced/ Troubleshooting click on Finish.
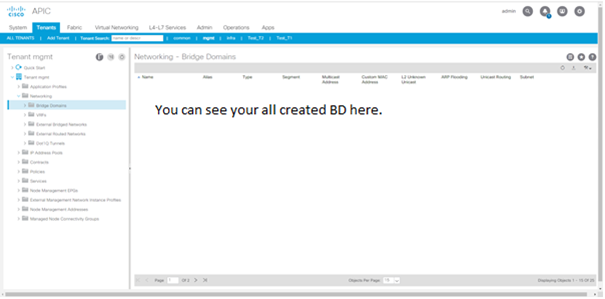
Step 8 :- You can see created BD on Right Side.
Configuring Cisco ACI – Creating EPG ( END POINT GROUP)
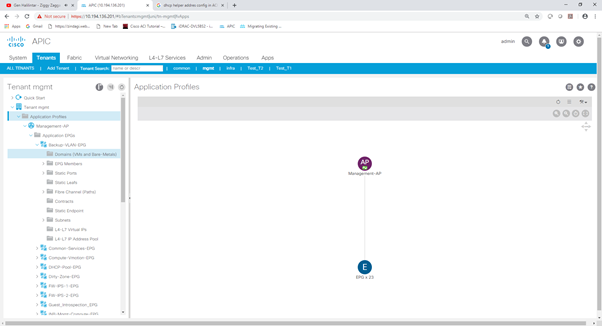
Step 1: Go to Tenant > Click on created tenant > click on tenant dropdown >click on Application Profile Dropdown you will see your configured application profile which you configured earlier.
Step 2 :- Click on created Application Profile dropdown navigator.
Step 3: – Right click on Application EPG
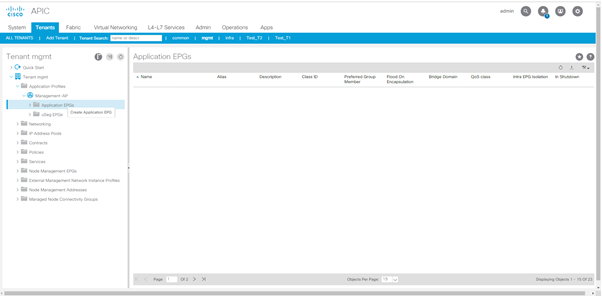
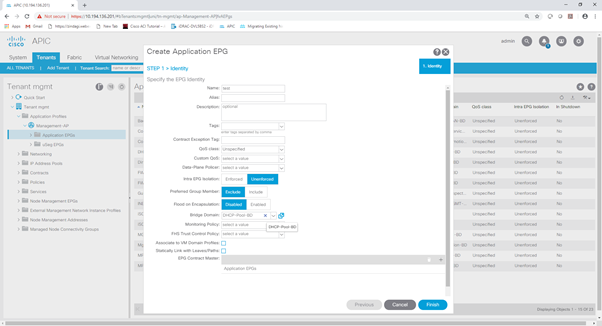
Step 4 :- Click on Create application EPG
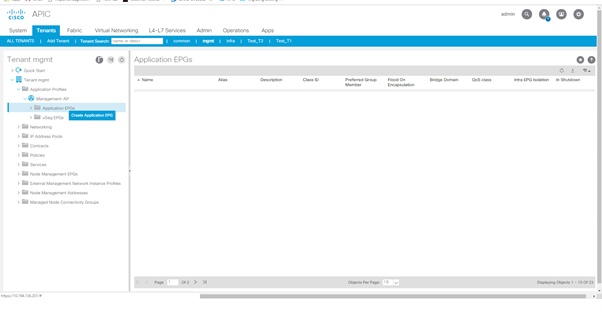
Step 5 :- In Step 1 > Identity enter the Name of EPG and enter the BD which you created earlier after that click on Finish tab.
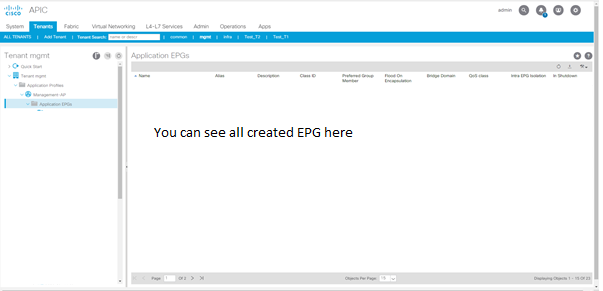
Step 6 :- you can see your created EPG on right side and you can click on Application EPG Navigator and you can see the list of created EPG’s in Navigation as well.
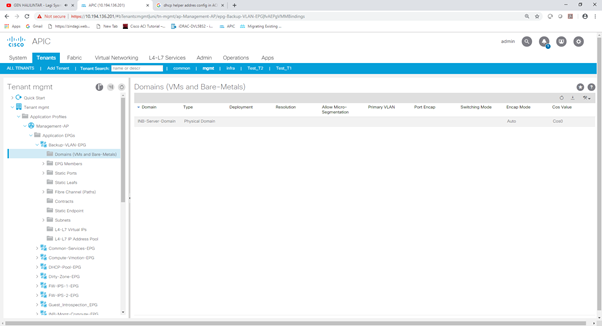
Configuring Cisco ACI – ADD Domain in EPG
Step 1 :- Click on created EPG navigator and go to Domains.
Step 2 :- Right Click on Domain and add Physical Domain Association.
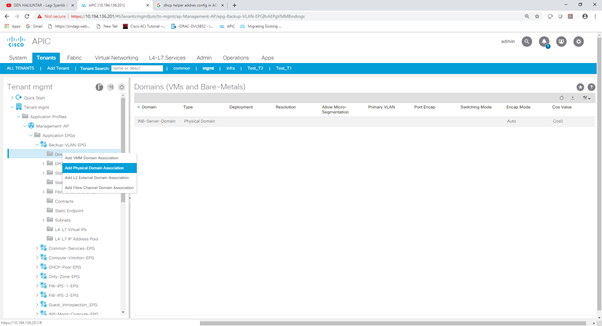
Step 3 :- Select Physical domain from dropdown which you configured earlier under Fabric > access policies > physical and external domain > Physical domain and click submit.
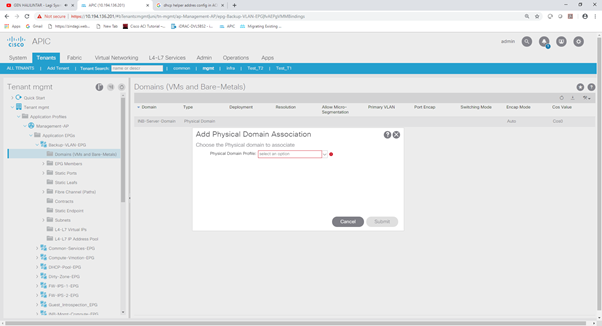
Step 4 :- You can see created domain in right side window.
Assign Static Ports IN EPG
Step 1 :- Click on EPG navigator and go to Static Port.
Step 2 :- Right Click on it and deploy static EPG on PC, VPC or Iinterface.
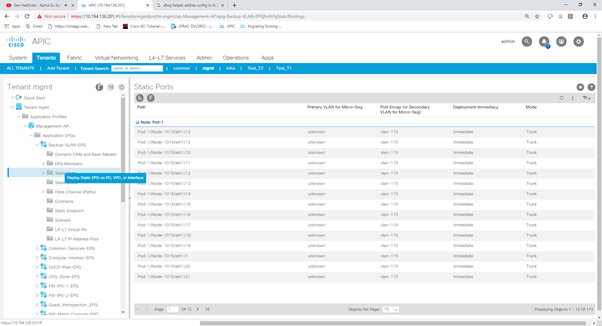
Step 3 :- Select Port Type, Node form Dropdown, Port form dropdown in path section, enter VLAN, Select deployment and interface Mode and click submit.
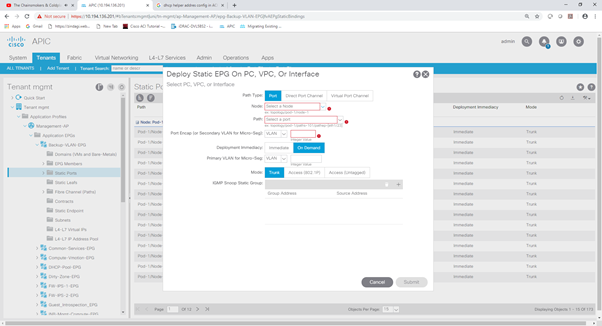
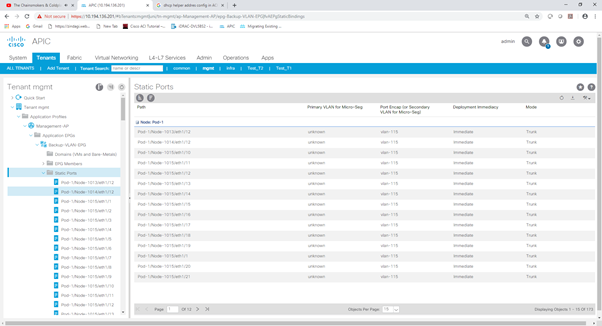
Step 4 :- you can see your created static port on right side window and you can click on Static port Navigator and you can see the list of configured ports in Navigation as well.
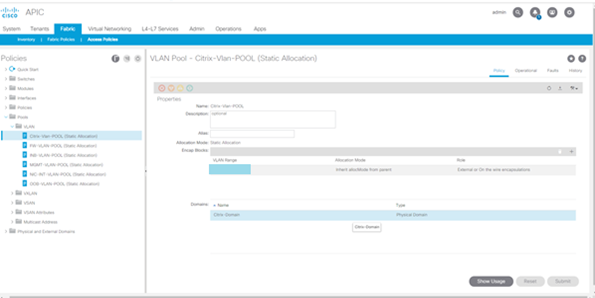
Creating VLAN Pool
Step 1:- Go to Fabric tab
Step 2:- Click on Access Policies
Step 3:- Go to Pool and click on navigator
Step 4 :- Go to VLAN and right click on it
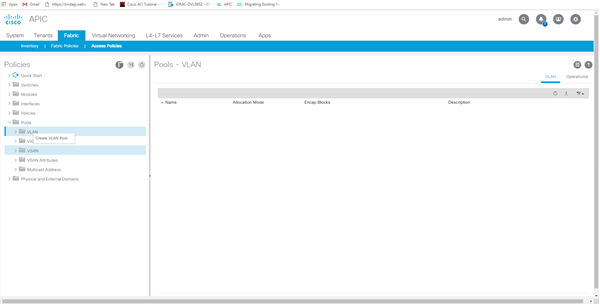
Step 5:- Click on Create VLAN Pool

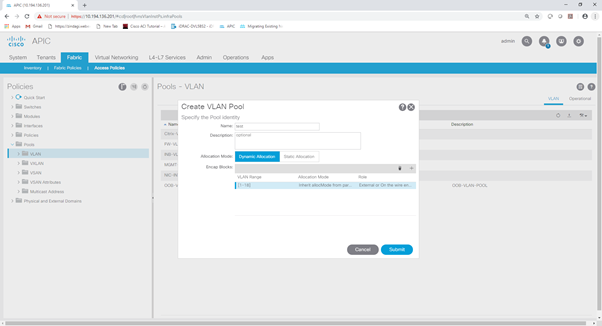
Step 6:- Enter Name of the pool and define the Allocation Type
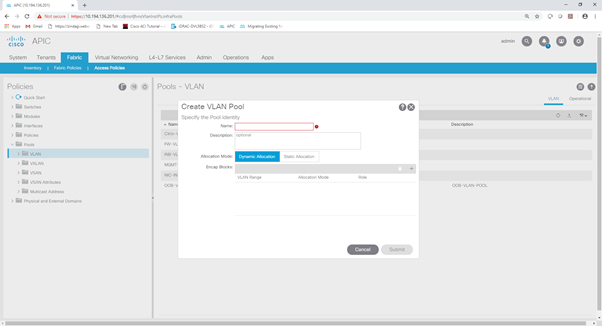
Step 7 :- Go to Encap Block and click on + button and define the VLAN Range

Step 8 :- Click on Submit button
Step 9 :- You can see created VLAN pool on right side and you can click on VLAN Navigator to see the individual Created Vlan Pool.
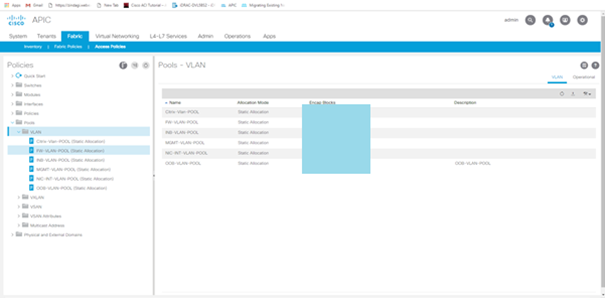
Step 10 :- Click on Created VLAN Pool in Navigator menu and you will see the VLAN Pool.
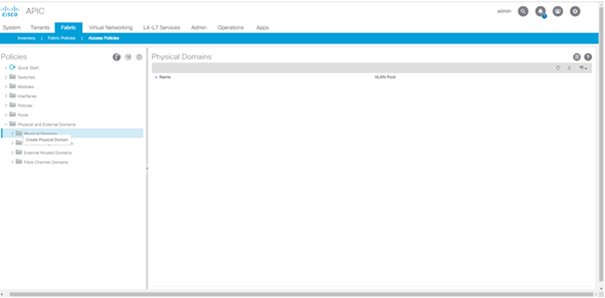
Creating Physical Domain
Step 1 :- Go to Fabric Tab > Access Policy > Physical and External Domain
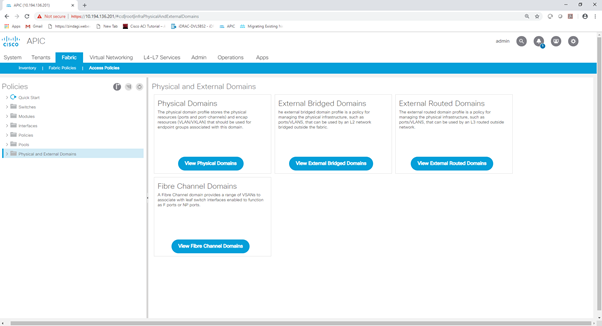
Step 2:- Click on the Navigator.
Step 3 :- Go to Physical Domain and right click on it.
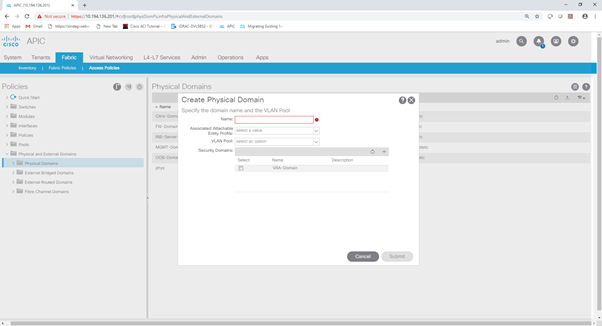
Step 4 :- Click on Create Physical Domain to create a physical domain.

Step 5 :- Enter Name and Vlan Pool which you Created earlier and click on submit.
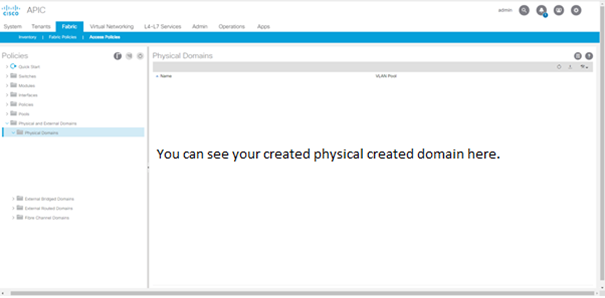
Step 6 :- You can see the created Physical domain in right side window and you can click on physical domain navigator and you can see the created physical domain in left side navigator as well.
Summary
In this section on configuring Cisco ACI, we brought up the physical domain and created basic logical constructs such as VLANs, tenants, bridge domains, etc. Stay tuned for part 2 of 2, where we’ll go deeper and create policies (global, Attachable Access Entity profiles, interface policies, link level policies, CDP interface policies, etc). We’ll also look at VPC config, and leaf switch policies and profiles, and other constructs required when configuring Cisco ACI.
Are you looking for advisory, consulting and professional services that will help you meet your Information Technology goals? Zindagi can help!
Zindagi Technologies is an IT consultancy and professional services organization based out of New Delhi, India. We’re experts in large scale data centre design and deployment, service provider network design, information security, blockchain, IoT, Smart Cities, and Private/Public/Hybrid cloud solutions. Each one of us has years of experience in large scale network design, deployment and automation. Our “customer first” motto drives us forward, and we believe in providing quality services to our clients always.
Contact us now, to know how Zindagi can help solve your IT / Information Security related problems. We’re also available on email and phone (India business hours).
Author
Hi, This is Gagan. I have had the opportunity of configuring Cisco ACI apart from many other complex technologies when working with the team at Zindagi Technologies. I believe that when one teaches, two learn. Which is why i love sharing my knowledge. Hope you enjoyed this. Keep an eye out for part 2!

Consulting Engineer
Zindagi Technologies LLP