How To Deploy Cisco Video Surveillance Solution on Cisco S3260
Cisco Video Surveillance Solution is a part of Cisco’s Connected Safety and Security solution portfolio. Cisco Video Surveillance solution is a smart surveillance solution from Cisco which can easily integrate with IP cameras, encoders, sensors, etc. from multiple leading OEMs. It also offers to apply analytical assessment of video feeds sent by cameras and then produces alerts corresponding to the type of event that occurs.
In this blog, we will cover the steps to deploy the Cisco Video Surveillance Manager solution on the Cisco S3260 server. There are two components in the Cisco VSM solution, namely:
- Cisco Video Surveillance Media Server
- Cisco Video Surveillance Operations Manager
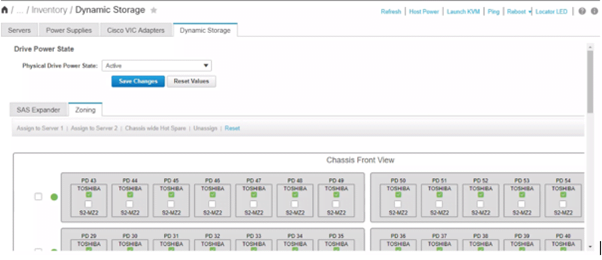
There are a total of 56 drives that are top-loaded on S3260. Distribute these drives equally between the two server nodes on S3260 using the dynamic zoning feature. Each S3260 has a dual node RAID controller which contains 2 mezzanine cards.
The best practices recommend physical drives to be distributed in a group of RAID 6 and RAID 1. RAID 6 will be used to store media server data and RAID 1 will be used for ESXi of the server node.
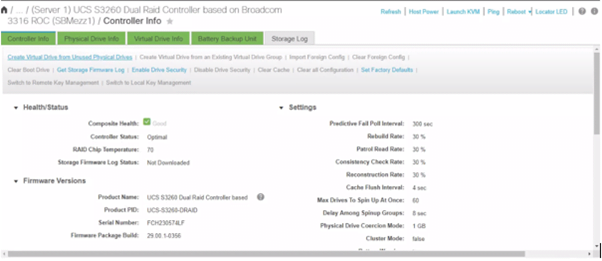
Next, you need to create virtual drives on the S3260 server node. You need to create a total of 3 virtual drives:
- Virtual Drive 1 – For installing the Media Server OVA
- Virtual Drive 2 – For installing the ESXi OS
- Virtual Drive 3 – For storing the Camera streams
The virtual drive for the media server shall be 200GB. To download the latest version of OVA click here Cisco Media Server OVA. Create a new virtual drive from an existing virtual drive to store the media server recordings. Last, you need to select the rear-mounted SSD in the virtual drive creation wizard to create the virtual drive for ESXi. After creating the virtual drive for ESXi, you need to select that virtual drive and set it as the boot drive.
After the virtual drives are created, navigate to the CIMC of the S3260 and open the virtual console or vKVM of the server node on which you have mapped the ESXi virtual drive. Install the ESXi on the S3260 server node by mounting the ISO on the vKVM. Boot the server node from the virtually mounted ISO.
Once ESXi is installed on the S3260 server nodes, navigate to the ESXi IP and add those virtual drives as a data store on ESXi.
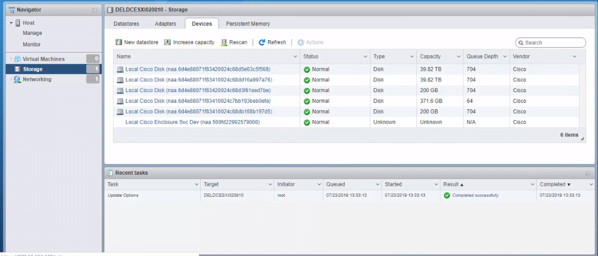
Navigate to storage > devices > new data store to create a new data store. The virtual drive created on CIMC will be listed as an available drive.
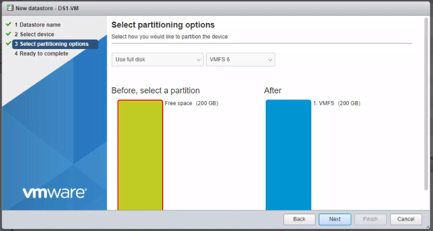
Ensure to select use full disk on the new datastore wizard. Repeat the same process for all the data stores you wish to provision.
After datastores are provisioned on the ESXi, you need to deploy the Cisco VSM OVA file. You need to select the option “Deploy a virtual machine from an OVF or OVA file”. Drag and drop the OVA file to the virtual machine creation wizard and follow the guided setup. Edit the setting of the virtual machine and increase the memory of the virtual machine to 16GB. Afterward, add a new hard disk to the virtual machine and select the datastore which you had added on the ESXi. This new hard disk will be used to store the video recordings and event recordings.
Open the console of the virtual machine, following the default credentials of the VSM:
- Username – Secur4u
- Password – Secur4u
Once you enter the default username and password, you will be prompted to enter a new password.
Setup the networking configuration like IP address, gateway, netmask, DNS IP, etc on the virtual machine. Use the following command to enter the network configuration setup on your machine:
System-config-network
Now we need to mount the drive on the VSM machine. Use the following commands to stop the cisco services and then configure RAID on the virtual drive and mount them on
Service cisco stop
Chmod +x /usr/BWhttpd/bin/setup_media_storage
Cd /usr/BWhttpd/bin
./setup_media_storage
At the setup enter the number of drives and the RAID you want to configure and verify that the drive is visible under the list of available drives by running the following command:
Df -h
Now start the Cisco services by running the following command:
Service cisco start
Access the Cisco VSM by entering the IP address you have just assigned to the VM. For the first time when you login to the CDAF page, you will be asked to configure the role on the machine, select the role which can be a Media Server, Operations Manager, Map-Server, etc.
To sum it up, these are the high-level deployment steps of the Cisco Video Surveillance Manager solution. If you’re looking for Planning, Designing, Implementation, or PoC professional services to build a resilient video surveillance solution that suits your organization’s requirements, reach us at [email protected] or give us a call at +91-9773973971.
Author
Sumit Yadav
Data Center Consulting Engineer