How to Install and Configure Openldap server on CentOS / RHEL Linux
In the previous blog, we explained the configuration process of DNS Server in Linux OS, and in this blog we will explain the configuration and installation of Openldap server on CentOS. LDAP stands for Lightweight Directory Access Protocol, is a protocol for managing related information from a centralized location through the use of a file and directory hierarchy. It functions in a similar way to a relational database in certain ways and can be used to organize and store any kind of information. A directory service is a shared information infrastructure for accessing, managing, organizing, and updating everyday items and network resources, such as users, groups, devices, emails addresses, telephone numbers, volumes, and many other objects.
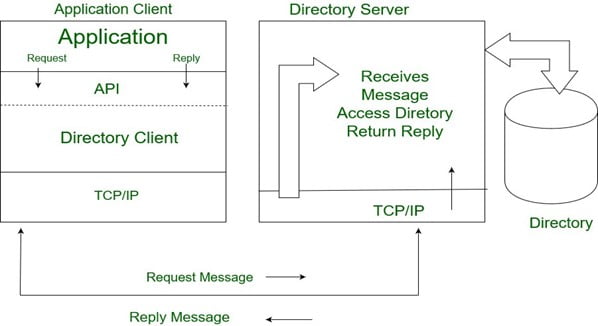
The following is an illustration of how information is arranged in the LDAP directory.
In this blog, we will show how to uninstall and configure OpenLdap server for centralized authentication in centos 7 and rhel.
Step1: Install OpenLdap server.
- First, install openldap server packages and some ldap management utilities using the following commands.
# yum -y install openldap* migrationtools
- Now start and enable ldap services by using the following commands.
# systemctl start slapd
# systemctl enable slapd
# systemctl status slapd
- Next, add ldap service into firewall policy as shown below:
# firewall-cmd – -add-service=ldap
Step 2: Configure OpenLdap server.
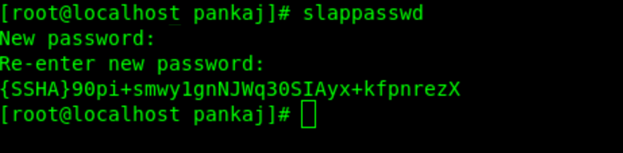
- Create a Ldap root password for administration purposes. In the below command, a hashed value is created for the given password, take a note of it, as this value is used in ldap configuration file.
# slappasswd
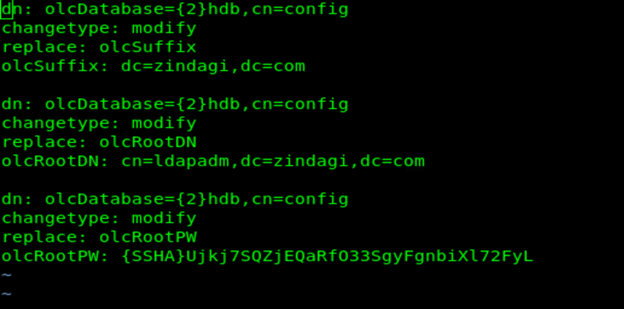
- Then create a db.ldif file. In this file you set the database suffix, root distinguish name, and ldap admin password for the above RootDN.
# vim db.ldif
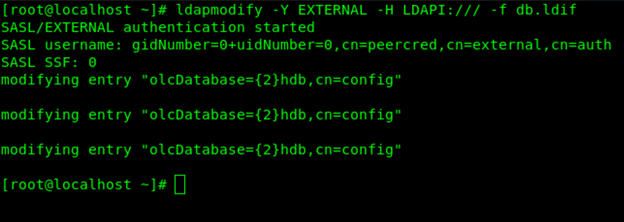
Once you are done with the ldif file, send the configuration to the ldap server.
- Now create monitor.ldif file. Make a change to the file to restrict the monitor access only to ldap root (ldapadm) users, not to others.
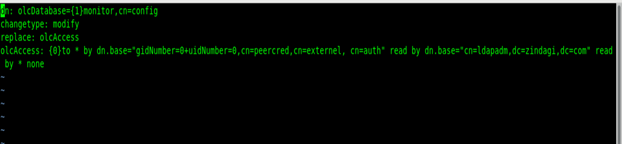
Once you have updated the file, send the configuration to the LDAP server. Use this command
# ldapmodify –Y EXTERNAL –H ldapi:/// -f monitor.ldif
STEP 3: Set up OpenLdap database.
Copy the sample database configuration file to /var/lib/ldap and update the file permissions.
# cp /usr/share/openldap-server/DB_CONFIG.example /var/lib/ldap/DB_CONFIG
# chown ldap:ldap /var/lib/ldap/*
- Now create the base.ldif fle for you domain.
# vim base.ldif
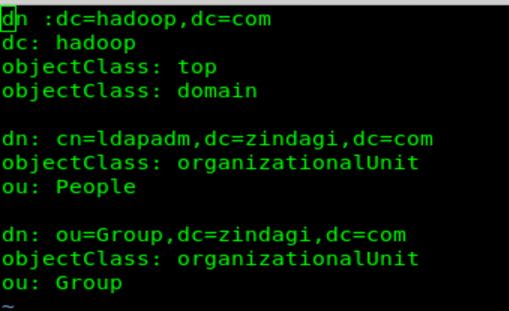
Once you have updated the file, send the configuration to the LDAP server.
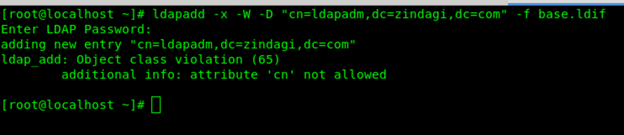
# ldapmodify -Y EXTERNAL -H ldapi:/// -f base.ldif
- We will deploy these configuration changes to the openldap server using the ldapm user:

Enter the root password when prompted.
- Test the configuration.to test the configuration, search for the user “ldapadm” in ldap as below.
# ldapsearch –D cn=”ldapadm,dc=zindagi,dc=com” -W -b “dc=zindagi,dc=com” objectclass=*
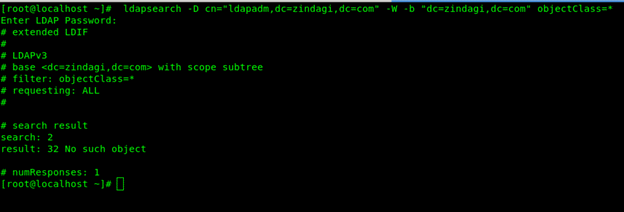
It prints all the user information.
That’s it you should now have the successfully installed ldap on centos 7
Zindagi Technologies provides all the solutions based on your requirement and on your need. If you want to know more about LDAP server and its uses, read out our blog. For more detail, we are available for you, give us a call on +91-9773973971 or reach us at Zindagi Technologies.
Author
Pankaj Bakshi
Associate Consultant