How To Set Up An NFS Server On Linux Host And The Client Machine.
What is a Linux NFS server?
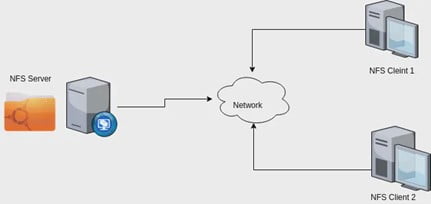
Network File Sharing (NFS) is a protocol that allows you to share directories and files with other Linux clients over a network. Shared directories are typically created on a file server, running the NFS server component. Users add files to them, which are then shared with other users who have access to the folder.
An NFS file share is mounted on a client machine, making it available just like folders the user has created locally. NFS is particularly useful when disk space is limited, and you need to exchange public data between client computers.

Installing NFS Server and NFS Client
Environment
In the first step, we assign Ip addresses on both the NFS server and the NFS client machine.
NFS server
Ip address : 192.168.1.10
NFS client
Ip address : 192.168.1.20
Setting up the NFS server
We need to install the NFS package on our NFS server as well as on the NFS client machine. We use the “yum” package installer. We use the same package of nfs-utils for server and client machines.
# yum install nfs-utils
After installing the NFS server package, ensure that the NFS service is running and will start automatically on subsequent machine boots.
#systemctl start nfs-server
# systemctl enable –now nfs-server
Now add nfs service to the firewall rules by firewall add command which is shown below:
# firewall-cmd –permanent –add-serice=nfs
Create a new directory named “nfsshare” in “/” partition to share with the client’s server, you call also share an already existing directory with nfs.
# mkdir /nfsshare
Next, we will edit the /etc/exportsconfiguration file. Here, you can configure which directory you are sharing and who can access them. You can also set specific permission for the shares for further limited access.
# vim /etc/exports
/nfsshare 192.168.0.10(rw,sync,no_root_squash)
In the above example, there is a directory in / partition named “nfsshare” is being shared with client IP “192.168.0.10” with read and write (rw) privilege, you can also use hostname of the client in the place of IP in the above example.
There are other options we can use in “/etc/exports” file for file sharing is as follows.
ro:This specifies that the directory may only be mounted as read only- rw: This option allows the client server to both read and write access within the shared directory.
sync: This just ensures that the host keeps any changes uploaded to the shared directory in sync.
async: Ignores synchronization checks in favor of increased speed.
- no_root_squash: This phrase allows root to connect to the designated directory.
subtree_check: This specifies that, in the case of a directory is exported instead of an entire filesystem, the host should verify the location of files and directories on the host filesystem.
no_subtree_check: Specifies that the host should not check the location of the files being accessed within the host filesystem.
Setting up the NFS client
Now we need to do is install the NFS packages on our system. Use the command below to install it with your system’s package manager.
# yum install nfs-utils
With the package installed, you’ll be able to mount the NFS share. Run the mount command as root privileges to mount the networked share. We are specifying the IP of the NFS server in this command, which happens to be 192.168.1.10.
# mount –t nfs 192.168.1.10:/nfsshare/mnt/nfsone
The above command will mount that shared directory in “/mnt/nfsshare” on the client server. You can verify it following the command.
# mount | grep nfs
The above mount command mounted the nfs shared directory on to nfs client temporarily, to mount an NFS directory permanently on your system, we need to make an entry in “/etc/fstab“.
# vi /etc/ fstab
Now add the new line as shown below.
192.168.1.10:/nfsshare/mntnfs defaults 0 0
To execute the fstab you just edited, run the following mount command.
# mount –a
Nfs server is now ready to start serving the file, on a client machine. We have shown you how to set up an NFS server and how to mount the remote file systems on the client machines.
Zindagi Technologies is an IT consultancy and professional services organization based out of New Delhi, India. We have expertise in planning, designing, and deployment of collaboration environments, large-scale data center solutions. If you want to know more about NFS server and its uses, read out our blog. For more detail, we are available for you, give us a call on +919773973971 or reach us at Zindagi Technologies.
Author
Pankaj Bakshi
Associate Consultant
