Improve our Monitoring systems with Cisco Prime Infrastructure Part-2
As we understand in the Part-1 blog “Improve our Monitoring systems with Cisco Prime Infrastructure Part-1” the importance of monitoring tools in network and basic installation process of Cisco Prime Infrastructure. Configuration, Maps, Services, Reports, Administration, Steps of taking backups, Steps to adding the devices, Licenses, set and create the reports, these all steps will cover in this Part-2 blog series.
Overview of Cisco Prime Infrastructure
Below mentioned all points: –
– Dashboard
– Monitor
– Configuration
– Inventory
– Maps
– Services
– Reports
– Administration
Dashboard
Dashboard of Cisco Prime Infra will provide the monitoring page which can customize by the admin and monitor clients’ count and overview of Devices ICMP, SNMP, Alarm, utilization, etc.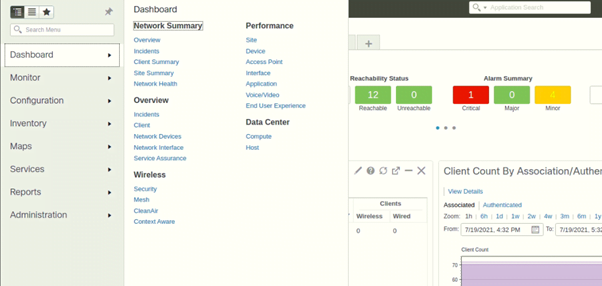
In this section, we will find the Overview for Network, Incidents, Clients information, Network devices, Wireless devices information like Access Points and WLCs (Wireless LAN Controllers). We can also find the performance of Devices, Applications, Sites, etc. We can see the customize view in the past logs for all mentioned points.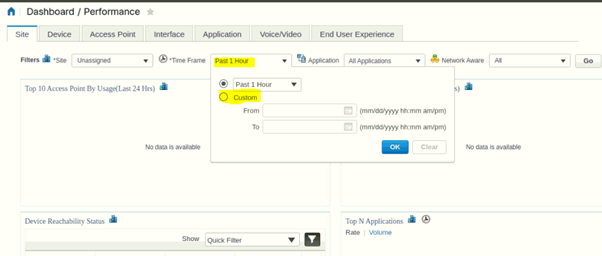
Monitor
In this tab, we will get to know the monitoring-related tabs. Monitoring policies, Alarm Notification or events, Clients and Users, Performance Graphs, etc as mentioned in Snapshot, we can modify as per the requirements.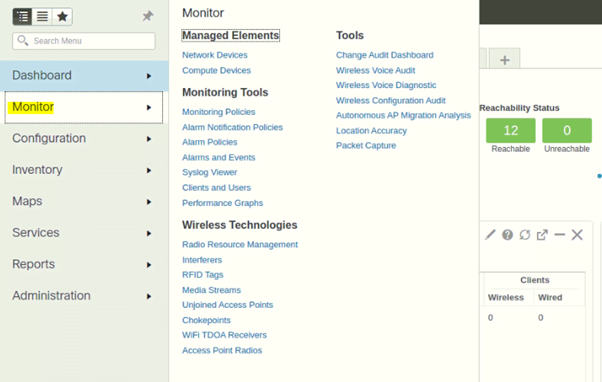
Network Devices add and Modify
Below mention snapshot shows yellow highlighted + to add the new devices.
Performance Graph
In this section, we can modify the Performance Graphs in customize view.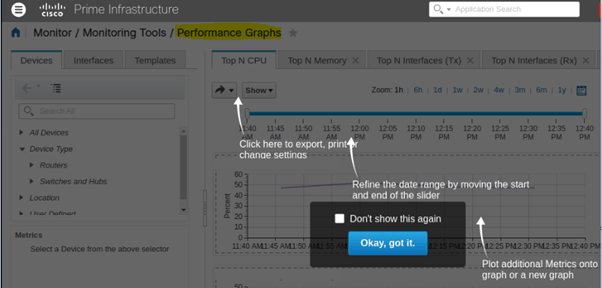
Configuration
In this tab, we can do configuration-related things. Network device addition or any modification related to policy password change, device location change, in Wireless Technologies many types of configurations can be done as below mentioned SS.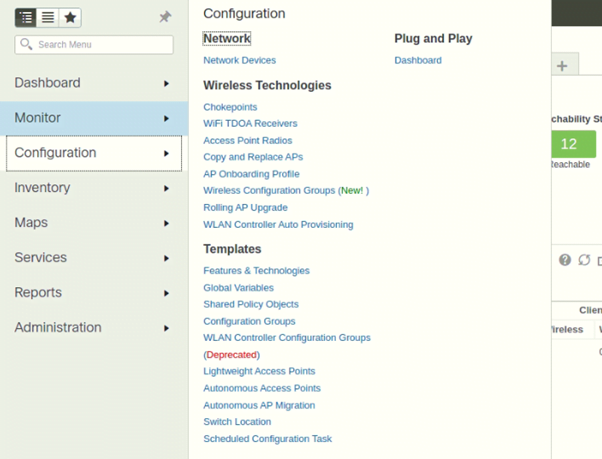
Wireless Technologies APs (Access Points) replace, and modification can be done (Submit) in bulk or single copy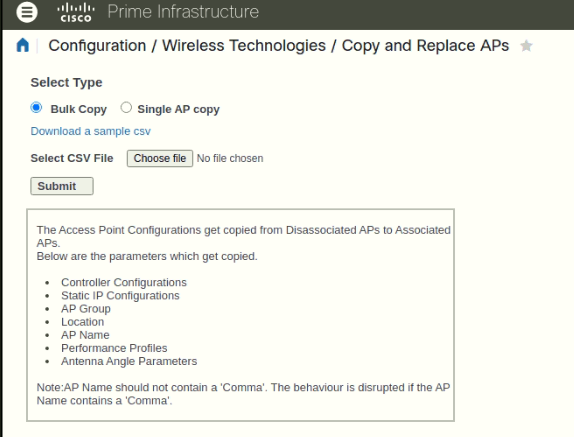
Also, in this tab, we can create the new Template for Controller WLAN (Wireless LAN), Security, WAN Optimization, CLI (Command Line Interface) Templates, Feature Templates, Composite Templates, My Tags, My Templates, etc as below mentioned image.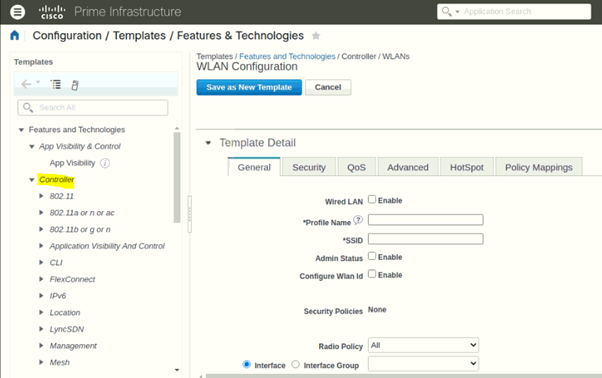
Plug and Play Dashboard
From this dashboard, we can perform devices Plug and Play, displayed in the below snapshot at the first time when we use it has required to add APIC-EM controller. For more configuration details model-wise we can find the steps here.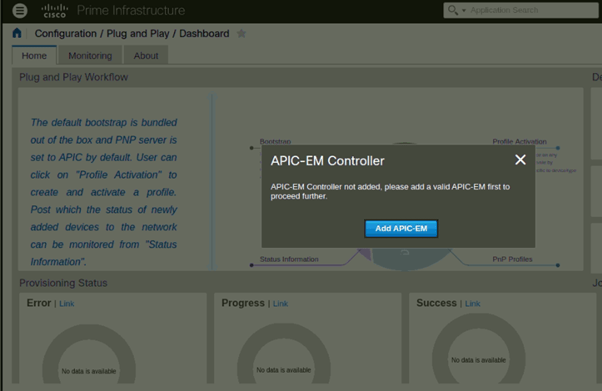
Inventory
In this section, we can see the list of devices that are added to Prime Infrastructure. From this tab, we can find the Devices Software Image, credential Profiles, Discovery, Compute devices, and Created groups like Network devices group, compute devices Groups, and Ports Groups.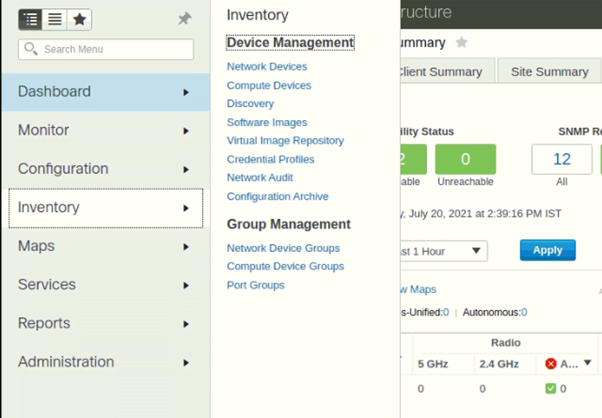
If we need to add devices in Cisco Prime Infrastructure below mentioned prerequisites required-
General Tab
– IP address
– License Level
– Device Role
– Groups
SNMP Tab
– Version
– SNMP Retries
– SNMP Timeout
– SNMP Port
– Read Community
– Confirm Read Community
– Write Community
– Confirm Write Community
Telnet/SSH
– Protocol (Telnet/SSH)
– CLI Port
– Timeout
– Username
– Password
– Confirm Password
– Enable Password
– Confirm Enable Password
HTTP/HTTPS
– Protocol
– TCP Port (80)
Civic Location
– Region
– Country
– State
– City
– County
– Street
– Building
– Floor
– Room 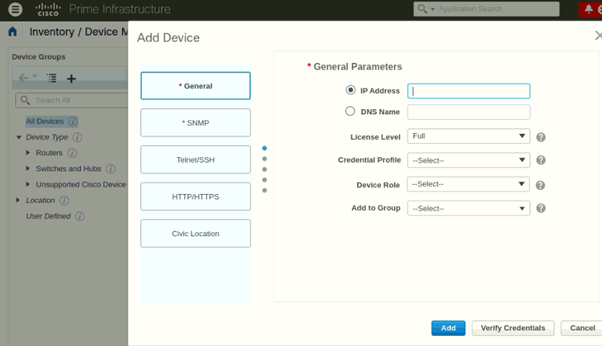
Maps
In this section, we will find the Network topology and Datacentre Topology, meanwhile, we can also check the Wireless Maps.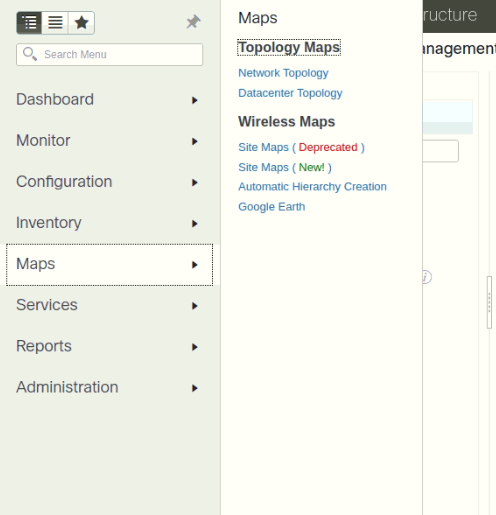
Network Topology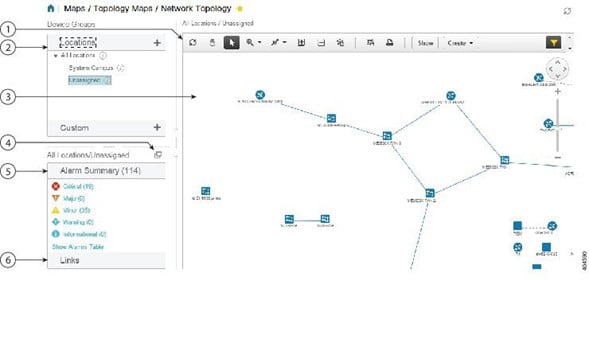
Services
Cisco TrustSec technology provides software-defined segmentation to simplify the provisioning of network access, accelerate security operations and consistently enforce policy anywhere in the network.
In this section, we can use the Network Services, Mobility Services, Mobility Domains, Wireless security, Application Visibility, and Control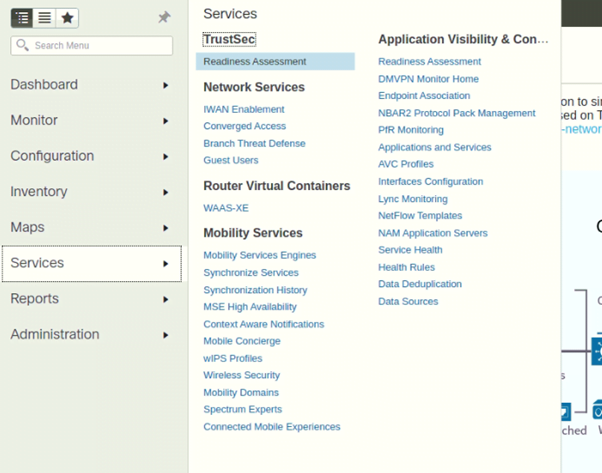
Mobility Services/Wireless Security This wizard will allow you to configure Rogue Policy, Rogue Rule, and wIPS Profile.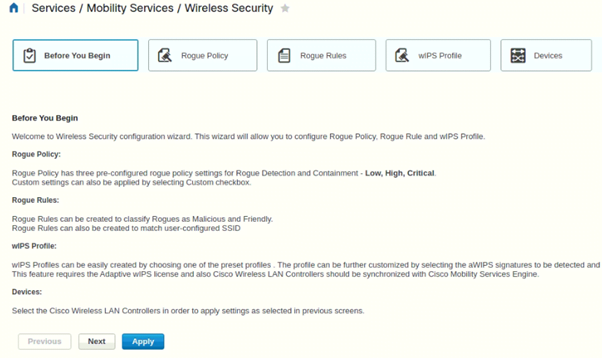
For more configuration details model-wise we can find steps here.
Reports
In this section, we can generate reports in the recommended format.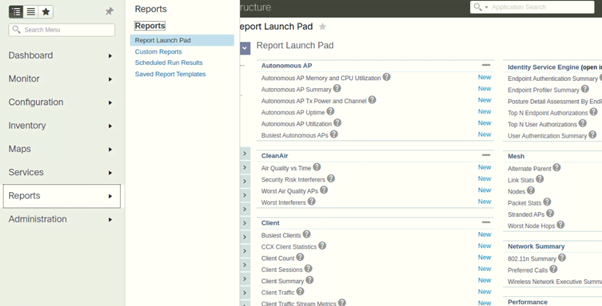
From the Report Launch Pad, we can create a new report in the below-mentioned format.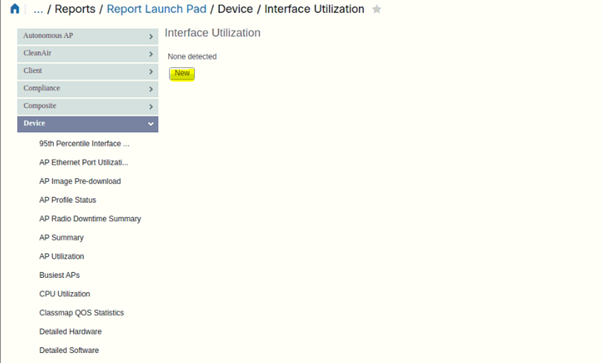
We need to file the below-mentioned information to fetch the utilization reports like Report title, Report Type, Reported by (Interface by Groups), Criteria, Units, Reporting Period, etc and we can schedule a report to generate time and Export in CSV format.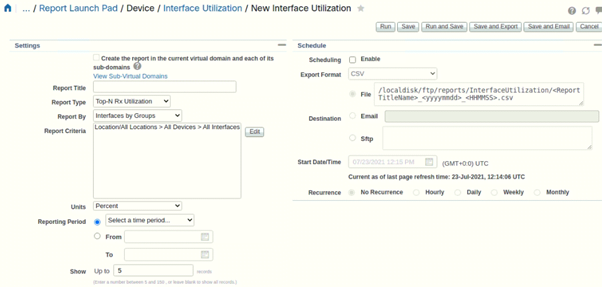
From the Custom Reports tab, we can generate the report to file the below-mentioned information.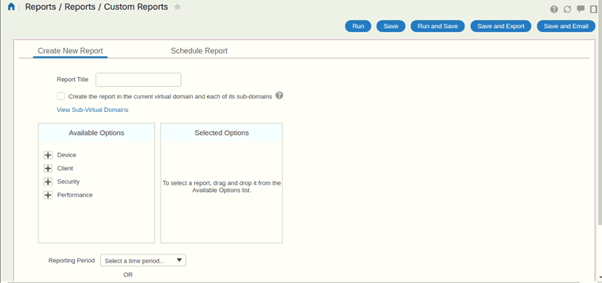
Administration
In this section, we can do all administration work like Licensing, System Monitoring configuration, System Settings, High Availability, Logging, Users, Role & AAA, Servers (TFTP, FTP, etc), Smart Software Licensing, and Software Update.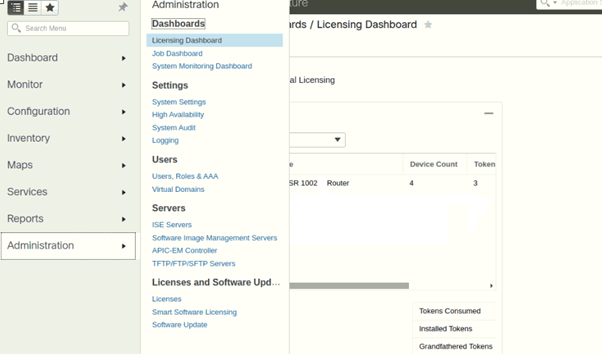
High Availability
To enable HA (High Availability), you must register HA on the primary server. The primary server needs no configuration during installation in order to participate in the HA configuration. The primary needs to have only the following information:
– The IP address or the host name of the secondary HA server you have already installed and configured
– The authentication key you set during installation of the secondary server
– One or more email addresses, to which notification will be sent
– The failover type.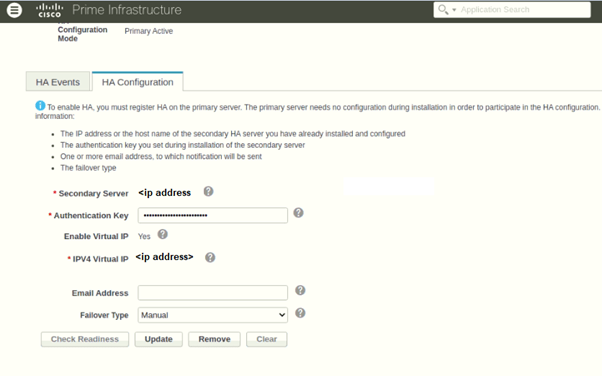
Administration/users/ Roles &AAA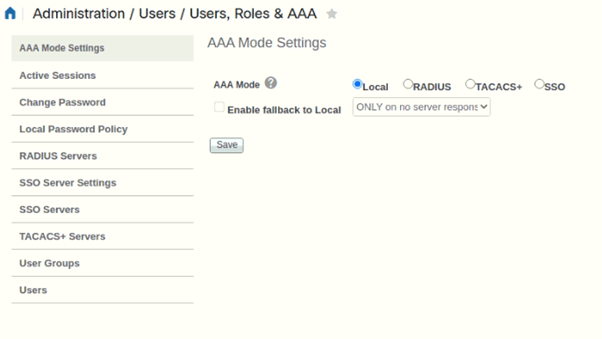
In this blog, we understood the complete features (configuration steps, adding devices and troubleshooting, Licensing, Report Generating, etc) of Cisco Prime infrastructure and cover most of the tab to see what information is required to configure the Cisco Prime infrastructure. It is a single pane of glass assessment; Cisco PI can provide for wired and wireless component monitoring with topology. If there is any requirement for a new implementation of any monitoring tool like SolarWinds, Cisco Prime Infrastructure, Nagios XI, Site24*7 for your organization then we are here to help. You can reach us through email or give us a call at +91 9773973971.
Author
Brijesh Yadav
Network Consultant Engineer
