Simple Steps To Manage File Server In Windows Server 2019 Using FSRM
File Server Resource Manager
FSRM is an important addition to a windows server. It is a file server resource manager is a feature that helps administrators classify and manage data stored in the File server. It is configurable with the file and storage service roles. FSRM’s capabilities make it easier to manage a file server. Within this administrator categories that our user is stored what type of data format in a disk, is that image file, is that .png format file or etc. The administrator set a limit on the disk. We can also define the limit of user storage.
In which two key features –
- File screen Management.
- Quota Management.
File Screening
File screening is a feature that helps you to control the type of Files that users can store on a file server. Administrators can limit the extensions that can be stored on your File server.
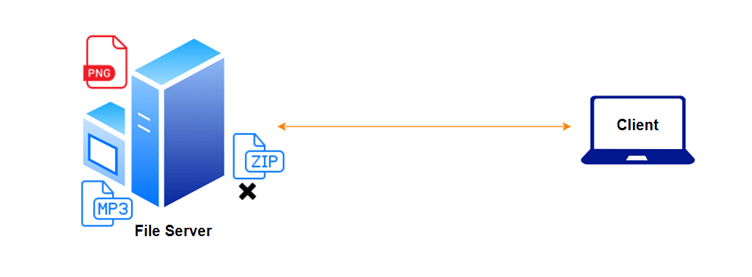
For example – if an administrator is creating a rule that any user cannot store a zip extension file in the File server. In these cases, users cannot save any zip extension file in a file server.
Quota Management
In the Quota option, you will provide a list of Quota Templates to help you assign a quota limit for storage. It means the Administrator can set a limit on storage, how much storage is shared with the user and any user how much user storge in the shared disk.
Open File Server Resource Manager > Expend Quota Management > click Quota Templates. Inside Quota templates, you set all limits.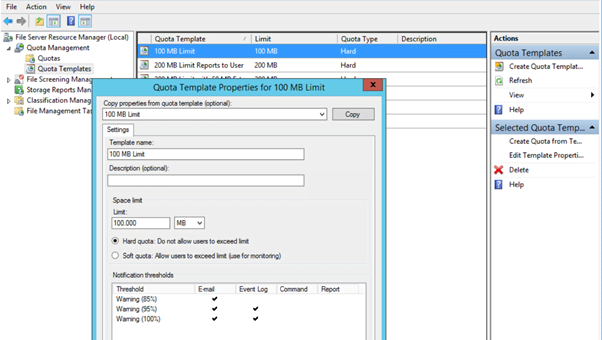
Infrastructure Requirement
DC server – ‘windows server 2019’
Domain name – deepak.com
IP – 192.168.10.1
Step 1st – “Install FSRM Roles”
First, we need to install the FSRM role in the windows server.
Click on Add Roles and Features > Expand File Storage Services > Expand File iSCSI Services and inside select File Service Resource Manage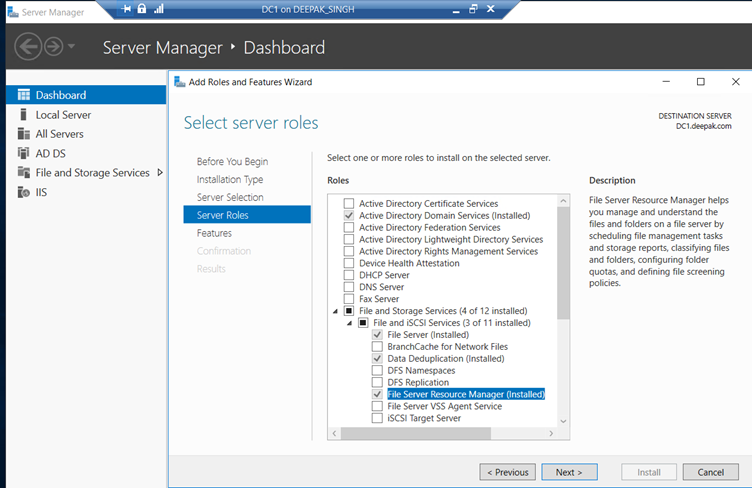
After selecting this option press next and install.
Step 2nd – “Open File Server Resource Manager”
Go to Tools and select the File Server Resource Manager option.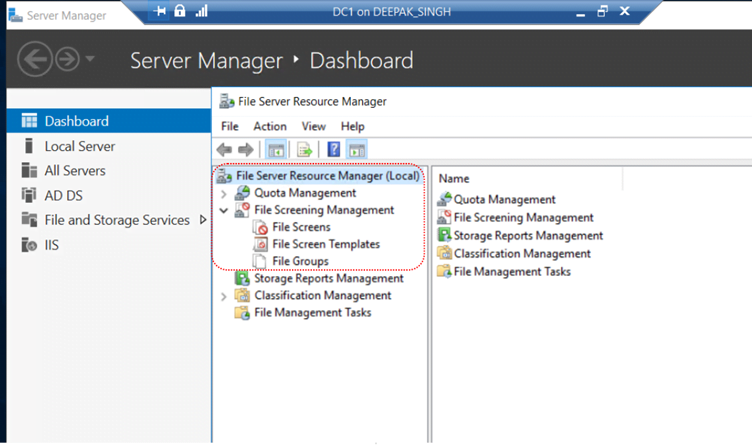
Here are all options related to FSRM services. You can check all options one by one inside this all-thing is stored by default. Here we cannot explain all options.
If you create your own template inside File screen Template, easily you create it. Simply click on File
Screen Template and click on Create new template
1st you click File Screen Template > 2nd click Create File Screen Template, after that open a wizard for creating template.
Give the Template name – abctemplate
Active screening – if we select this option then the user cannot create or save unauthorized files.
Passive screening – if we select the passive option, it means the user creates or saves the unauthorized file, but the admin will know as soon as it is creating or save the file.
File groups –
Select file groups to block:
In this section, we select those files which we must block for the user. If we select the image file box it means the user cannot create any image file in the shared disk.
The second option – “Email message”
In which we define that is in the first option we select passive screening then we create an alert from email. When any user creates or saves any unauthorized file then automatically send a mail to Admin or use both.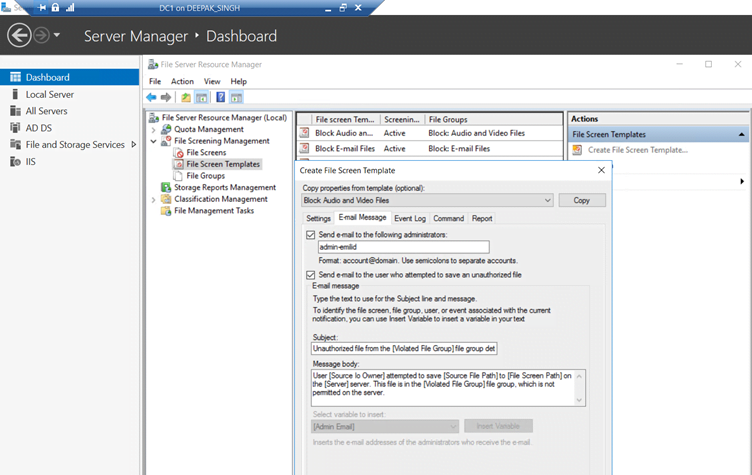
You give admin email id in the first box and if you want a message send to the user also then select the second check box. In this message body, you type your own message, or you select the default message.
Now if you configure all things then click ok and close it.
Step 3rd – “Share folder in C drive”.
Go to your C drive and create a folder and share it. When you have done this task now come on again FSRM wizard and click on File screens.
In our case, we create a Data folder in our C Drive and shared it.
Now in FSRM wizard select the File screens option and on the right side click create file screens. When you click the open a new wizard. Here you browse your shared folder path and select in drop-down menu Block Image file option and click create.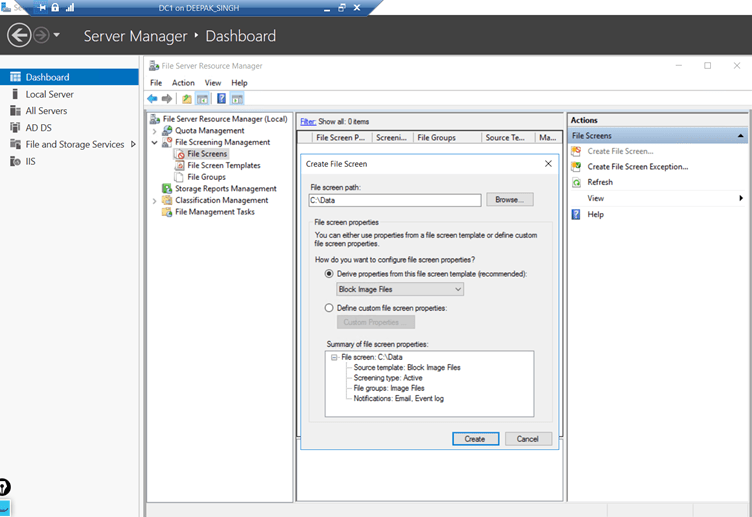
Now we create File screens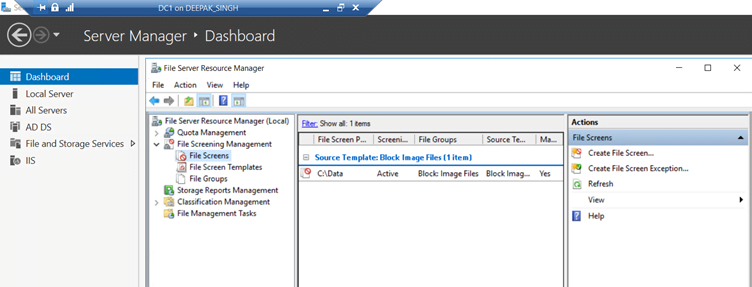
Verify that –
You go to your Drive in the Data folder you try to create an image file. You get an error you have no permission to create an image file.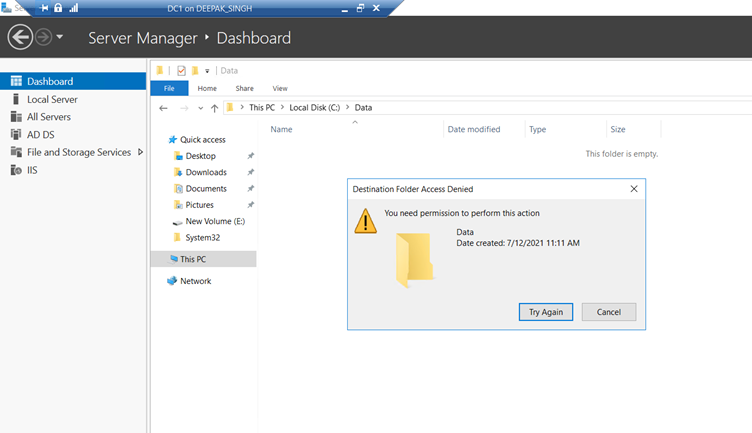
Using this method administrator can apply this rule and save Unwanted storage in the server.
Zindagi Technologies has been helping businesses in becoming something big by the services given by us like data center planning and implementation, Iot smart buildings, IT consulting, and managed IT services. You can get in touch with us by calling us on +919773973971.
Author
Deepak Kumar
Linux and Server Administrator