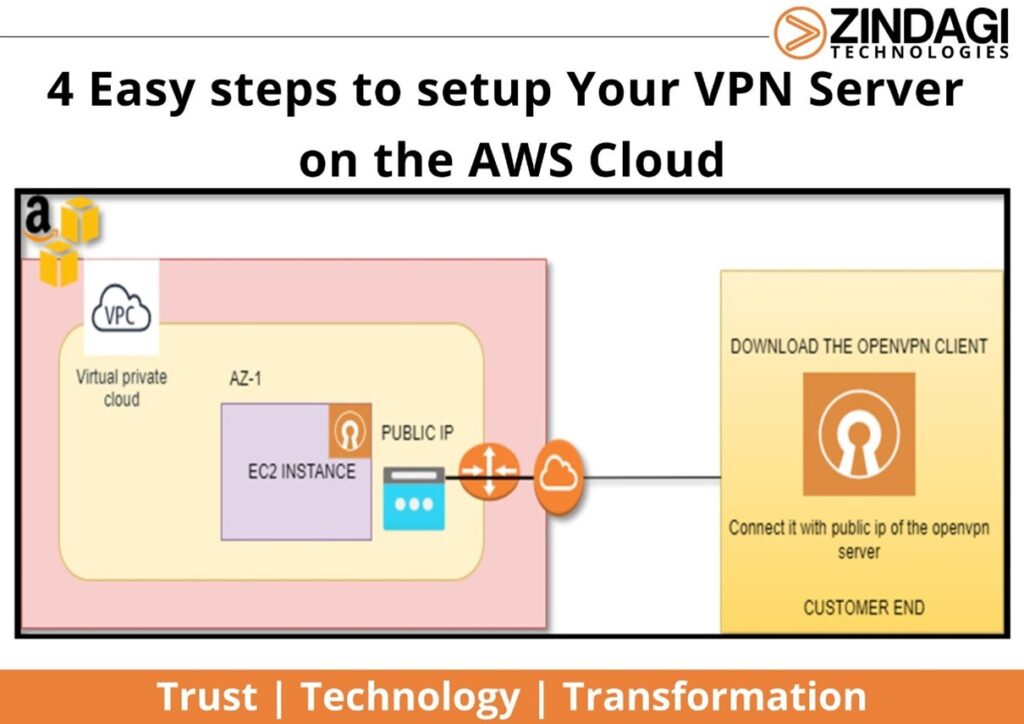
4 Easy steps to setup Your VPN Server on the AWS Cloud.
In this Blog, we will learn about simple steps to configure Your VPN (Virtual Private Network) on the AWS (Amazon Web Services) Cloud. This helps you to configure your Private Network.
Let Us First Understand What Is VPN?
VPN stands for Virtual Private Network. It is used to connect private Networks (Remote locations) with the help of Public Networks (Remote locations). In other terms, we can say that Virtual Private Network is a technology solution used to provide privacy and security for inter-network connections. The most well-known case consists of people connecting to a remote server with traffic going through a public or insecure network.
So, VPN extends private network access to a public network and enables users to send and receive data across shared or public networks as their computing devices were directly connected to the Private network.
Applications running across VPN may therefore benefit from the functionality, security, and management of the private network.
Encryption is common although not on the internet, but part of a VPN connection.
Prerequisites
The following things need to be done before initiating the VPN server configuration: –
- Aws Account
- Knowledge of using an EC2 instance
- Understanding of VPN
- Putty Terminal
- Using Basic Command of Linux
Basic Terminology
VPN Connection: it stands for Virtual Private Network. It is the secure connection between on-premises Network
NAT (Network Address Translation): NAT stands for Network Address Translation. It is translated from Public IP into Private IP and Private IP into Public IP.
OpenVPN: It is an Open-Source software that is used to Create the VPN Connection between AWS Cloud and on-premises. We will use this software to set up OpenVPN Server on AWS. It is used as a commercial service, but we can make 5 VPN accounts for free without any charges.
Firewall: It is used to secure the Host or Network from unauthorized access.
Step 1: Let us Start to Configure the VPN Server
To Configure the VPN Server on the AWS Cloud, First, log in with an AWS account with Credentials.
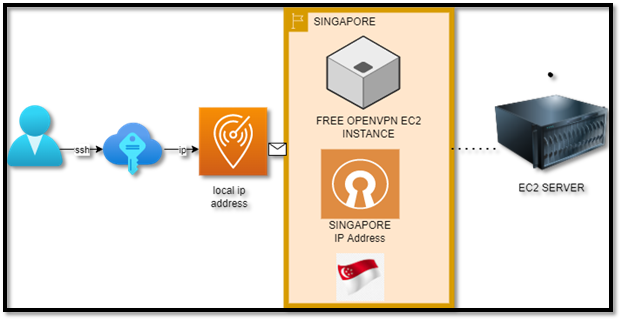
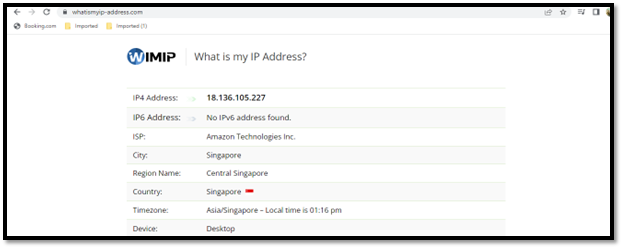
In this scenario, I have selected the Region as Singapore. So, in the Last output you can see the My Public we will be reflecting as the location of the Singapore Region.
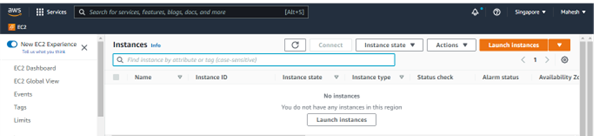
In the Search Box, type EC2 service on the AWS Cloud.
In the EC2 service, click on the Launch instance, and it will appear with Some options, First Type the Name of the EC2 instance, in my case I must assign the name as the “VPN server”.
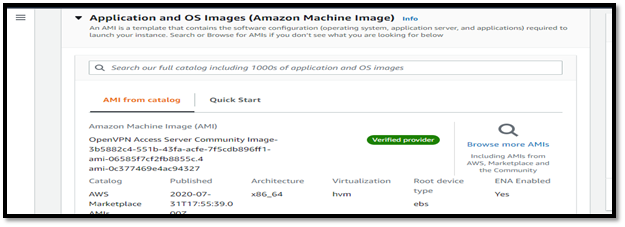
Now in Application and OS images click on Browse for more AMIs, Now searches for the Open VPN server. Now we can find many OpenVPN Access Server AMI. Most AMI (Amazon Machine Images) are paid But for the Free tier you have a limit of 5 connected devices as a VPN Client, as you can see in the below image, Now clicks on the continue Button.

Now you can see the output after selection like the image below,
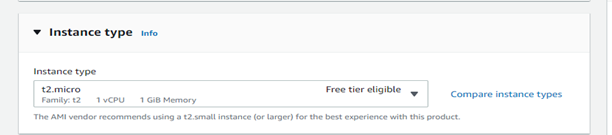
Now in the instance type select the t2.micro for the Machine if you are using a Free tier AWS account.
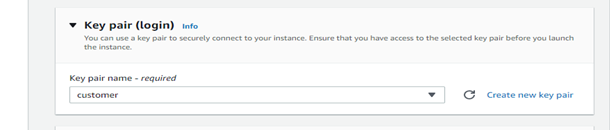
Next Create Your New key pair, for accessing the EC2 instance From Your on-premises Machine.
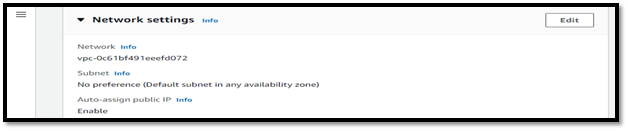
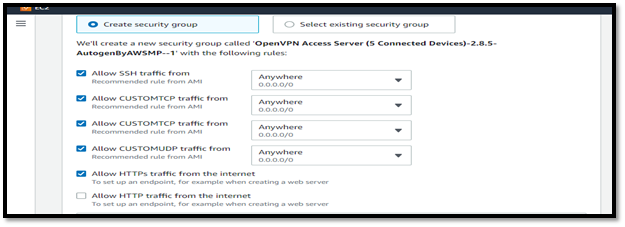
In the Network Settings, Select the default VPC (Virtual Private Cloud) and default security group for accessing the VPN server from the remote location.
Now Click on the Launch instance. It will create the instance as you can see in the below images:
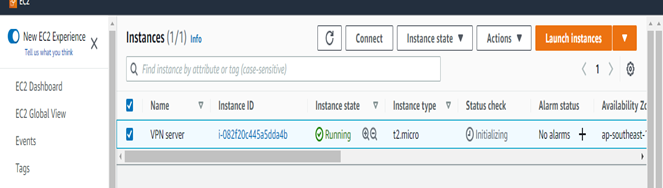
Step 2: Now the part of the setting of the VPN Server
After Selecting the VPN server, you can see the instance details in which You will see the Public IP of this server, copy the Public IP of the instance.

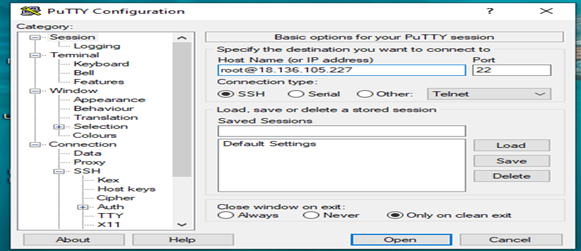
Open the Putty Terminal on your machine, Enter the username as root and public IP of the OpenVPN server (e.g., root@PublicIP address), in the connection type select the SSH (Secure shell) choice and in the Authentication, possibility Browse your private key of the instance. Next click on the open option.
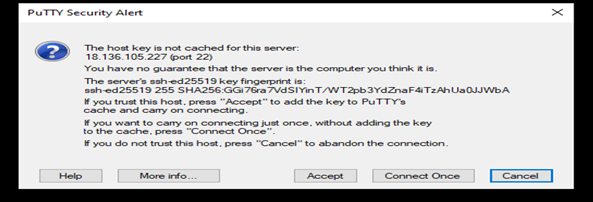
In Putty Security Alert, select the Accept the warning dialog box.
Now you can see the welcome screen of the OpenVPN server configuration, Here You can see the EULA of the OpenVPN.
Note: EULA means End User License Agreement.
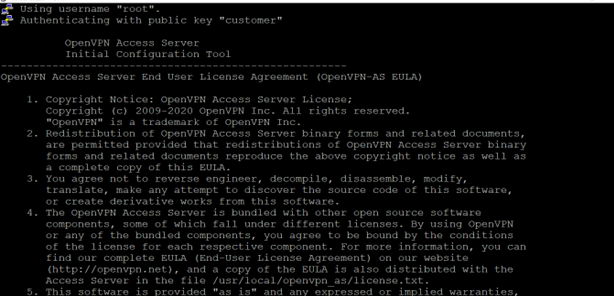
Next type “Yes” for selecting the Terms and conditions of the Agreement, like the below image.
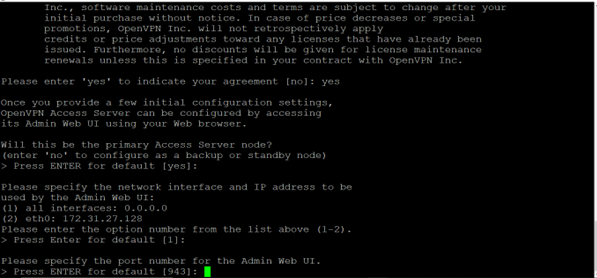
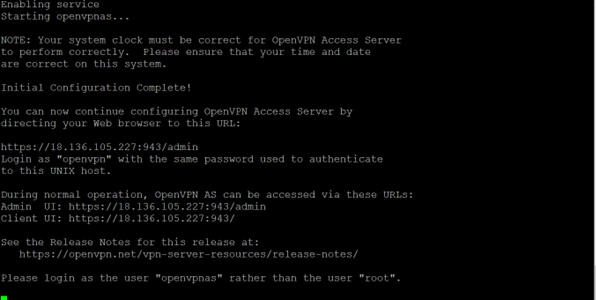
Next, you will prompt for how to set up your VPN, leave all the settings default, just continue to Hit Enter and it will start the VPN Server Configuration for You. After the setup is completed, you will see the instructions that How to access the VPN server configuration through Browser and you will check that there is no longer login as root, Now again reconnect the VPN server through SSH and login as “openvpnas.” It looks like the image below:
Now SSH again the instance with the username “openvpnas” with putty Terminal and set the password for the user OpenVPN by using the passwd command and it will prompt for the password, like the image below:
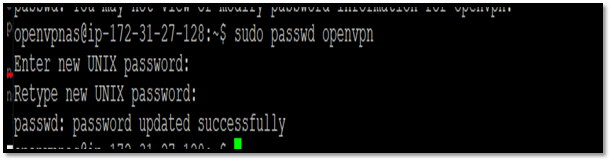
Now that is it, we have successfully configured the OpenVPN Server from the command line perspective.
Step 3: Setup VPN Service
We have successfully configured the VPN server, but we need to enable some settings of the VPN server by using the Web Browser.
To access the OpenVPN server by using a Web browser, we need to type the following URL:

Note: Replace the Public IP of the EC2 instance with Your EC2 instance.
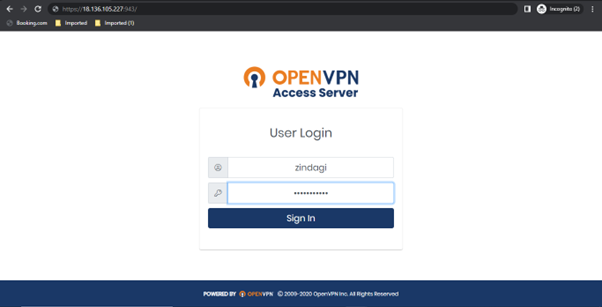
After entering the URL, you will see the following page in the Web Browser:
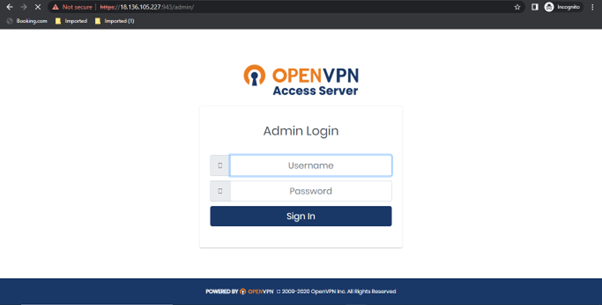
Now Enter the Credentials for the Login page Enter the username as “OpenVPN” and the password you earlier created in the earlier step.
After Providing the Credentials You will see the License and Agreement page of the OpenVPN server, accept the License and agreement.

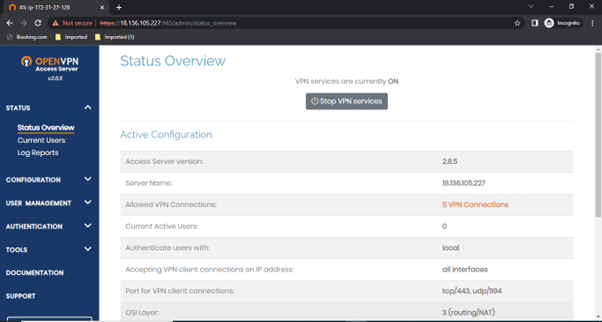
Now after accepting the License and Agreement page you will see the OpenVPN server Dashboard like the image below:
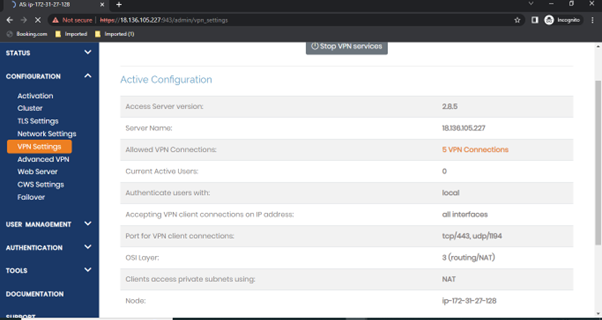
On the Left side of the Page, go to configuration and click on the VPN settings.
In the VPN settings page scroll to the Routing page and enable the setting “Should client Internet traffic be routed through the VPN”
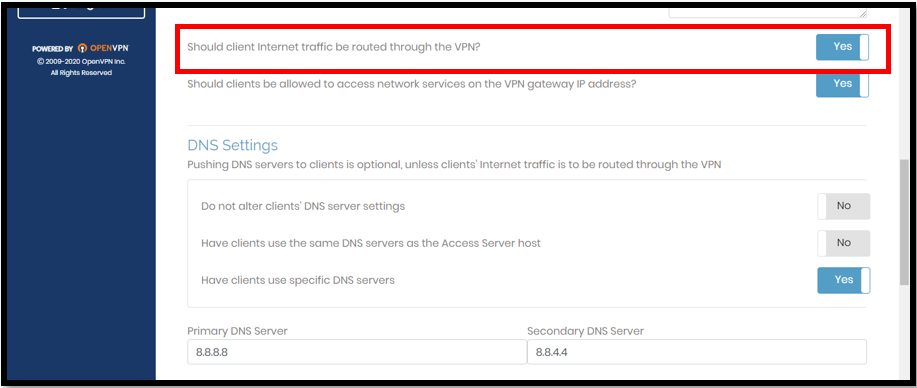
Now scroll down to the page and click on the save settings.
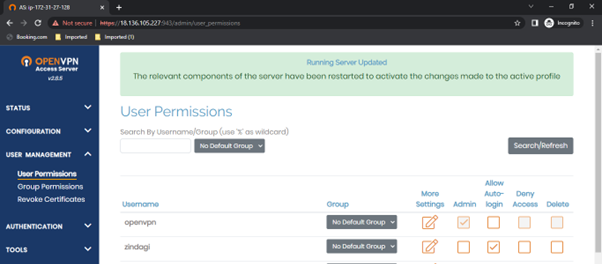
Now when you change the settings you need to update the server settings, it is a key step. so, click on “update the Running server” and now you are done.
Now Left side of the page, click on the User configuration, and select the user settings, in this page, you can create a user for the VPN client for authentication.
Now we are done with the VPN server settings.
Note: Every time you change the settings on the VPN server. Always you need to Update the Server settings for applying the settings for the VPN server.
Step 4: Set up VPN Client
Now Enter the Client URL of the OpenVPN in the web browser to download OpenVPN and its download configuration file automatically.
HTTP:// < Your instance Public IP or DNS name>:943
Now you will see the login page of the client, Enter the credentials of the user you have created in the earlier step:
Now select the OS of your choice in which you want to use the VPN settings, follow the prompts and you are good to go.
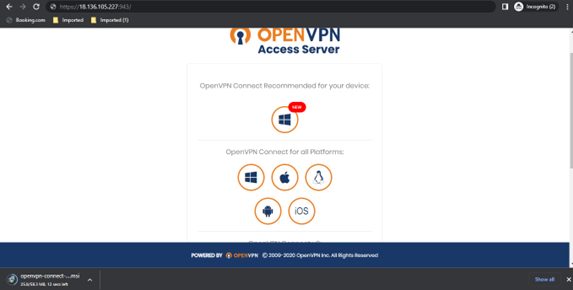
In my Scenario, I am using the Windows Platform, so I have downloaded the Windows file for OpenVPN.
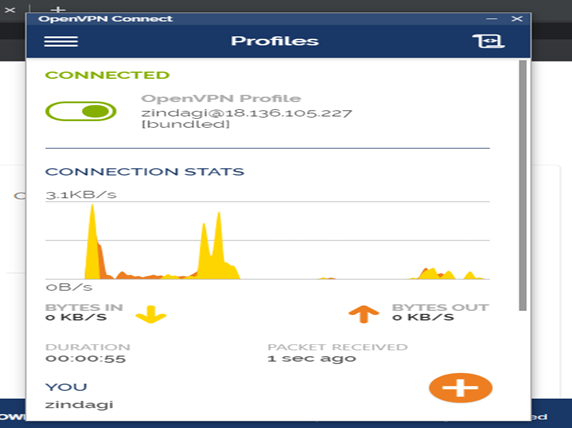
After installing the OpenVPN software, you can use turn on the profile of the VPN server, it will prompt you to Enter the Credentials of the VPN server.
Now on the OpenVPN server admin page, you can see user login information with their Real Public IP.
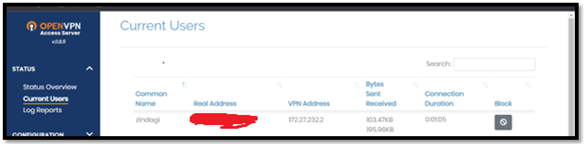
And, if you want to verify on your side you can search for “what is my Public IP” on Google. Here you can see that Public IP is showing where you have created the OpenVPN server as well as you will see the location in which the OpenVPN server is in the AWS Region (in my case it is in the Singapore Region).
Now we have done it. Thanks for reading this blog and hope you have enjoyed it! This blog aims to give to understanding of the VPN network to secure your on-premises infrastructure.
Zindagi Technologies is a leading IT service and consulting company, and we provide IT professional services in India. Zindagi Technologies offers Cloud Services, Security Center Solutions, Infrastructure consulting, designing, and implementation as well as supplying support for the services. If you have any questions, suggestions, or comments, please feel free to reach us at +919773973971 or drop an us email and let’s get connected.
Author
Amit Kashyap
Consultant – Server and Virtualization