5 Steps To Configure Your Media Streaming Server By Using AWS.
Hi Everyone, welcome to this amazing blog on building media servers on AWS EC2 instances. This blog will help you to build your own media streaming server on the cloud.
Prerequisites
To configure the media streaming server by using AWS, we understand that you know about the following components:
- Basic Knowledge of AWS EC2 instances
- Basic knowledge of Linux commands
- Knowledge of using putty terminal
- WinSCP
- Understanding of Firewall to allow port numbers
Step 1
To configure the Media streaming server on the AWS EC2 Linux instance. First, we will log in to the AWS account with credential ls and then search for the EC2 service on the AWS cloud.
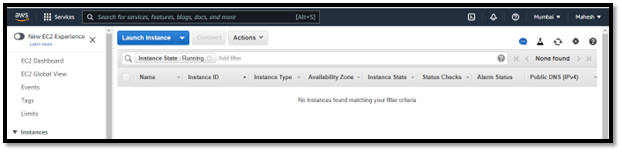
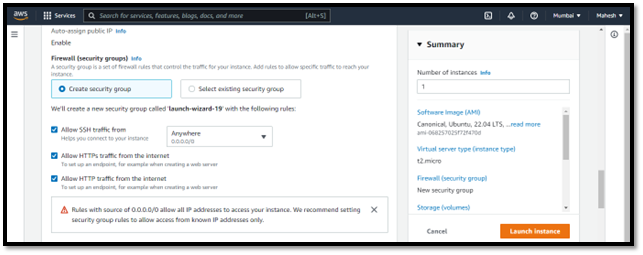
Here click on the Launch instance option. It will open some other options to configure the instance or virtual machine for creating a Linux instance, in my case, I assign the name of the instance to is Stream server.
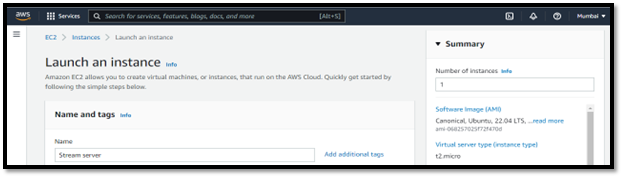
Next select the AMI (Amazon Machine Image), in my scenario I have selected ubuntu 22.04, then select the option machine type (I have selected here as t2.micro).

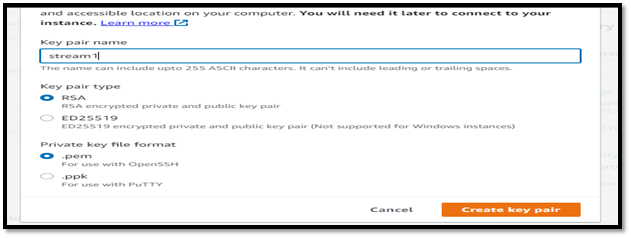
Then create a new key pair if you do not have any key pairs. This key pair helps you to access the Linux EC2 machine on the AWS Cloud.
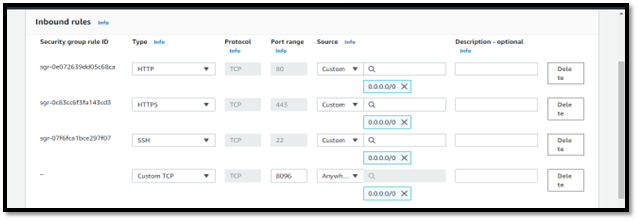
In the next steps, we need to configure the Firewall of the instance that can be accessible from the internet by users as well as we also need to allow the custom port for the media streaming service so that users can access the service from the internet.
STEP 2
Now copy the public IP from the EC2 Linux instance and try to access the instance by using the putty application.
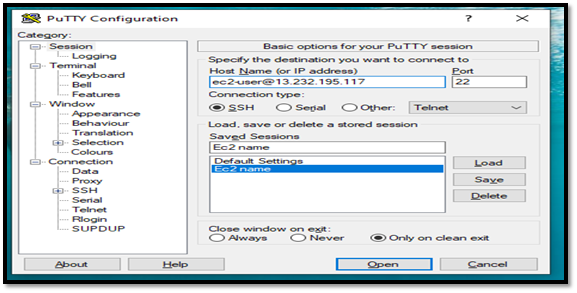
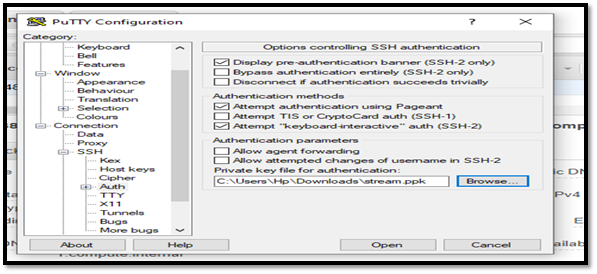
In the putty configuration dialog box, we also need to add the private key of this instance that we had created in the previous steps. For adding the key, First click on the SSH (Secure Shell) under the connection option then select auth, here click on the Browse option, and select the private key of the instance.
Click on the open option. Now you have access to the EC2 Linux instance.

Note: ubuntu is the username of this instance (Ubuntu 22.04 AMI) on the AWS Cloud.
STEP 3
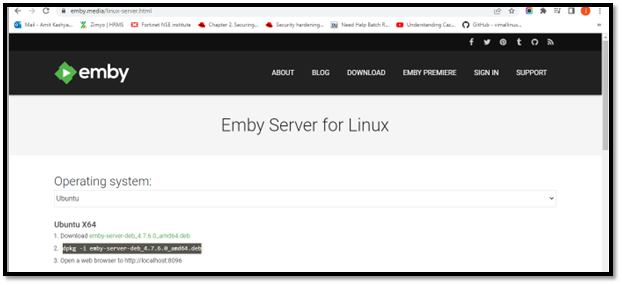
Now on the google search for the emby media service. Here you will see the link to emby. media. on the website page, select the operating system (e.g. in my example I have selected Ubuntu).
Now run the following commands on the Linux terminal. First, update the packages by the command Sudo apt update.

Then run the wget command in the Linux terminal to download the packages from the emby media GitHub repository (Note: this repository is already given on the website)

Now run the sudo dpkg -i emby-server-deb_4.7.6.0_amd64.deb command for installation of the package in the Linux system.

Now you have successfully installed the Emby service for the media streaming from the AWS cloud.
STEP 4
In the Next steps, copy the public IP of the Linux EC2 instance, then in the browser type the following information given in the below image:

(Note: it is necessary to add the port number 8096 to access the media streaming service)
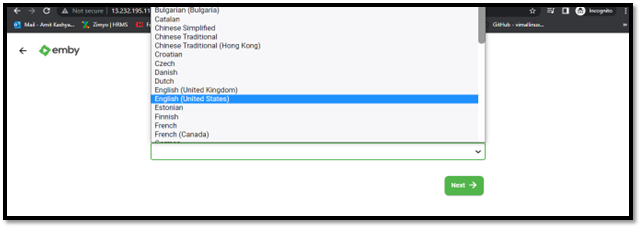
Next, select the language option from the given emby service as a media streaming website, then click on the Next button
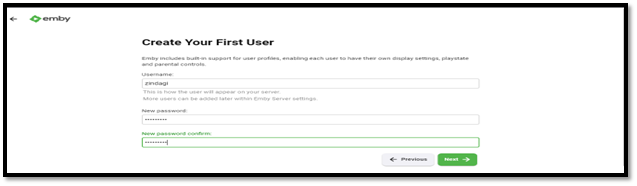
Now configure the username and password for uploading the music and video content for the Media streaming website.
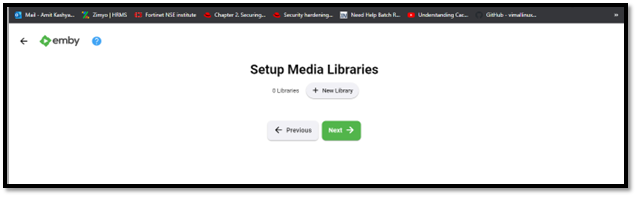
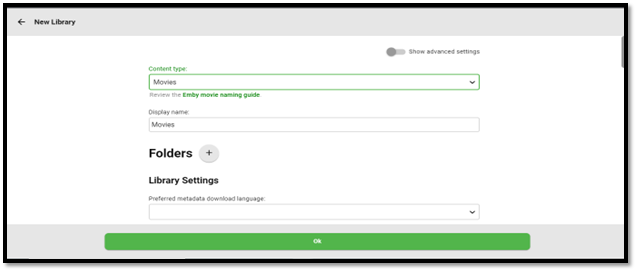
Now set up your media Library, for that click on the New Library button.
Now In Content type select the option Movies and in the Display name dialog box, type the display name such as movies.
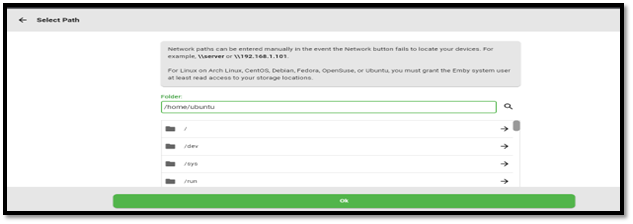
Now select the path where you want to save your media such as video and audio in the Linux system.
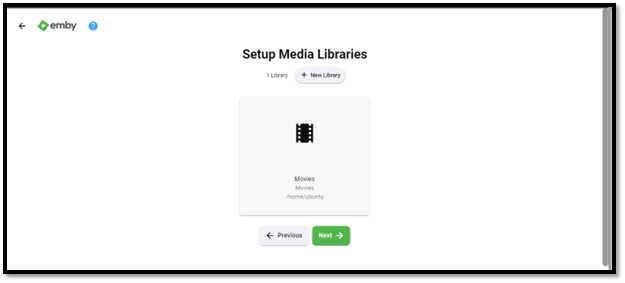
After selecting the path verify the current Folder location on the setup Media Libraries screen and click on the Next option.
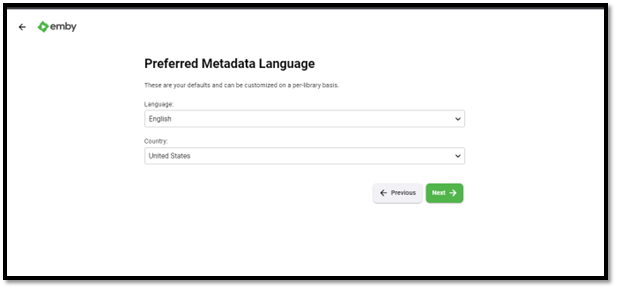
Now select your preferred metadata language and country option in the Next Window. In my scenario, I have selected the Language such as English, and the In-country option selects India.
It is important that if you want to remotely manage the media server select the option to enable automatic port mapping on the Configure Remote Access page and click the Next button.
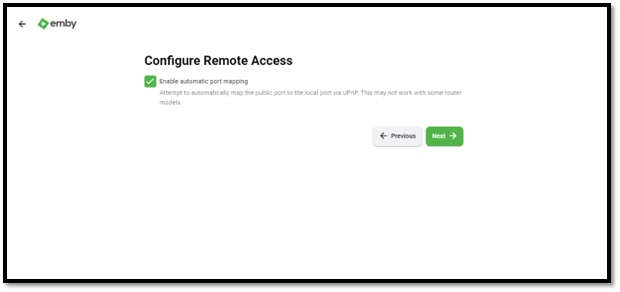
Next, Accept the Terms and services and click on the Next button.

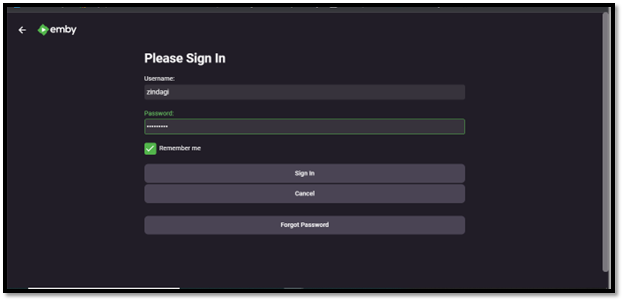
After Finishing the setup of Emby services. It will ask you to reload the pages and try to sign in again with previously set up user credentials.
STEP 5
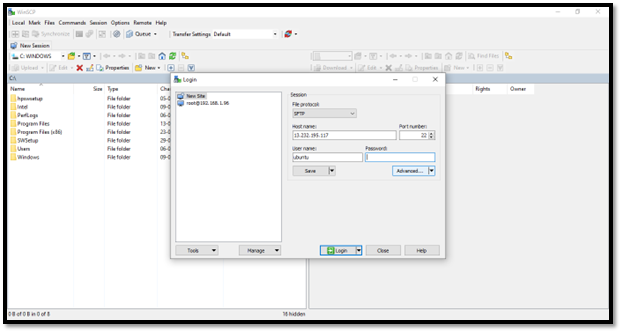
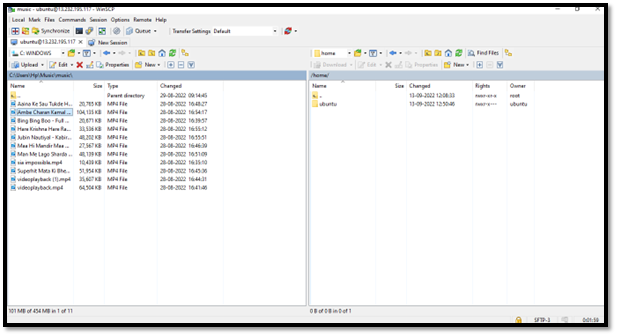
Now open the WinSCP program in your system Enter the remote host IP address of the Ec2 instance and then provide the credentials of the user and select the port number of the destination server.
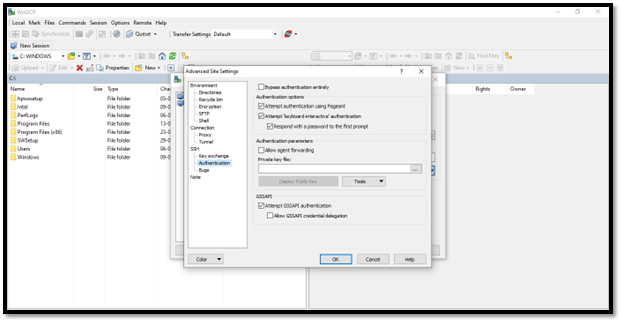
For the authentication in the Ec2 instance, In the Advanced Site settings, select the option Authentication and in the Private key file, Browse for the private key of the Ec2 instance. Then click on the Ok button.
Now try to upload the media file from your computer to the Destination computer by using the SCP program.
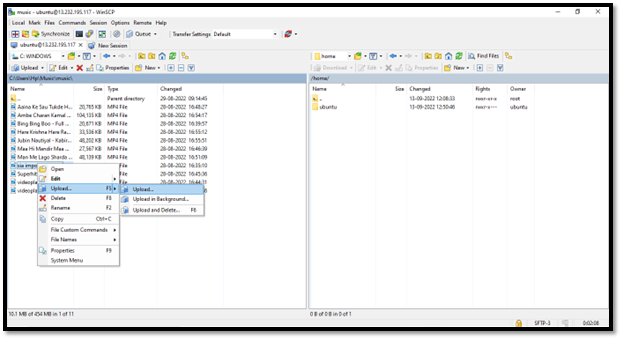
For uploading any file from your computer to the destination computer. Right-click on any file and select the option upload to transfer the file to the destination location on the destination machine or you can also drag and drop any file from the source to the destination.
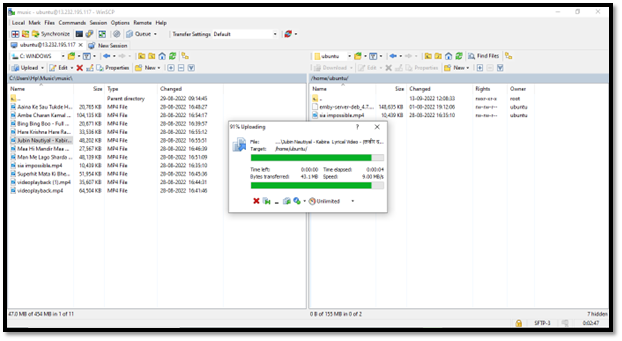
When you upload the file from the source machine to the destination, it looks like the below image…
After uploading the file to the destination machine, open the cloud portal to see the media on the portal.
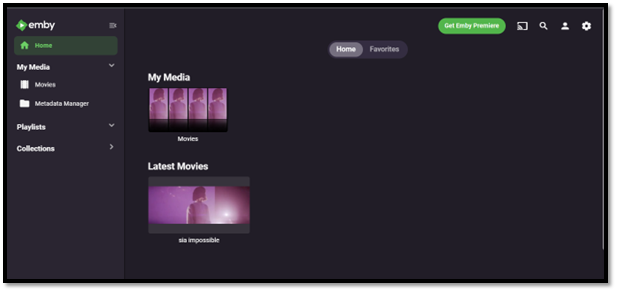
Now you have set up the media streaming server on the AWS platform. So, you can share this URL with your friends or family to stream media services like Netflix or Hotstar.
Note: If your media is visible to the Media service platform, then you need to give permission for the Folder location of media using the setfacl command like the below image:

Thank you for Reading this blog…we’ll bring more for you.
Zindagi Technologies is a leading IT consultancy in Delhi. We finished several IT projects in both the public and private sectors. We offer IT solutions such as cybersecurity, data center planning, design, and implementation, virtualized services, application development, Voice over Ip, and other IT business-related services. We are the people you need to help you with network programs and cloud solutions.
If you want to use any of our services, kindly contact us at +919773973971 or send us an email. We will get back to you as soon as possible.
Author
Amit Kashyap
Consultant – Server and Virtualization