Getting Along With The Initial Configuration of FortiManager – Part 2
Welcome back friends to Part 2 of Initial Configuration of FortiManager but if you have not checked my first part of this blog then you must check it out. In this blog, we will see ADOMS, management of FortiGate devices via Manager, and updates.
Contents
Licensing of FortiGate Devices. 6
Push configuration to FortiGate. 9
Create a new policy and push to firewall 9
Service updates upload in FortiGate Firewall 10
ADOMS
Enable the ADOM feature:
1. Log in to the FortiManager as a super user administrator.
2. Go to System Settings > Dashboard.
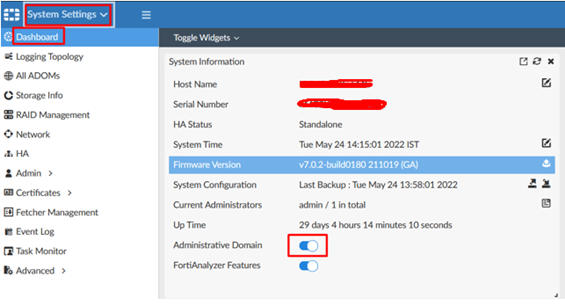
3. In the System Information widget, toggle the Administrative Domain switch to ON.
You will be automatically logged out of the FortiManager and returned to the log-in screen.
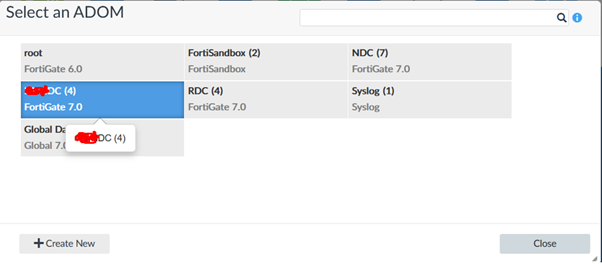
Create an ADOM:
1. Go to System Settings > All ADOMs.
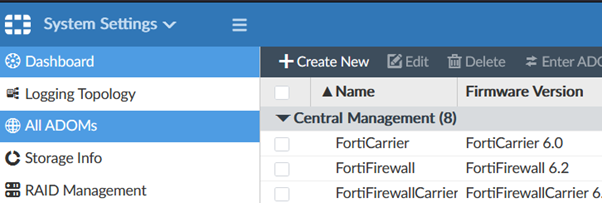
2. Click Create New in the toolbar. The Create New ADOM pane is displayed.
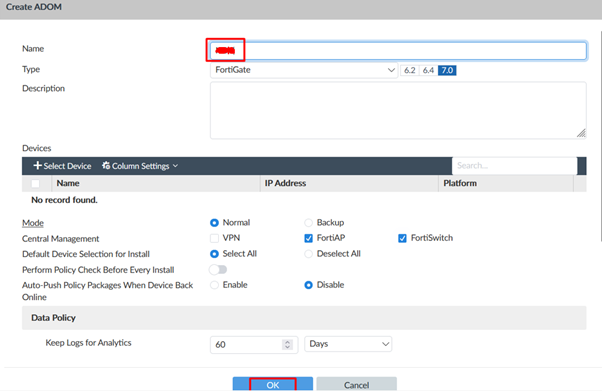
3. Configure the Name, Type as FortiGate, version of firewall and Mode set to Normal then click OK to create the ADOM.
Add FortiGate Devices
1. After setup FortiManager IP in the FortiGate firewall, Login the FortiManager and Select the ADOM where you want to add devices.
2. In the Device manager, click to Add Device
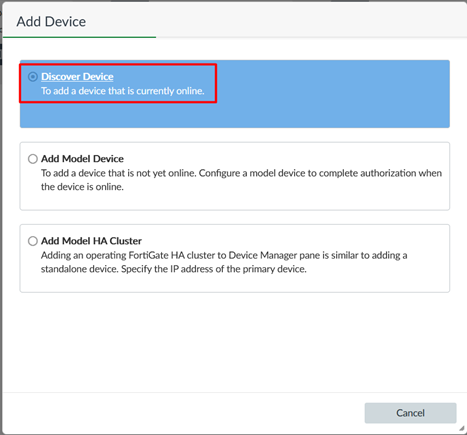
3. Discover and authorize the device for management by FortiManager:
a. Select Discover Device.
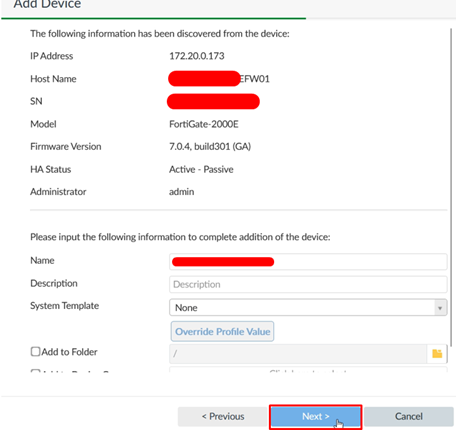
b. In the box, type the management port IP address and click Next.
c. Cancel the POP-UP window.
4. click Next to the Discovered devices
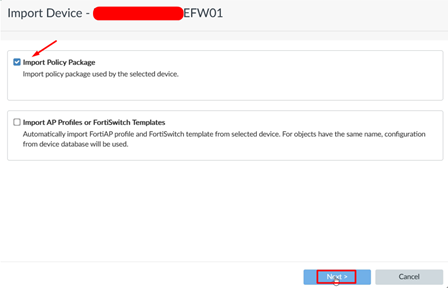
5. Wait till complete the process is and click on Import Now.

7. Select ‘Import Policy Package’ and click Next.
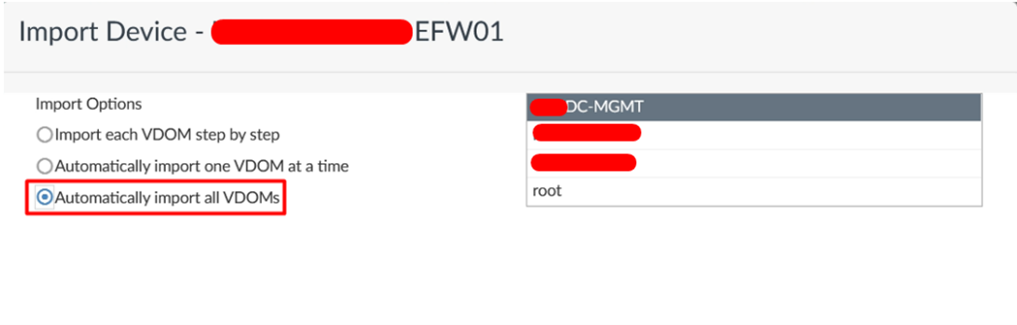
8. Select ‘Automatically import all VDOMs’ and click Next.
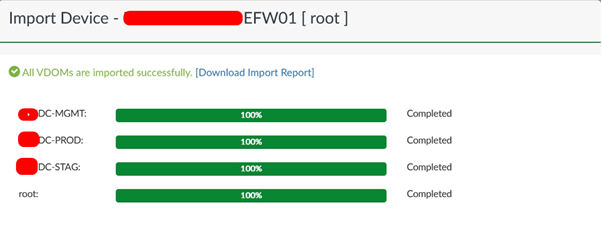
9. Wait for VDOMs to get imported successfully and click Finish.
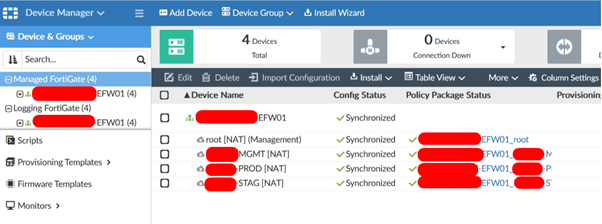
10. Device is successfully added and displayed on the FortiManager Device Manager page.
Licensing of FortiGate Devices
1. Visit https://support.fortinet.com/asset/#/dashboard
2. Select FortiGate and Click on any device to download the license file.
3. Drop down the page and click on “Get the License File” to download the license.
4. Open the FortiManager GUI page
5. select FortiGuard and go to Settings.
6. Disable Communication with FortiGuard Server.
7. Select the FortiGate Firewall firmware version and upload the license file in “Service License” of “Upload Options for FortiGate/FortiMail”
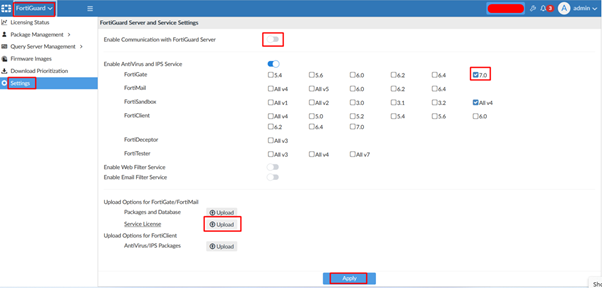
8. It can upload via PC/LAPTOP directory then click Apply.
Configure Syslog Server
1. Go to System Settings > Advanced > Syslog Server.
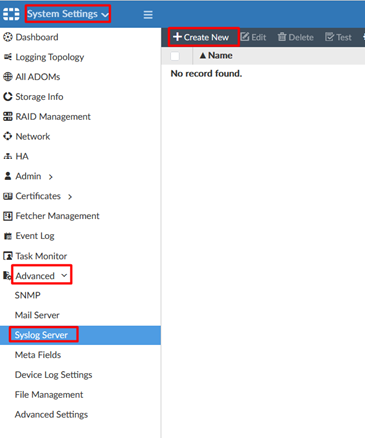
2. Click Create New in the toolbar. The Create New Syslog Server Settings pane opens.
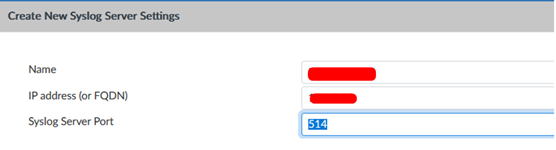
3. Configure the following settings and then select OK to create the mail server.
Name Enter a name for the Syslog server.
IP address (or FQDN) Enter the IP address or FQDN of the Syslog server.
Syslog Server Port Enter the Syslog server port number. The default port is 514.
Push configuration to FortiGate
Create a new policy and push to firewall
1. Ensure you are in the correct ADOM.
2. Go to Policy & Objects.
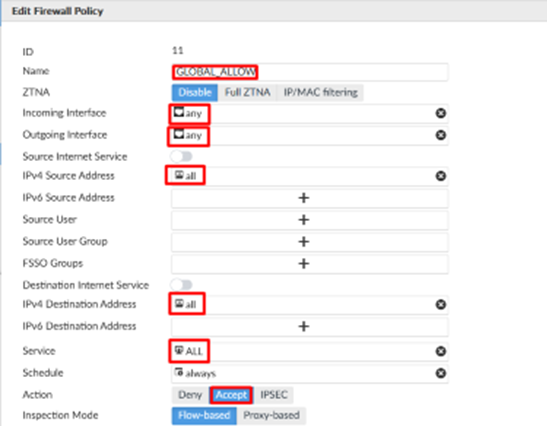
3. Select the device and click Create New. (Create Policies as per your requirement. Below is just an example to globally allow the traffic)
4. Fill in the parameters:
- Policy Name
- Incoming interface
- Outgoing interface
- Source address
- Destination address
- Service
- Select Action (Accept/Deny)
- Disable NAT
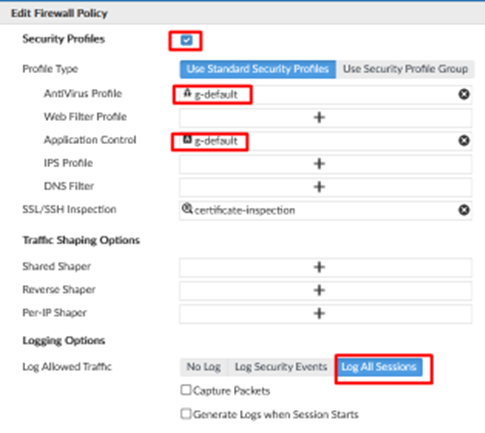
5. Set security Profile if required.
- Enable Antivirus Profile and Select “g-default” profile.
- Enable Application Control Profile and Select “g-default” profile.
- Enable IPS Profile and Select “g-default” profile.
6. Enable Log Allowed Traffic and select for All Sessions.
7. Click OK
Service updates upload in FortiGate Firewall
1. Login to the FortiGate support website via https://support.fortinet.com/Download/AvNidsDownload.aspx
2. Select the FortiGate version and click on the file link to download the file.

3. Go to FortiGuard > Package Management > Receive Status
4. Click to Import the file from the Laptop or PC directory.
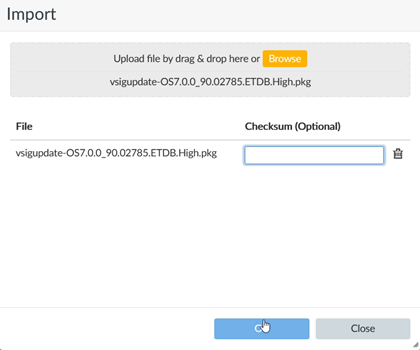
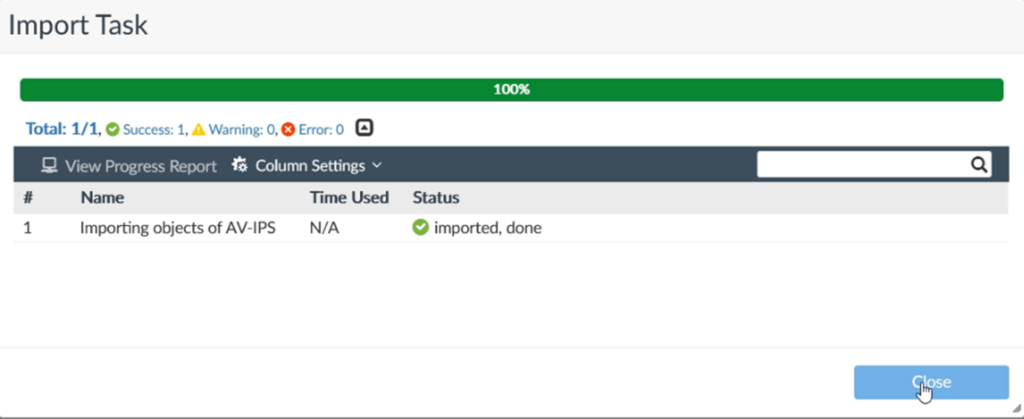
6. Click OK to get it imported.
7. Go to Package Management > Service Status
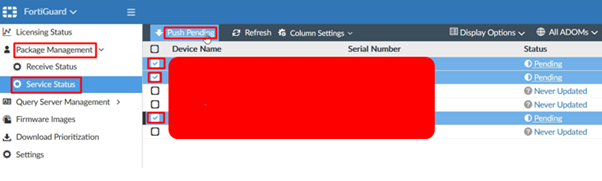
8. Select FortiGate Devices and click Push Pending to Push the Service updates
We wish that we clear all your doubts regarding the Initial or Day-1 Configuration. We tried to explain maximum configuration in simple steps. You can also check Part 1 of the Initial Configuration of FortiManager.
Zindagi Technologies is a leading IT consulting company in Delhi and has been dealing with Network Security, Data Centre Services, Cyber-Security, Managed IT Services, VAPT Assessment, and other business-related IT services. If you wish to use any of our services then you can Contact US or Call us at +91-9773973971.
Author
Jagjeet Singh
Senior Network Security Consultant