FortiGate Firewall Installation in EVE-NG in 11 Steps
Hello Guys, today we will learn the installation of FortiGate Firewall in EVE-NG. It might seem difficult to some people but we are here to make things easy for you.
Now, you must have the following software, tool, and file.
– VMware Workstation.
– File transfer Software, we recommend “WinSCP”.
– FortiGate Firewall “.qcow2” file.
First, you need to install a VMware workstation and WinSCP in your system and then install EVE-NG in VMware.
After the above installation and run the software and VM, we will proceed to install FortiGate Firewall in EVE-NG.
Step 1
Open WinSCP and type the IP address of EVE-NG in hostname.
Choose the Protocol: SFTP, Port Number: 22, Username: root, and Password: eve.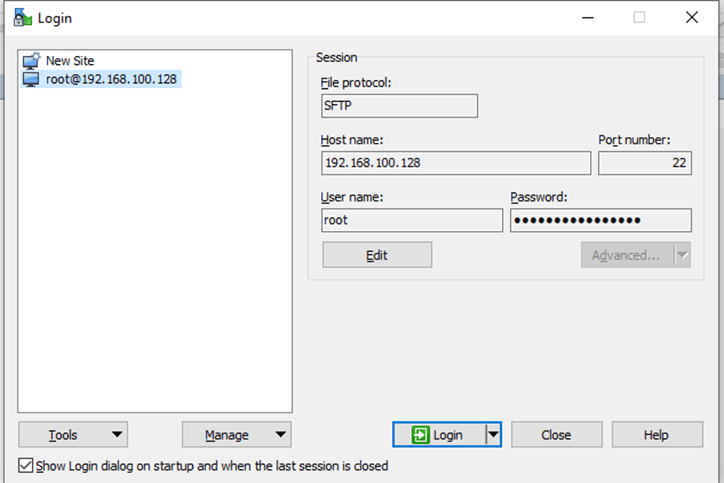
The column on the left will show you the files and folders on the local machine and the column on the right represent files and folder on EVE-NG VM.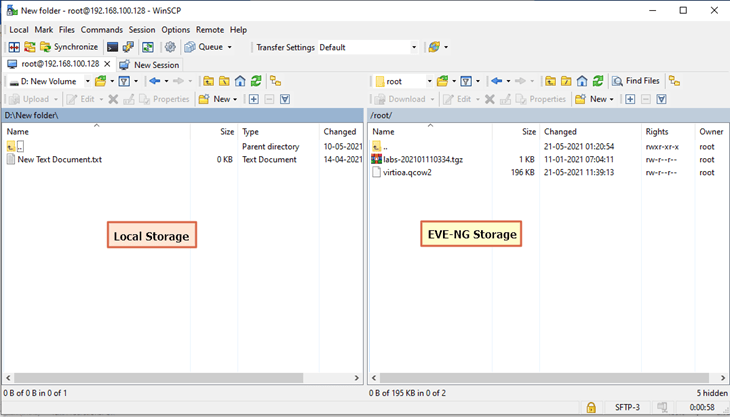
Step 2
Go to the path opt->unetlab->addons->qemu on the remote machine.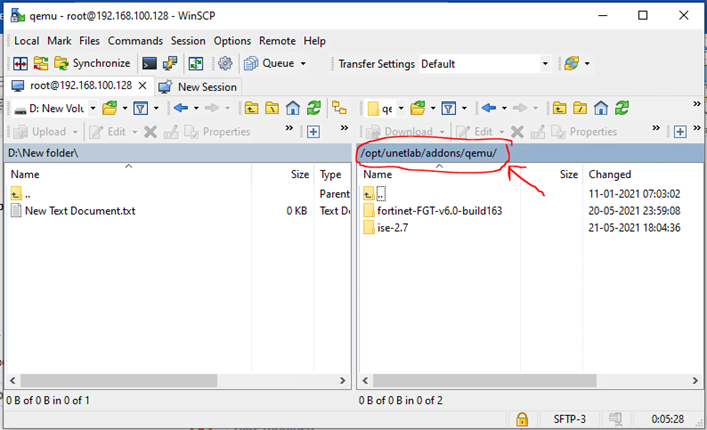
Step 3
You have already downloaded the FortiGate Firewall image file “.qcow2”. Rename the file to virtioa.qcow2
The name must be – virtioa.qcow2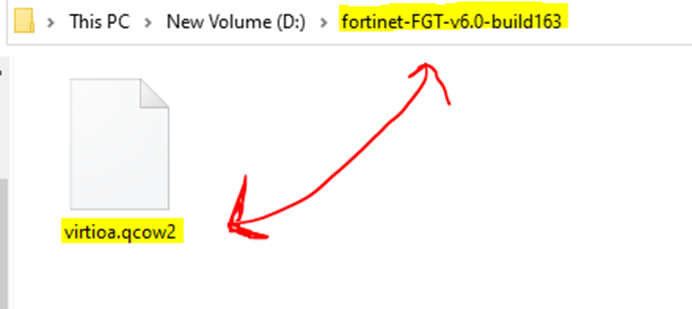
Step 4
Navigate to the folder from local to remote machine and upload. Once the process is completed the file will be available immediately. In our case, virtioa.qcow2 file is in the “Fortinet-firewall6.2.2” folder.
Step 5
Now, we need to fix the permissions using the following command on EVE-NG.
/opt/unetlab/wrappers/unl_wrapper -a fixpermissions
Step 6
Open the EVE-NG in the browser then ‘Add an Object’ and select the Node.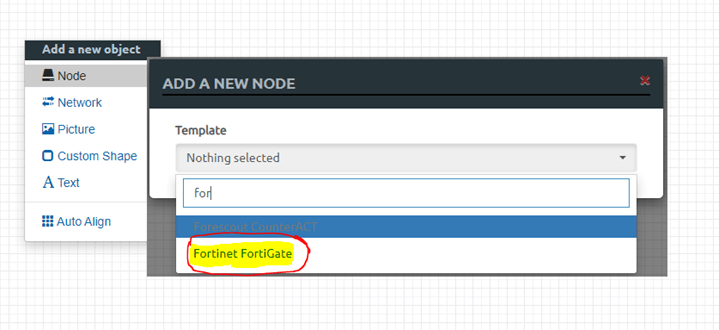
Step 7
Add an object’ and select the Network to make Type Management (Cloud0) and press the Save button.
Step 8
Connect Network Object to Fortinet Port1.
Step 9
At the login prompt type admin and press Enter. The password area is blank by default.
It may ask to change the password. Provide the password twice.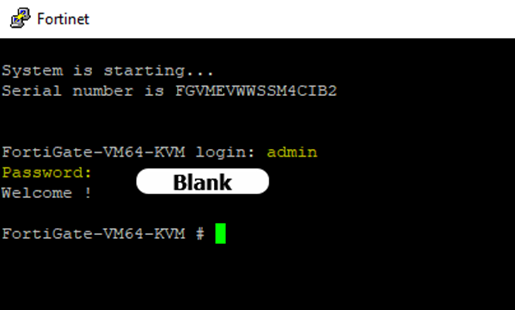
Step 10
It will get the IP address from the DHCP server if available or you can set a static IP address. Type the command to see IP Address: FortiGate-VM64-KVM# Diagnose ip address list.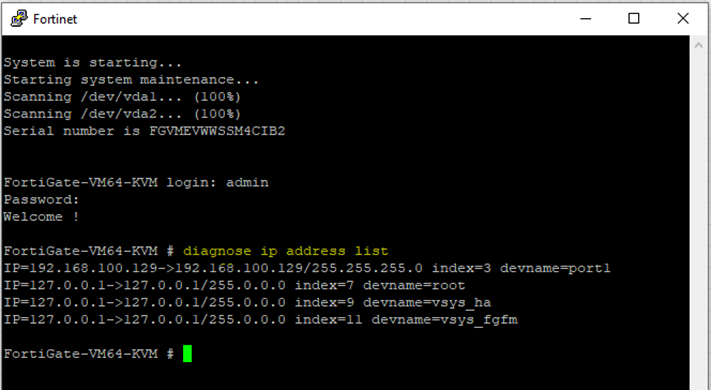
Step 11
Now can manage the FortiGate Firewall via GUI, Use the computer that is connected to the management network; then use a web browser to navigate http://192.168.122.134/ Login using admin/123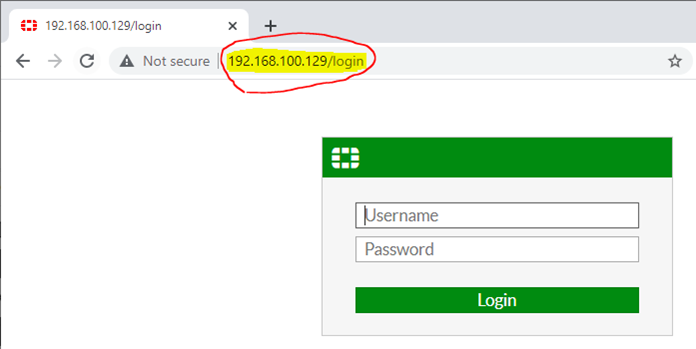
Now as we have installed FortiGate Firewall in just 11 steps. It is easy to install and configure. Now, you can make topologies and it is very helpful for practice and can learn new scenarios as well.
If you want CLI then you can take Console, enable SSH/Telnet or you can take CLI directly from GUI. We have also explained about FortiGate Firewall and its uses and also about FortiGate Firewall installation in VMware Workstation. FortiGate Firewall is one of the many services that Zindagi Technologies provides. Apart from this, we have plenty of other services like Data Center Services, Network Design and Implementation, Network Automation, and Security Services. You should contact us if you want any of the services or you can also give us a call at +91-9773973971.
Author
Jagjeet Singh
Senior Network Security Consultant